
6 L4-2.5L (2010)
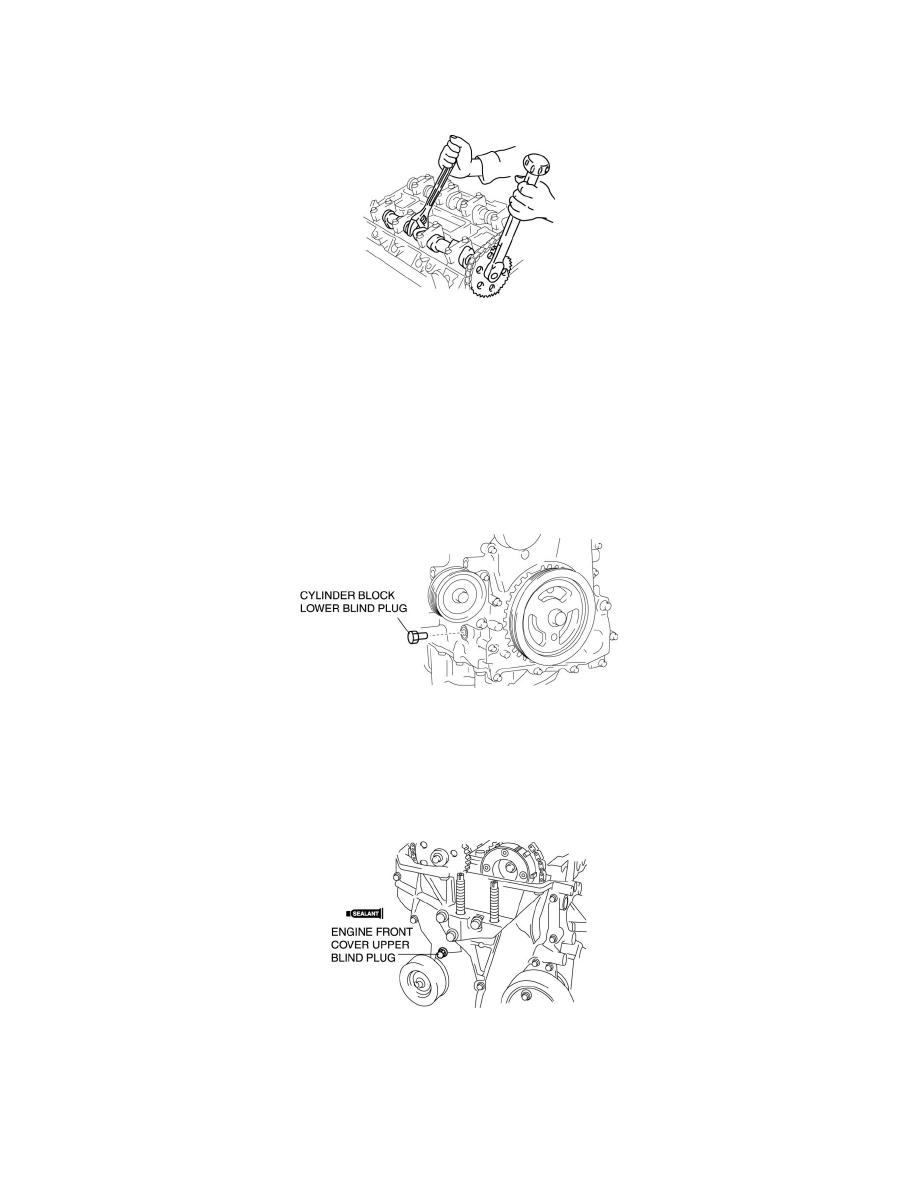
36. Remove the installation bolt for the engine front cover upper blind plug (M6 X 1.0 length 25-35mm {1.0-1.3 in}), and apply tension to the timing
chain.
37. Fix the exhaust camshaft using a wrench on the cast hexagon, and tighten the sprocket bolt.
Tightening torque
-
69-75 Nm {7.1-7.6 kgf-m, 51-55 ft-lbf}
38. Remove the SST from the camshaft.
39. Remove the SST installed in the cylinder block lower blind plug hole.
40. Rotate the crankshaft clockwise two turns and inspect the valve timing.
-
If not aligned, loosen the camshaft sprocket bolt and repeat the procedure from Step 35.
41. Install the cylinder block lower blind plug.
Tightening torque
-
18-22 Nm {1.9-2.2 kgf-m, 14-16 ft-lbf}
42. Connect the drive shaft (RH) to joint shaft. (ATX) See: Transmission and Drivetrain/Drive Axles, Bearings and Joints/Axle Shaft
Assembly/Service and Repair/Removal and Replacement/Drive Shaft Removal/Installation
43. Apply the silicone sealant and install the engine front cover upper blind plug.
CAUTION:
-
Install the engine front cover upper blind plug before the applied silicone sealant starts to harden.
Tightening torque
-
8-11 Nm {82-117 kgf-cm, 71-101 in-lbf}
44. Install a new engine front cover lower blind plug.