
6 L4-2.5L (2010)
Seals and Gaskets: Service and Repair
Oil Seal Replacement - FS5A-EL
OIL SEAL REPLACEMENT [FS5A-EL]
1. Disconnect the negative battery cable.
2. Remove the aerodynamic under cover NO.2. See: Body and Frame/Splash Guard/Service and Repair/Aerodynamic Under Cover No.2
Removal/Installation
3. Drain the ATF into a separate suitable container. See: Service and Repair/Procedures/Automatic Transaxle Fluid (ATF) Replacement - FS5A-EL
CAUTION:
-
The oil seal is easily damaged by the sharp edges of the drive shaft splines. Do not let the splines contact the oil seal.
4. Remove the drive shaft and/or joint shaft. See: Drive Axles, Bearings and Joints/Axle Shaft Assembly/Service and Repair/Removal and
Replacement/Drive Shaft Removal/Installation See: Drive Axles, Bearings and Joints/Axle Shaft Assembly/Service and Repair/Removal and
Replacement/Joint Shaft Removal/Installation
5. Remove the oil seal using a flat-head screwdriver.
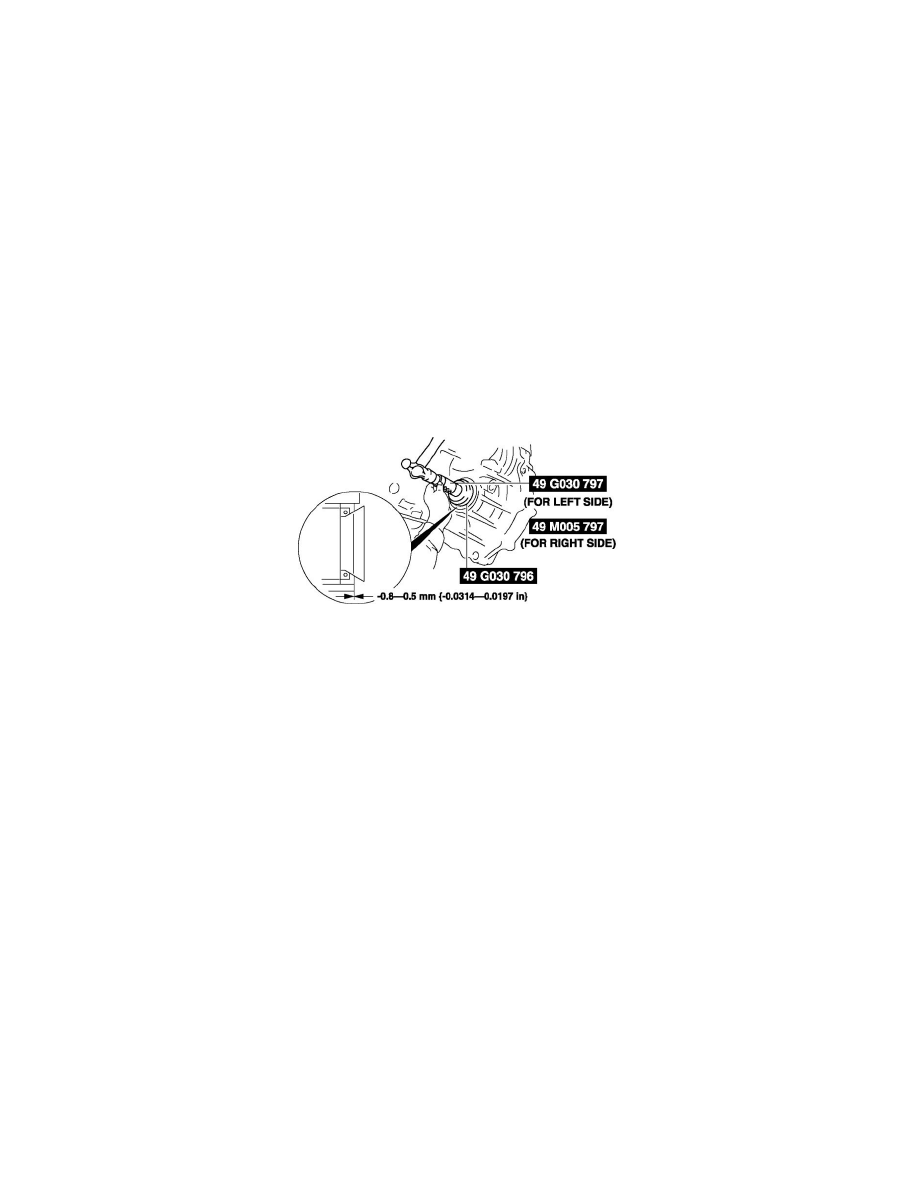
6. Using the SST and a hammer, tap a new oil seal in evenly until the SST contacts the transaxle case.
7. Coat the lip of the oil seal with ATF.
8. Install the drive shaft and/or joint shaft. See: Drive Axles, Bearings and Joints/Axle Shaft Assembly/Service and Repair/Removal and
Replacement/Drive Shaft Removal/Installation See: Drive Axles, Bearings and Joints/Axle Shaft Assembly/Service and Repair/Removal and
Replacement/Joint Shaft Removal/Installation
9. Add the ATF. See: Service and Repair/Procedures/Automatic Transaxle Fluid (ATF) Replacement - FS5A-EL
10. Install the aerodynamic under cover NO.2. See: Body and Frame/Splash Guard/Service and Repair/Aerodynamic Under Cover No.2
Removal/Installation
11. Perform the "Mechanical System Test". See: Transmission Control Systems/Testing and Inspection/Initial Inspection and Diagnostic
Overview/Mechanical System Test - FS5A-EL