
Drive Belt: Diagrams (page 5 of 6)
- Make
- Mazda
- Model
- 6
- Engine
- V6-3.7L
- Year
- 2009
- Section
- Drive Belt
-
If the drive belt auto tensioner indicator mark is not within the limit, replace the generator and A/C drive belt.
10. Install the cooler hose.
11. Install the splash shield (RH).
12. Install the front mudguard (RH).
13. Install the engine cover. See: Engine, Cooling and Exhaust/Engine/Service and Repair/Removal and Replacement/Engine Cover
Removal/Installation
Power Steering Oil Pump Drive Belt
1. Remove the generator and A/C drive belt.
2. Remove the power steering oil pump drive belt.
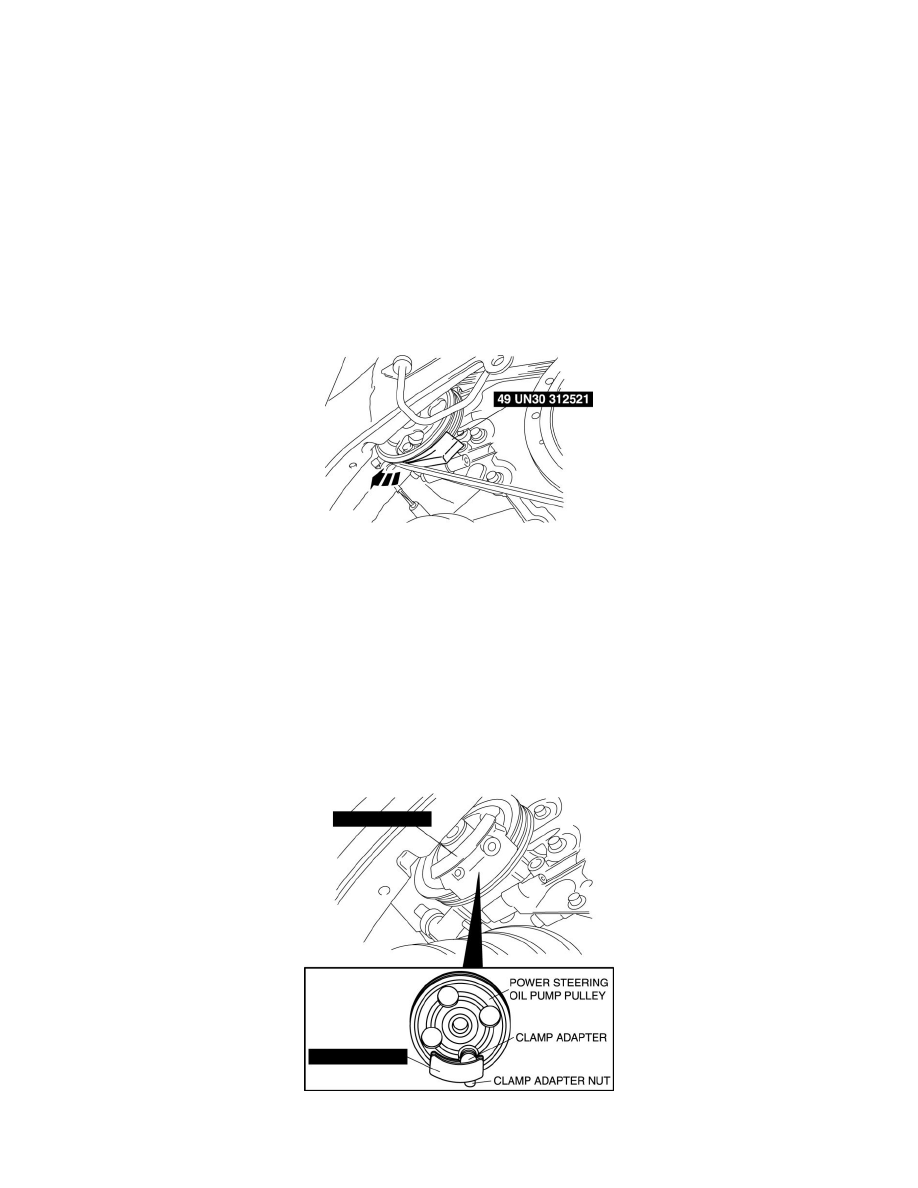
a. Install the SST between the power steering oil pump drive belt and the power steering oil pump pulley.
NOTE:
-
Hold the SST by hand until it is lodges between the power steering oil pump pulley and power steering oil pump drive belt.
b. Turn the crankshaft clockwise to remove the power steering oil pump drive belt.
NOTE:
-
If there is power steering oil pump drive belt damage and cracks, replace the power steering oil pump drive belt.
3. Install the power steering oil pump drive belt.
a. Install the SST according to the following steps.
i.
Loosen the clamp adapter nut of the SST.
NOTE:
-
There is no need to remove the clamp adapter nut completely when positioning the SST on the power steering oil pump pulley.
ii.
Position the SST on the power steering oil pump pulley with the clamp adapter in one of the holes of the pulley.
iii.
Tighten the clamp adapter nut by hand.
NOTE:
Pinch or Ctrl + scroll to zoom. Double-tap to reset.
Parts & tools for this job For 2009 Mazda 6 3.7L
- PARTOil filterSearch: Mazda 6 2009 3.7L oil filter
- TOOLOil filter wrenchSearch: oil filter wrench
- FLUIDEngine oilSearch: Mazda 6 engine oil
Links open Amazon search results in a new tab. As an Amazon Associate I earn from qualifying purchases.