
B3000 SE Regular Cab 4WD V6-3.0L OHV (1998)
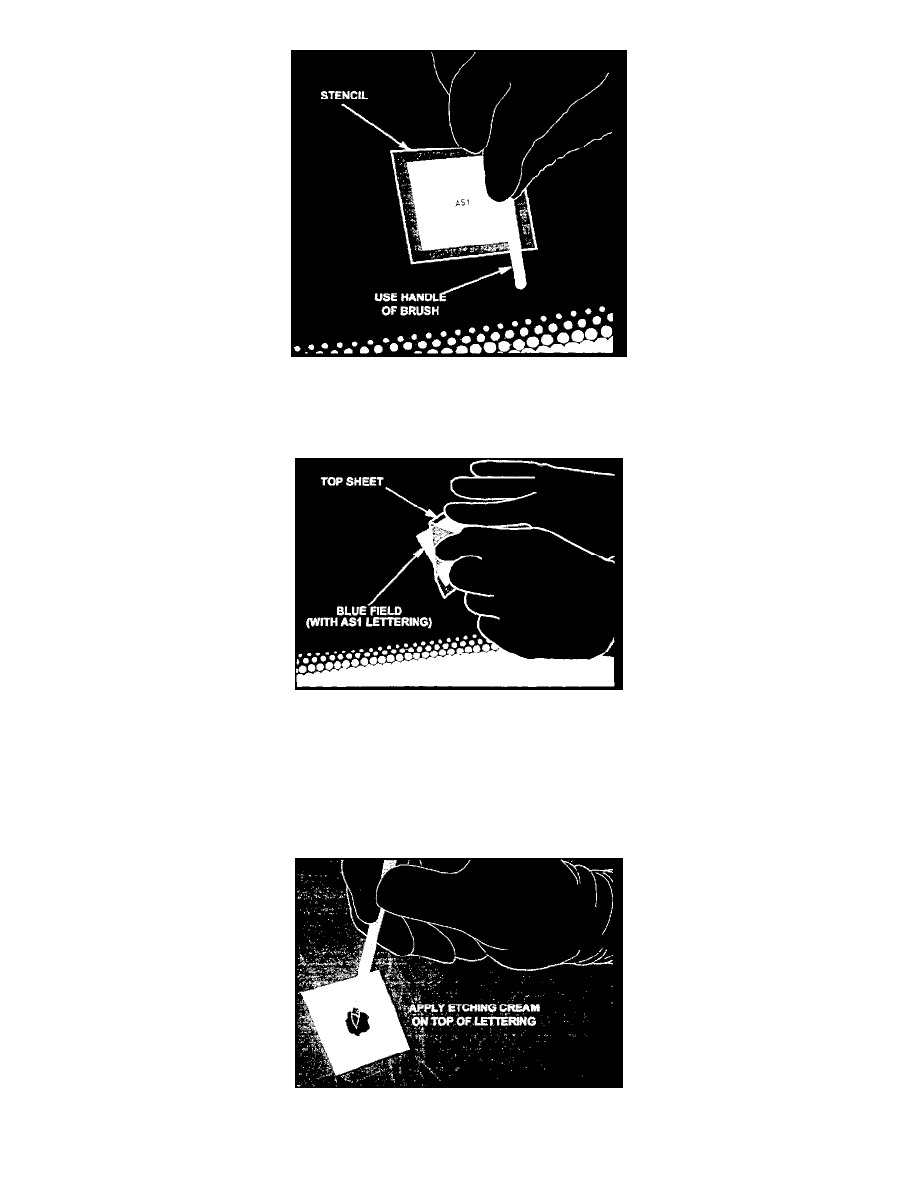
3. With smooth, even strokes, firmly rub over entire blue area of stencil as shown below. DO NOT DIG INTO STENCIL.
The entire blue field of the stencil will transfer from the sheet to the windshield. During this process you will see the sheet turning to clear as the
stencil transfers.
4. Slowly peel back clear top sheet as shown below. The AS1 lettering and surrounding blue field should remain on windshield.
If the entire blue field did not transfer to the windshield, remove the blue field With luke warm water. Be sure the windshield is completely dry and
at room temperature (approximately 70°F), then return to STEP I of "APPLICATION OF STENCIL".
APPLICATION OF ETCHING CREAM
1. Shake/stir etching cream thoroughly.
2. Using brush, cover AS1 lettering with a thick layer of etching cream as shown in the illustration. Use 2-3 vertical and 2-3 horizontal strokes to
ensure complete coverage of the AS1 letters.