
Connecting Rod Cap
- Make
- Mazda
- Model
- MX-5 (NA) Factory Workshop Manual
- Year
- 1990–1992
- Section
- Piston and Connecting Rod Assembly › Connecting Rod Cap
EngineConnecting Rod Cap
Caution
• Protect the connecting rod bolts with rubber sleeves to prevent damage to the crankpin journals.
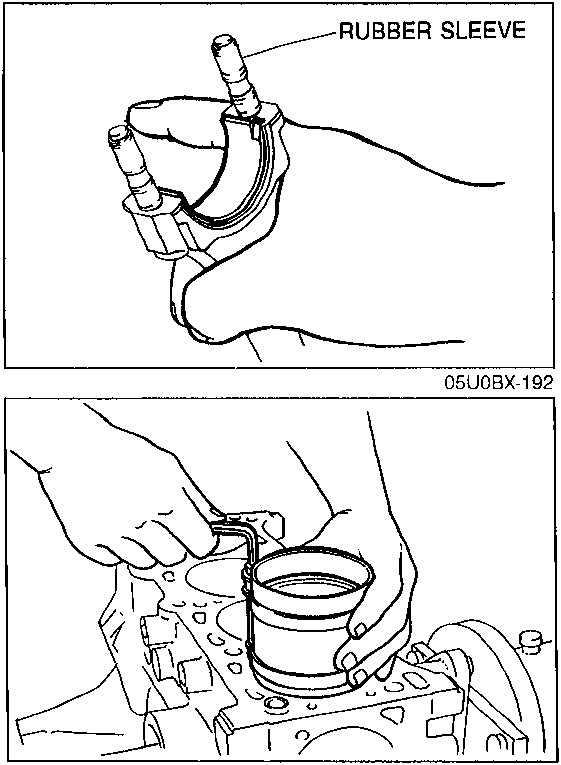
- Apply a liberal amount of clean engine oil to the cylinder walls, pistons, and piston rings.
- Check the piston rings for correct end gap alignment.
- Insert each piston assembly into the cylinder block with the F mark facing the front of the engine. Use a piston ring compressor (commercially available).
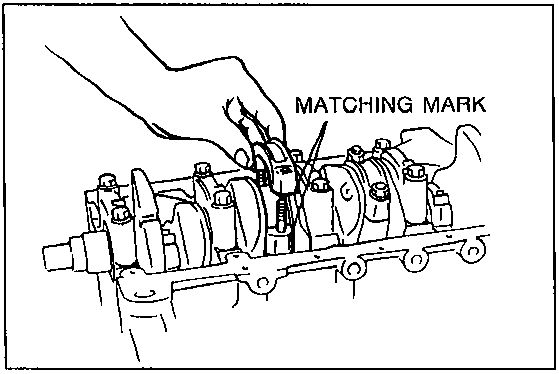
Connecting Rod Cap
- Measure the connecting rod bearing oil clearances using the same procedure as for the main bearing oil clearance.
Caution
• Align the matching marks on the cap and the connecting rod when installing the connecting rod cap.
Tightening torque:
50—54 N·m (5.1—5.5 m·kg, 37—40 ft-lb)
Oil clearance: 0.028—0.068mm (0.0011—0.0027 in)
Maximum: 0.10mm (0.004 in)
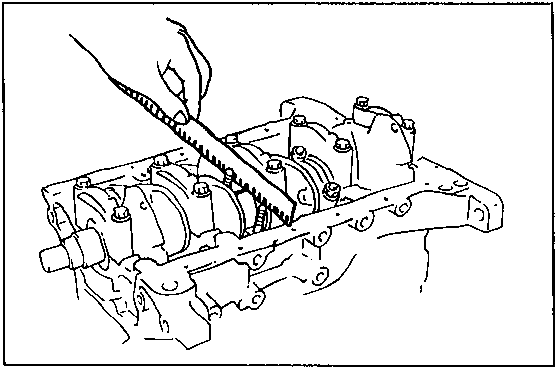
- If the oil clearance exceeds the maximum, grind the crankshaft and use undersize bearings. (Refer to page B–58.)
- Measure the connecting rod side clearances.
Side clearance: 0.110—0.262mm (0.0043—0.0103 in)
Maximum: 0.30mm (0.012 in)
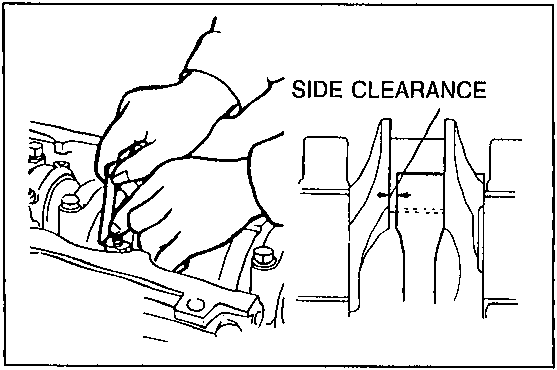
- If the clearance exceeds the maximum, replace the connecting rod and cap.
Parts & tools for this job For 1990 Mazda MX-5
- PARTEngine gasket setSearch: Mazda MX-5 1990 engine gasket set
- TOOLTorque wrenchSearch: 3/8 inch torque wrench
- TOOLFeeler gauge setSearch: feeler gauge set
Links open Amazon search results in a new tab. As an Amazon Associate I earn from qualifying purchases.