
Checking switches
- Make
- Mazda
- Model
- MX-5 (NA) Factory Workshop Manual
- Year
- 1990–1992
- Section
- Measuring continuity/resistance › Checking switches
Checking switches
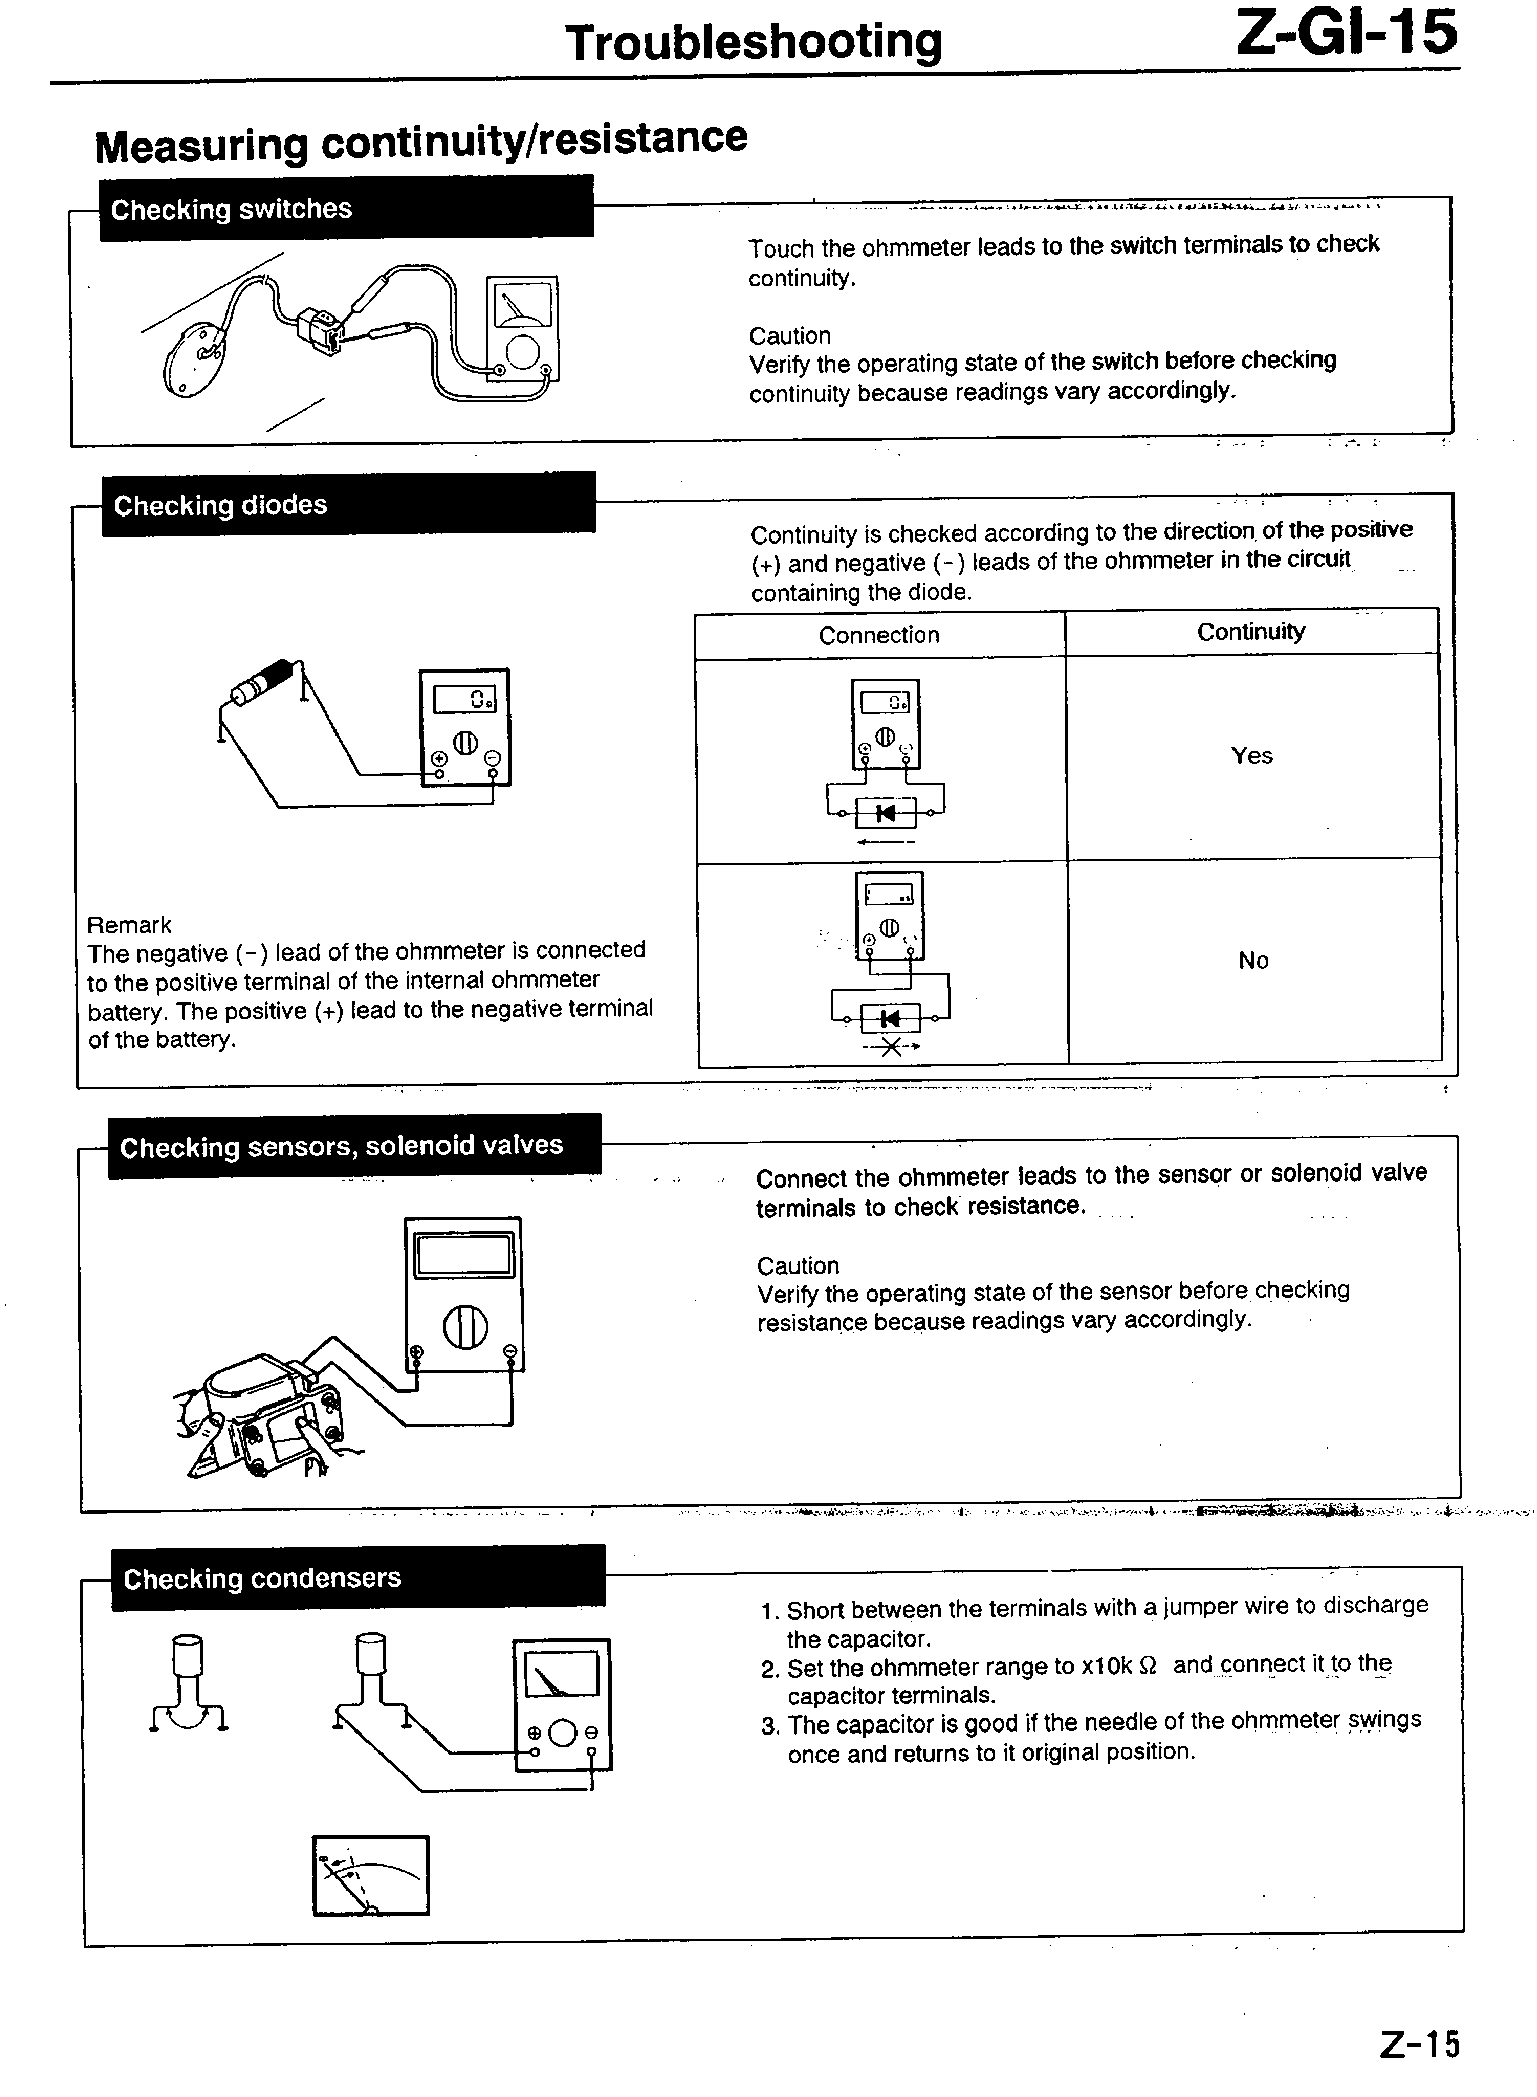
Touch the ohmmeter leads to the switch terminals to check continuity.
Caution
Verify the operating state of the switch before checking continuity because readings vary accordingly.
Checking diodes
Continuity is checked according to the direction of the positive (+) and negative (-) leads of the ohmmeter in the circuit containing the diode.
Remark
The negative (-) lead of the ohmmeter is connected to the positive terminal of the internal ohmmeter battery. The positive (+) lead to the negative terminal of the battery.
| Connection | Continuity |
|---|---|
| Yes | |
| No |
Checking sensors, solenoid valves
Connect the ohmmeter leads to the sensor or solenoid valve terminals to check resistance.
Caution
Verify the operating state of the sensor before checking resistance because readings vary accordingly.
Checking condensers
- Short between the terminals with a jumper wire to discharge the capacitor.
- Set the ohmmeter range to x10k Ω and connect it to the capacitor terminals.
- The capacitor is good if the needle of the ohmmeter swings once and returns to it original position.
Parts & tools for this job For 1990 Mazda MX-5
- TOOLDigital multimeterSearch: automotive digital multimeter
- PARTAssorted fuse kitSearch: car fuse assortment kit
- TOOLWire crimper and connector kitSearch: wire crimper connector kit
Links open Amazon search results in a new tab. As an Amazon Associate I earn from qualifying purchases.