
Protege DX L4-2.0L DOHC (2002)
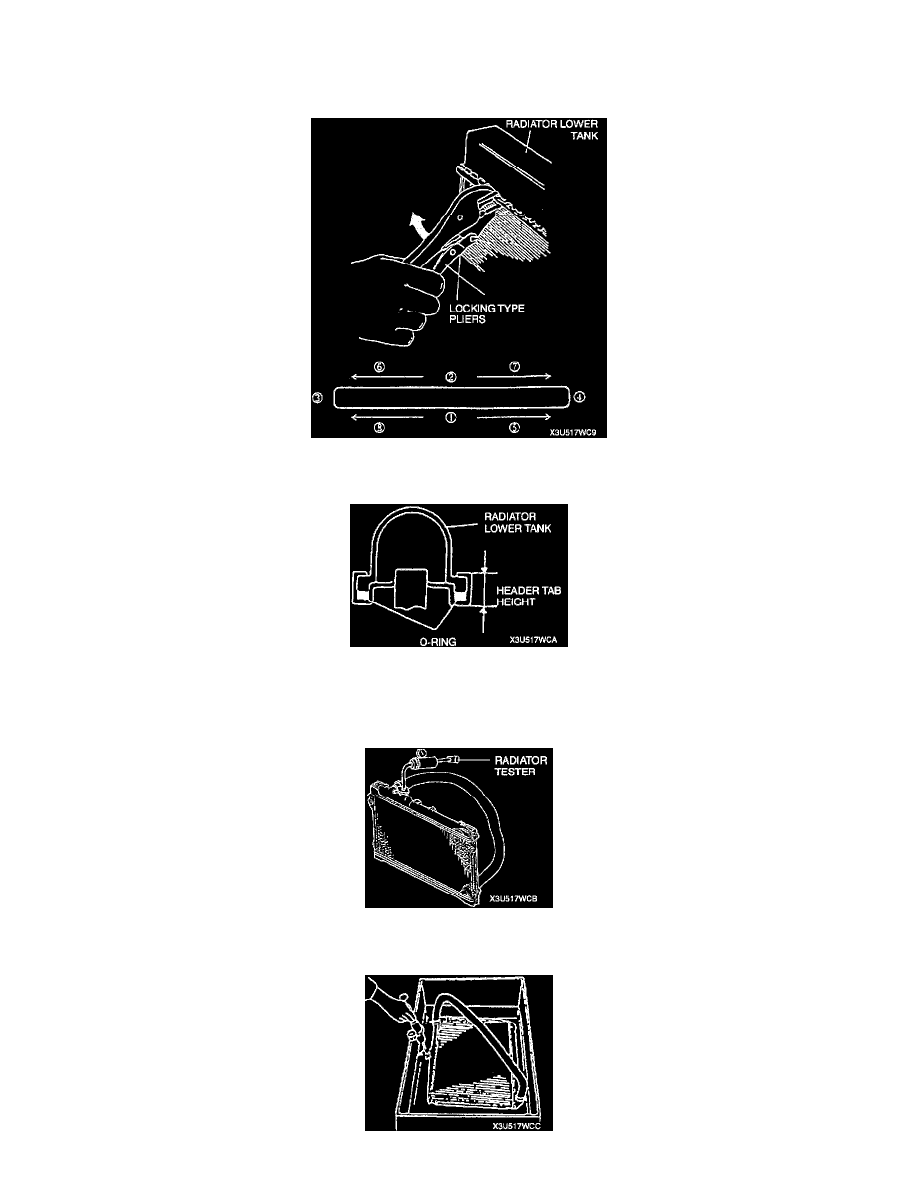
3. With the jaws of locking-type pliers (vise grips) closed and locked, turn the adjusting screw to position the jaws against the drill bit with the
diameter measured (height) in removal procedure.
^
Tighten the lock nut on the adjusting screw against the handle to lock the adjustment in place.
4. Squeeze the header tabs down in order as shown against the lip of radiator lower tank base with locking-type pliers while rotating the pliers toward
the tank.
5. Verify the height of the header tabs is same as the height before removal.
6. Inspect for the leakage of radiator according to the following procedure.
(1) Blind the radiator inlet and outlet.
(2) Blind the ATF cooler inlet and outlet.
(3) Connect a radiator tester.
(4) Apply pressure of 150 kPa (1.5 kgf/m2, 21 psi) and verify that the pressure is held.