
Tribute 2WD L4-25L (2009): Cylinder Head Assembly Valve Cover Repair
9. Remove the oil level indicator.
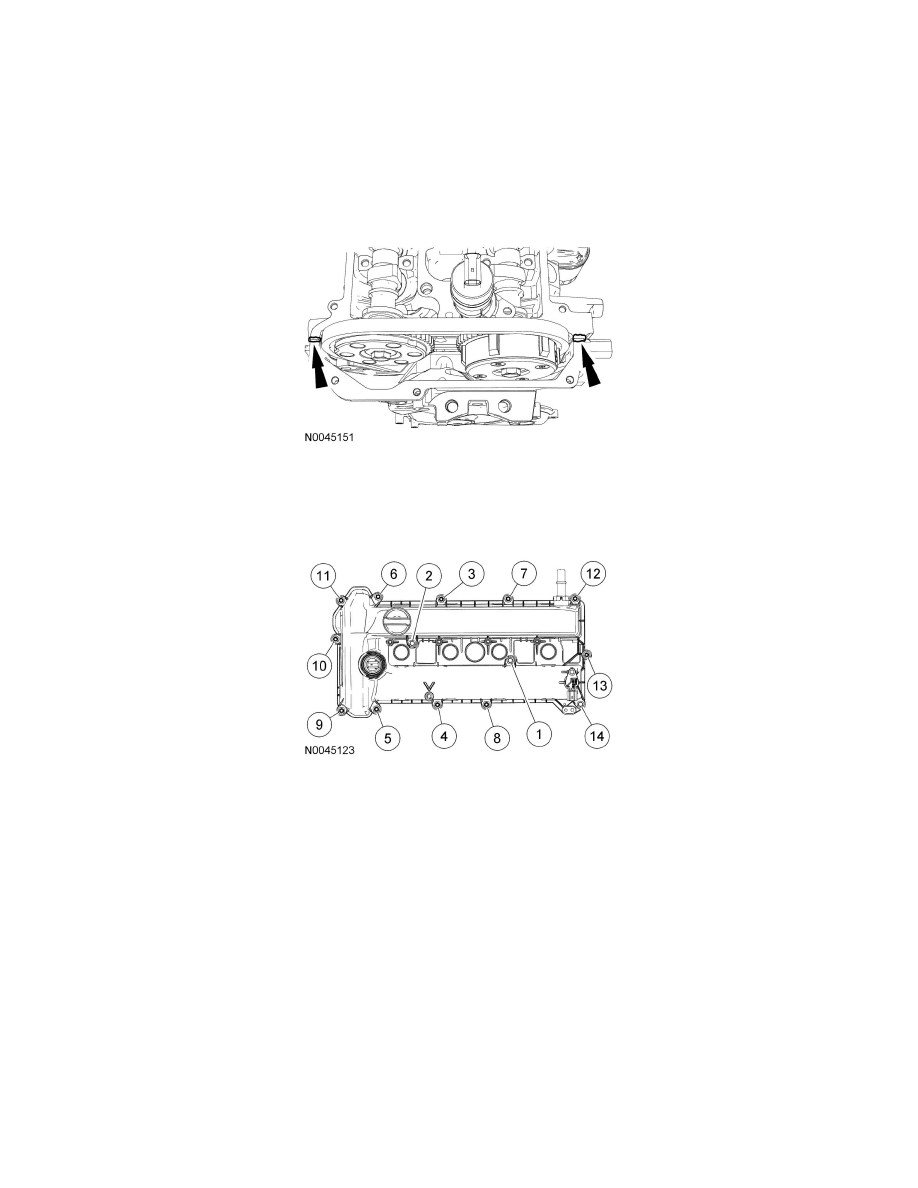
10. Remove the 14 valve cover retainers, the valve cover and the gasket.
Installation
1. Clean and inspect the sealing surfaces.
CAUTION:Do not use metal scrapers, wire brushes, power abrasive discs or other abrasive means to clean the sealing surfaces. These tools cause
scratches and gouges which make leak paths.
2. Apply silicone gasket and sealant to the locations shown.
NOTE:The valve cover must be secured within 4 minutes of silicone gasket application. If the valve cover is not secured within 4 minutes, the sealant
must be removed and the sealing area cleaned with metal surface prep.
3. Install the valve cover, gasket and retainers.
-
Tighten in the sequence shown to 10 Nm {1.0 kgf-m, 89 in-lbf}.
NOTE:Clean and inspect the gasket. Install a new gasket, if necessary.
4. Install the oil level indicator.
5. Connect the VCT solenoid electrical connector.
6. Connect the CHT sensor electrical connector.
7. Connect the CMP sensor electrical connector.
8. Attach the 3 wire harness retainers to the valve cover stud bolts.
9. Install the 4 engine cover studs.
10. Connect the crankcase vent hose to the valve cover.
11. Install the ignition coil-on-plugs. See - See: Powertrain Management/Ignition System/Ignition Coil/Service and Repair.