
Sable V6-183 3.0L DOHC VIN S MFI (1997)
Connecting Rod: Service and Repair
Removal and Installation
CAUTION:
Aluminum Components
Do not work on aluminum engine components until the engine is cold.
Component Location/Orientation
The location and orientation of each precision machined component should be noted. When engine is assembled each component should be
installed in its original position. These components include:
-
Rocker arms, rocker arm seats and valve tappets.
-
Crankshaft main bearings and bearing caps.
-
Connecting rod bearings and bearing caps.
-
Pistons, piston rings and piston pins.
-
Camshafts and camshaft journals.
REMOVAL
1. Remove cylinder heads as required.
2. Remove oil pan.
3. Inspect the top of the cylinder bores. If necessary, remove the ridge and/or carbon deposits from each cylinder using Cylinder Ridge Reamer
T64L-6011-EA.
4. Turn crankshaft until connecting rod to be removed is at the bottom point of its travel, piston at bottom dead center (BDC).
NOTE: Mark position of connecting rod cap to connecting rod for aid in reassembly.
5. If more than one piston is being removed, identify the pistons, connecting rods and connecting rod caps for cylinder position.
6. Remove the connecting rod cap retaining bolts, connecting rod cap and lower connecting rod bearing. Keep connecting rod cap and lower
connecting rod bearing together.
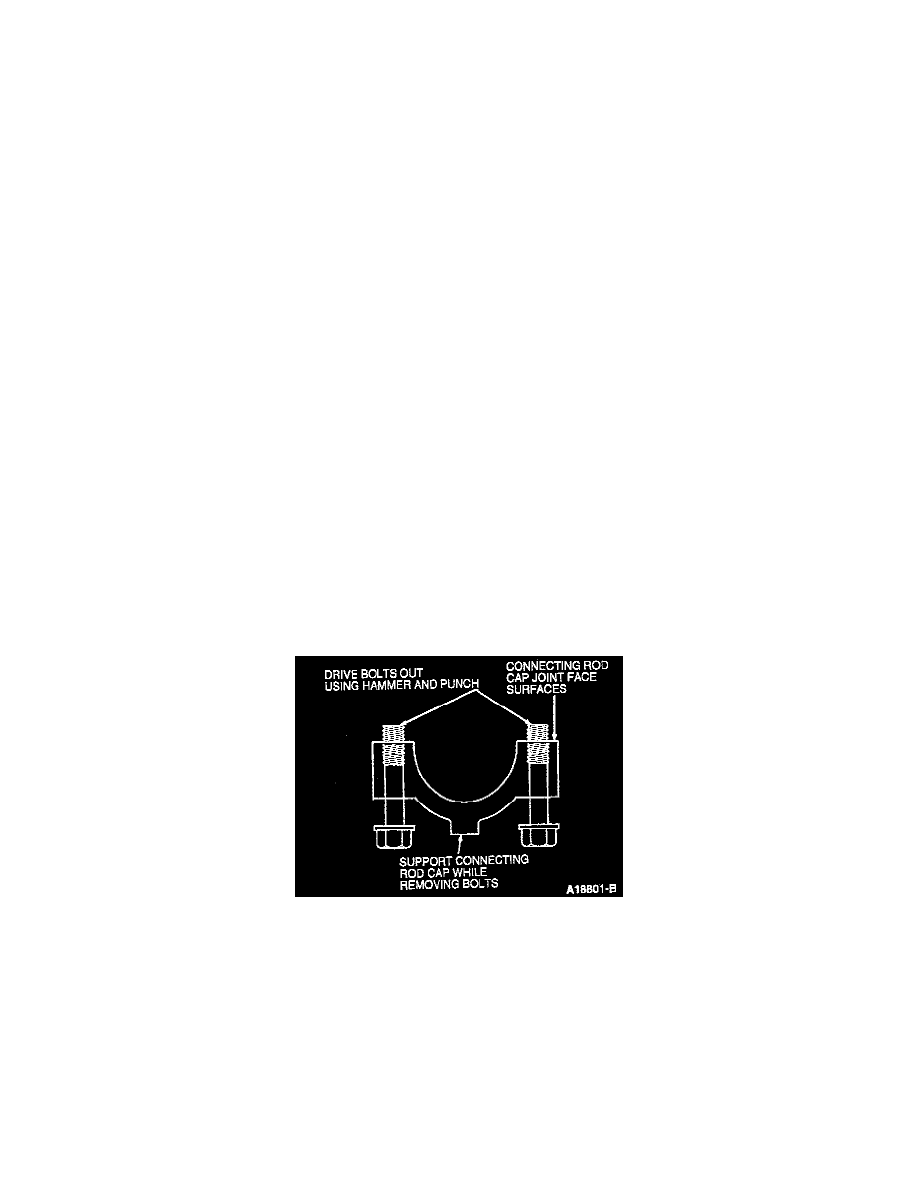
CAUTION: Care should be taken not to damage the connecting rod and cap joint face surfaces or possible engine damage may occur.
7. Using Connecting Rod Guide Tool T94P-6136-AH installed into the connecting rod bolt holes, push the piston, connecting rod and upper
connecting rod bearing through the top of the cylinder bore. Use care to prevent damage to the crankshaft bearing journals and cylinder bore
surfaces. Keep upper connecting rod bearing and connecting rod together.
CAUTION: Connecting rod bolts must be replaced with new bolts. They are torque-to-yield designed and cannot be reused.
8. Connecting rod bolts are retained in the bolt hole with a light press fit. The bolts have been torqued to yield at least twice and must be discarded.
Using a hammer and punch, drive bolts from bolt holes.
9. Using a new connecting rod bolt, attach connecting rod cap and lower connecting rod bearing to connecting rod and upper connecting rod bearing
to prevent mixing parts and damaging the connecting rod joint face surfaces.
10. Repeat procedure until all necessary pistons and connecting rods are removed.
INSTALLATION
NOTE: If required, deglaze the cylinder walls using a suitable spring type tool. Clean the cylinder walls with a detergent and water solution with
the engine upside down to prevent contamination of the crankshaft and bearings.
1. If disassembled, assemble pistons onto connecting rods. If being replaced, assemble new piston rings onto pistons.
NOTE: The connecting rod bearing tangs should align with notch in connecting rod and cap.