
Rear damper
- Make
- Mini
- Model
- Mini Workshop Manual
- Year
- 1996–2000
- Section
- Repairs › Rear damper
SuspensionRear damper
REAR DAMPER
Service repair no - LH side - 68.15.22 RH side - 68.15.23
Remove
- LH damper only: Remove fuel tank. See FUEL DELIVERY SYSTEM, Repairs.
- Raise rear of vehicle, one side.
WARNING: Support on safety stands.
- Remove road wheel(s).
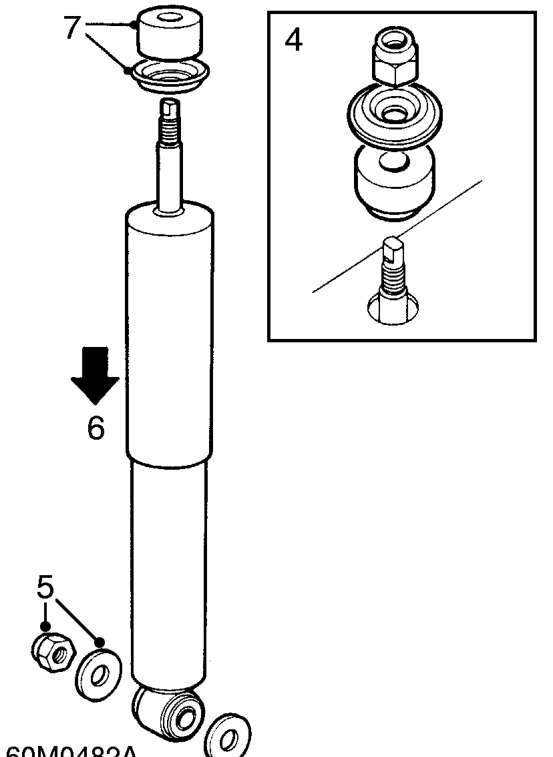
- From inside luggage compartment, remove nut, washer and bush securing damper to body.
- Remove nut and washer securing damper to suspension arm.
- Compress damper and remove from suspension arm.
- Remove rubber bush and washer from damper.
NOTE: Store damper upright if it is to be refitted.
Refit
- Hold new damper in vice, compress and and extend it through its full stroke until there is no free travel when changing direction of stroke.
- Fit rubber bush and washer to top of damper.
- Fit damper to suspension arm.
- Fit nut and washer securing damper to suspension arm and tighten to 25 Nm.
- Extend damper and locate shaft in hole on body.
- Fit bush and washer to damper shaft.
- Fit nut securing damper to body, hold damper shaft and tighten nut to 25 Nm.
- LH damper only: Fit fuel tank. See FUEL DELIVERY SYSTEM, Repairs.
- Fit road wheel and tighten nuts.
- Remove stand(s) and lower vehicle.
Parts & tools for this job For 1996 Mini Mini
- TOOLCoil spring compressorSearch: coil spring compressor
- TOOLBall joint separatorSearch: ball joint separator
- PARTRear shock absorbersSearch: Mini Mini 1996 rear shock absorbers
Links open Amazon search results in a new tab. As an Amazon Associate I earn from qualifying purchases.