
3000GT V6-3.0L SOHC (1998)
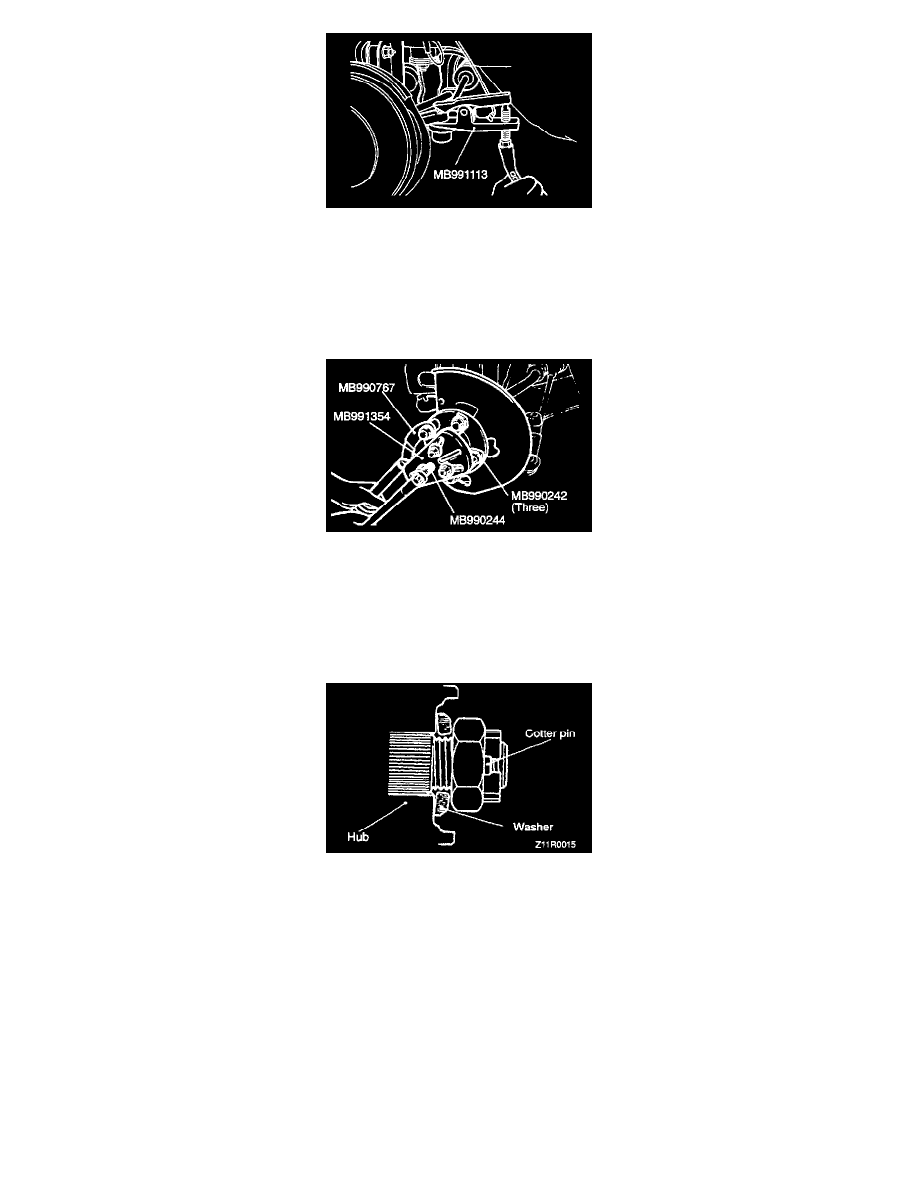
Using the special tool, disconnect the tie rod end from the knuckle.
CAUTION:
1. Be sure to tie the cord of the special tool to the nearby part.
2. Loosen the nut but do not remove it.
<F> Drive Shaft Removal
Use the special tool to push out the drive shaft from the front hub.
<G> Hub Removal
In the case of AWD-vehicles with ABS, take care not to damage the rotor for ABS installed to the B.J. outer race when removing the hub.
Installation Service Point
>A< Drive Shaft Nut / Cotter Pin Installation
1. Be sure to install the washer and wheel bearing nut in the specified direction.
2. After installing the wheel, lower the vehicle to the ground and finally tighten the wheel bearing nut
3. If the position of the cotter pin holes does not match, tighten the nut up to 260 Nm (188 ft. lbs.) in maximum.
4. Install the cotter pin in the first matching holes and bend it securely.
INSPECTION
-
Check the hub for cracks and spline for wear.
-
Check the oil seal for damage.
-
Check the knuckle for cracks.
-
Check for defective beaning.
NOTE: If the meshing of the wheel bearing outer race and the knuckle, or of the wheel bearing inner race and the hub, is loose, replace the
bearing or damaged parts.
Measurement Of Front Hub Unit Bearing Rotation Starting Torque