
Diamante V6-2972cc 3.0L SOHC (1992)
2.
Remove the ignition key from the ignition switch.
3.
Disconnect the negative battery terminal and wait for at LEAST 30 (thirty) seconds before proceeding with any further steps. This allows the
capacitors inside the SRS control unit to discharge.
4.
Remove the air bag module from the steering wheel (4 screws) and disconnect the electrical connectors.
5.
Remove the nut securing the steering wheel to the column shaft.
6.
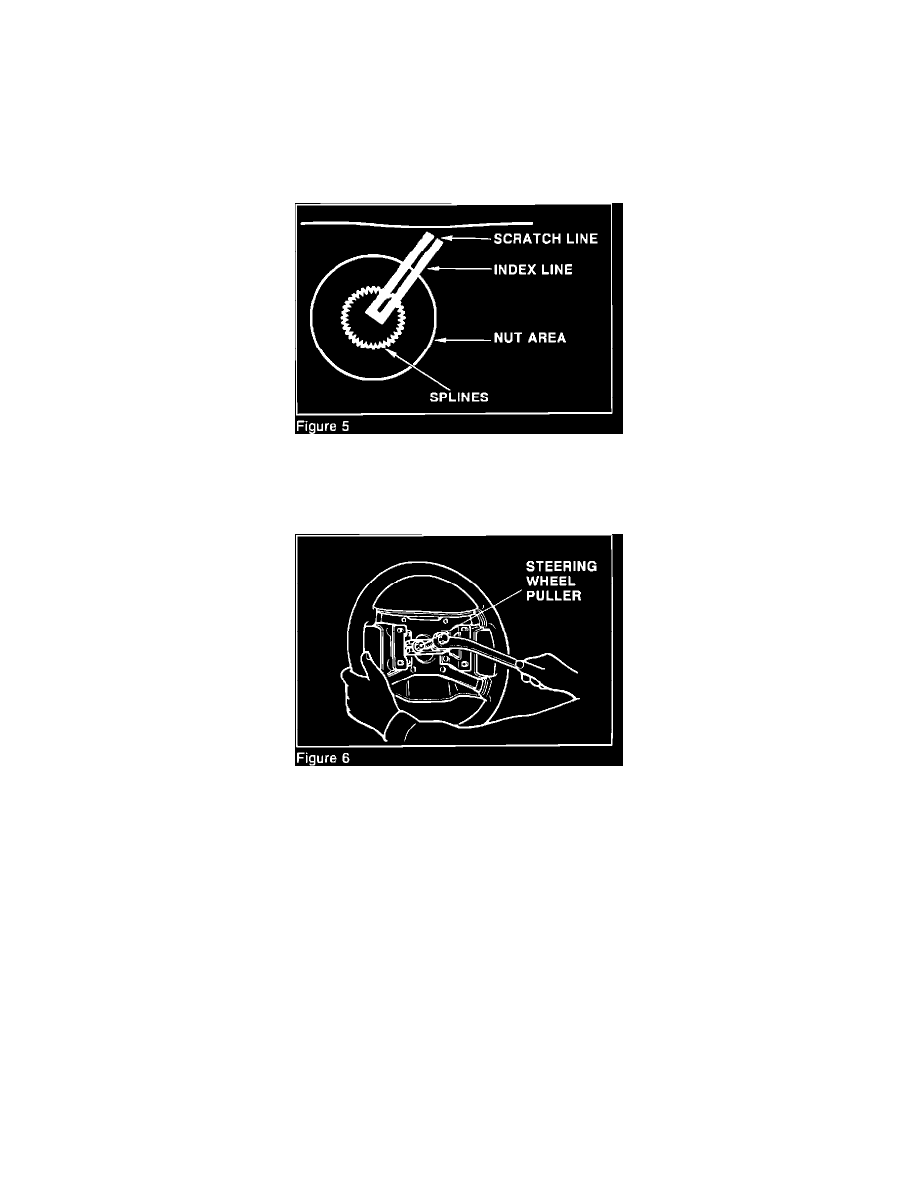
Make a temporary index mark on the steering wheel hub and the steering shaft. Use a permanent marker or white out correction fluid, paint a line
across the column shaft and onto the steering wheel "nut area." After the line has dried, using a screwdriver, lightly scratch a line into the line
(Figure 5). This thin scratch line will provide you with a reference mark after the steering wheel has been removed should the steering column
shaft accidentally turn.
7.
Loosen the steering wheel from the steering column shaft splines using a standard steering wheel puller (Figure 6). Do not remove the steering
wheel yet.
8.
Reinsert the ignition key in the ignition key and unlock the steering lock mechanism. Turn the steering wheel side to side until the chalk mark or
tape line on the steering wheel hub and the chalk mark or tape line on the steering wheel cover are lined up and the front wheels are near the
STRAIGHT AHEAD POSITION.
NOTE:
When you take your hands off the steering wheel the wheel should remain in place.
9.
Without disturbing the position of the steering wheel shaft, remove the steering wheel.