
Eclipse L4-1996cc 2.0L DOHC (1995)
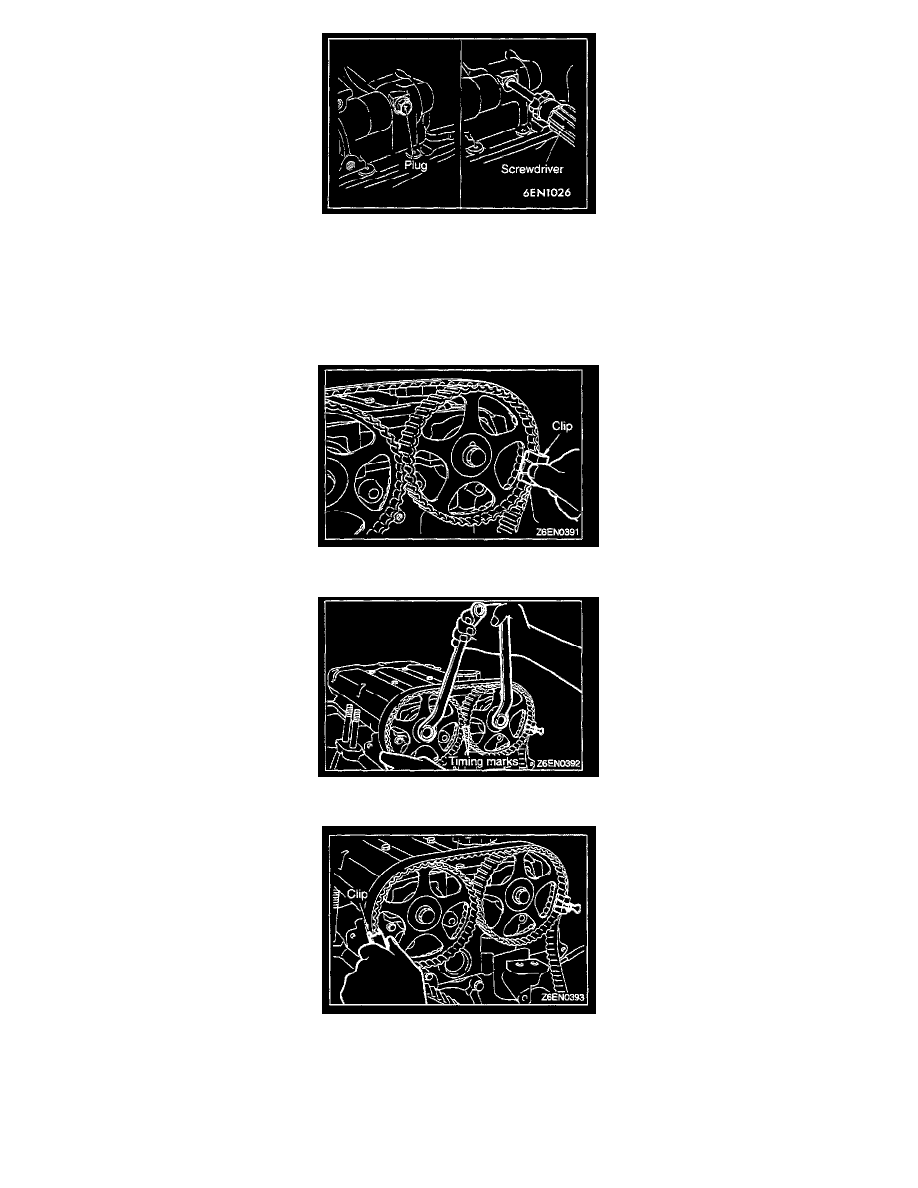
4. Insert a Phillips screwdriver [shank diameter 8 mm (.31 in.)] through the hole.
If it can be inserted as deep as 60 mm (2.4 in.) or more, the timing marks are correctly aligned. If the inserted depth is only 20-25 mm (.8-1.0
in.), turn the oil pump sprocket one turn and realign timing marks. Then check to ensure that the screwdriver can be inserted 60 mm (2.4 in.)
or more. keep the screwdriver inserted until the installation of the timing belt is finished.
NOTE: Step (4) is performed to ensure that the oil pump sprocket is correctly positioned with reference to the counterbalance shafts.
5. Thread the timing belt over the intake side camshaft sprocket and fix it at indicated position by a clip.
6. Thread the timing belt over the exhaust side sprocket, aligning the timing marks with the cylinder head top surface using two wrenches.
7. Fix the belt at indicated position by a clip.