
Eclipse L4-1996cc 2.0L DOHC (1995)
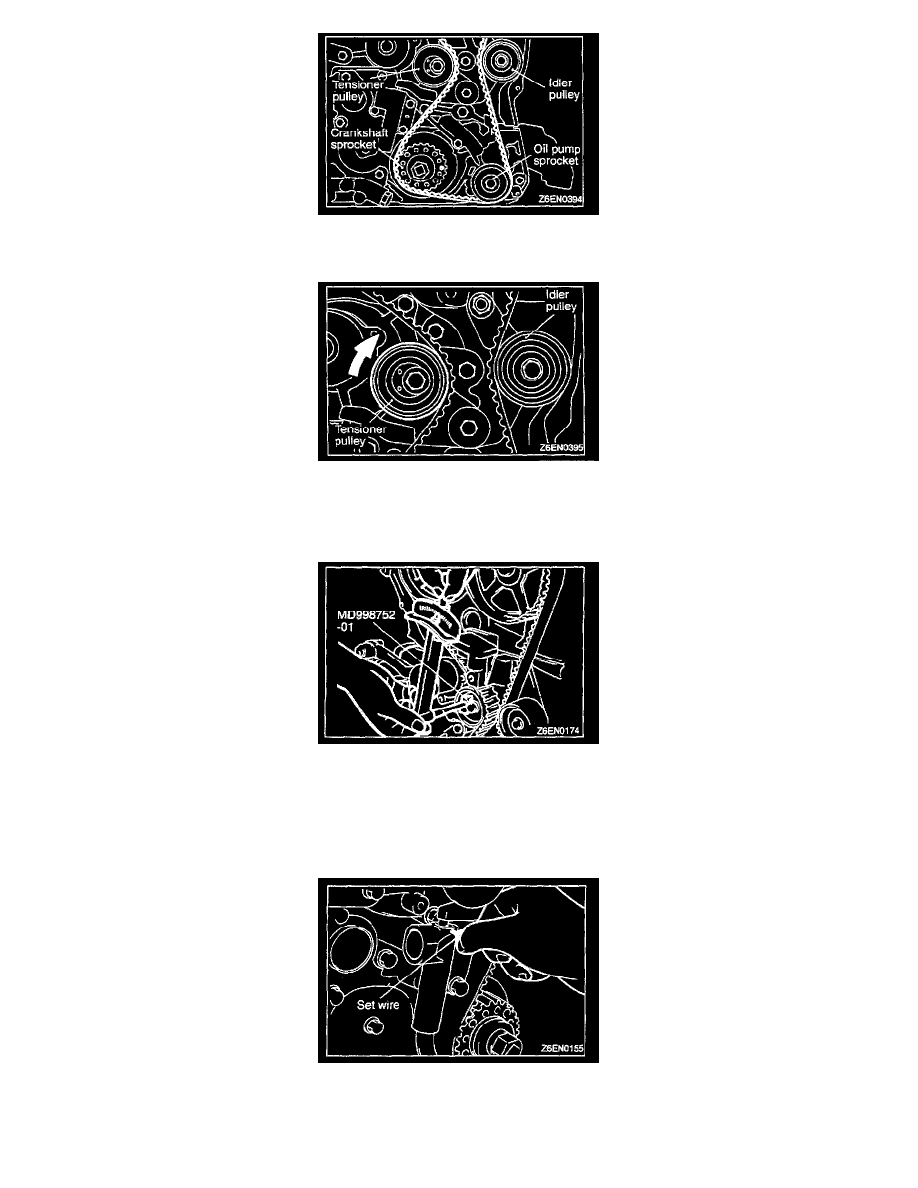
8. Thread the timing belt over the idler pulley, the oil pump sprocket, the crankshaft sprocket and the tensioner pulley in that order.
9. Remove the two clips.
10. Lift up the tensioner pulley in the direction of arrow and tighten the center bolt.
11. Check to see that all timing marks are lined up.
12. Remove the screwdriver inserted in step (4) and fit the plug.
13. Give the crankshaft a quarter counter-clockwise turn. Then, turn it clockwise until the timing marks are lined up again.
14. Install the special tools, Socket Wrench and Torque Wrench, on the tensioner pulley, and loosen the tensioner pulley center bolt.
NOTE: If the special tool is not available, use a commercially available torque wrench that is capable of measuring 0-5 Nm (0-3.6 ft.lbs.).
15. Torque to 2.6-2.8 Nm (1.88-2.03 ft.lbs.) with the torque wrench.
16. Holding the tensioner pulley with the special tool and torque wrench, tighten the center bolt to the specification.
17. After giving two clockwise turns to the crankshaft, let it alone for approx. 15 minutes. Then, make sure that the auto tensioner setting wire
moves freely.
NOTE: If the wire does not move freely, repeat step (13) above until it moves freely.