
Eclipse GT V6-3.0L SOHC (2000)
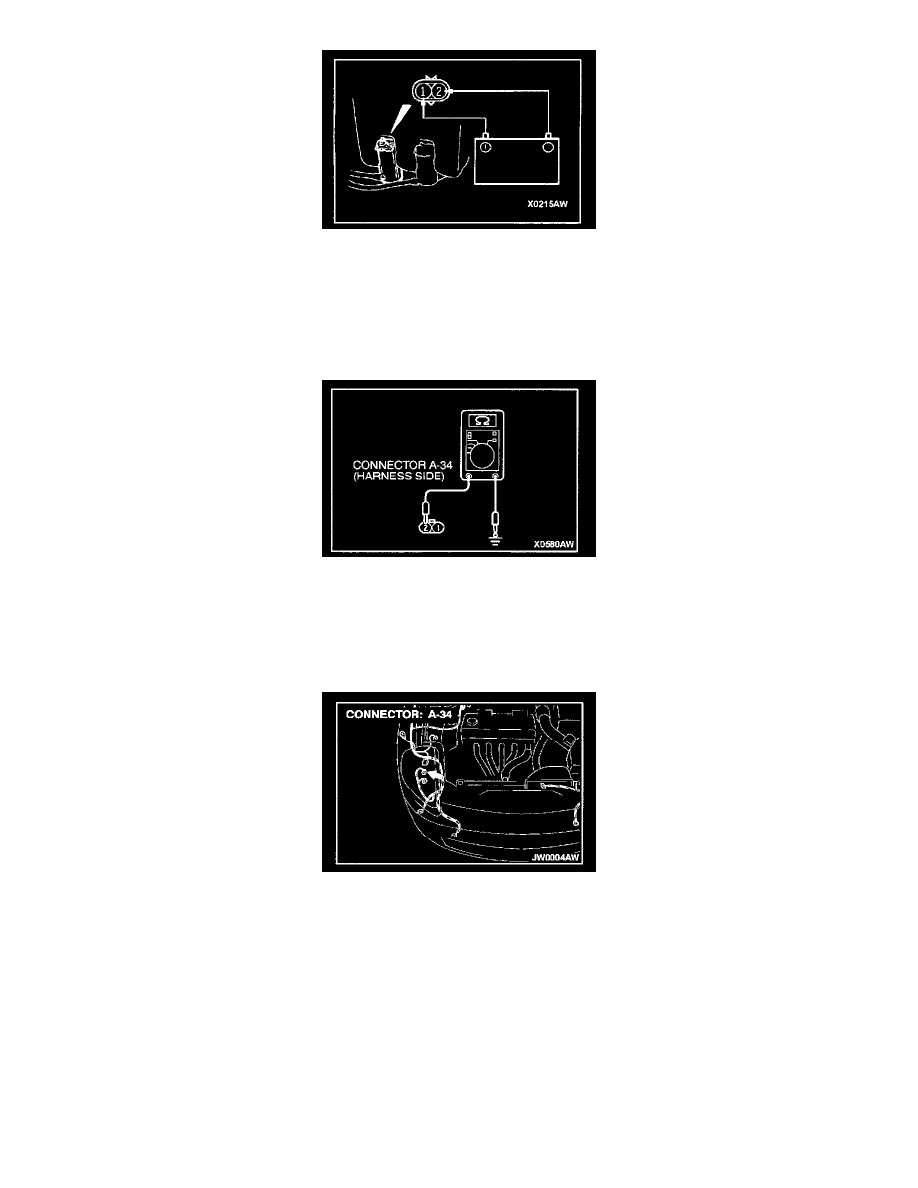
STEP 3. Check the washer motor.
1. Disconnect the rear washer motor connector A-34.
2. Fill the washer tank with water.
3. Check that the water squirts out strongly when battery positive voltage is applied to terminals 1 and 2.
If the rear washer motor is damaged, replace it.
The rear washer should work normally.
If the rear washer motor is in good condition, go to Step 4.
STEP 4. Check the rear washer motor ground circuit at the rear washer motor connector A-34.
1. Disconnect the washer motor connector A-34 and measure at the harness side.
2. Resistance between terminal 2 and ground.
-
Should be less than 2 Ohms.
If open circuit, go to Step 5.
If less than 2 Ohms. go to Step 7.
STEP 5. Check the rear washer motor connector A-34 for damage.
If the rear washer motor connector A-34 is damaged, repair or replace it. Refer to Harness Connector Inspection.
The rear washer should work normally.
If the connector is in good condition, go to Step 6.