
Mirage Sedan LS L4-1834cc 1.8L SOHC MFI (1999)
CAUTION: Let the cleaned places stand for 3 minutes or more, and carry out the next procedures after they have dried. Also, do not
touch any surface that has been cleaned.
INSTALLATION SERVICE POINTS
<A>
CLIP/WINDOW DAM/WINDOW SPACER/WINDSHIELD UPPER MOLDING/WINDSHIELD INSTALLATION
1. When replacing the glass, temporarily set the glass against the body, and place a mating mark on the glass and body.
2. Use 3M ATD Part No.8906 or equivalent to degrease the inside and outside of the windshield and the body flanges.
3. Soak a sponge in the primer, and apply evenly to the glass and the body in the specified places.
4. Apply the primer, and then let it dry for 3 to 30 minutes.
CAUTION:
1. The primer strengthens the adhesive, so be sure to apply it evenly around the entire circumference. However, a too thick application
will weaken the adhesive.
2. Do not touch the coated surface.
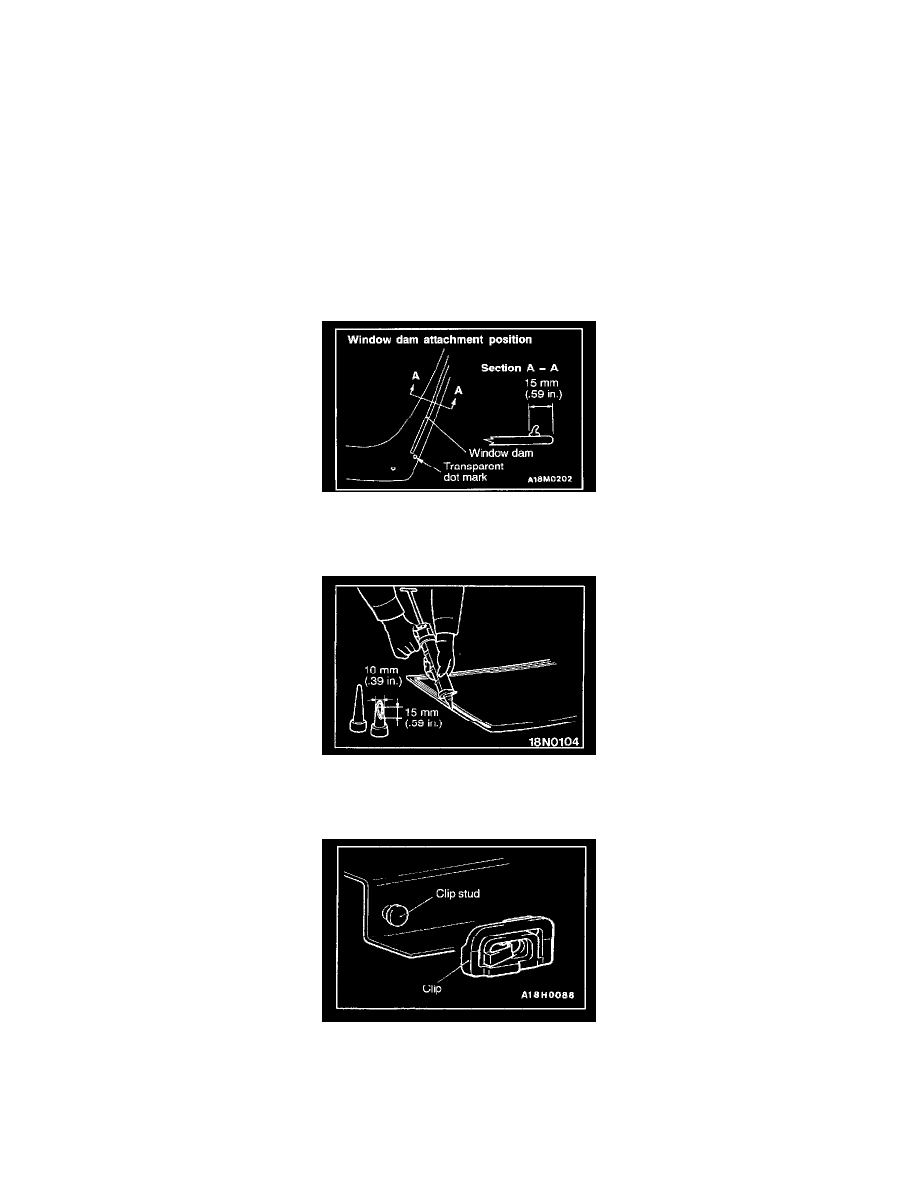
5. Attach the window dam in the specified positions so that there are no bends or lifts on the inside of the windshield.
6. Attach the window spacers so that the clearance at both left and right will be the same during installation.
7. Install the windshield upper molding.
8. Fill a sealant gun with adhesive. Then apply the adhesive evenly around the windshield within 30 minutes after applying the primer.
NOTE: Cut the tip of the sealant gun nozzle into a V shape to simplify adhesive application.
9. Place the clips onto the clip studs.
10. Align the mating marks on the glass and the body, and lightly press the windshield evenly so that it adheres completely.
11. Use a spatula or the like to remove any excessive adhesive. Clean the surface with 3M ATD Part No.8906 or equivalent. Install the root
drip molding before the adhesive hardens. Try not to move the vehicle until the adhesive sets.
12. Wait 30 minutes or more, and then test for water leakage.