
Montero Sport XLS 4WD V6-3.0L SOHC (1999)
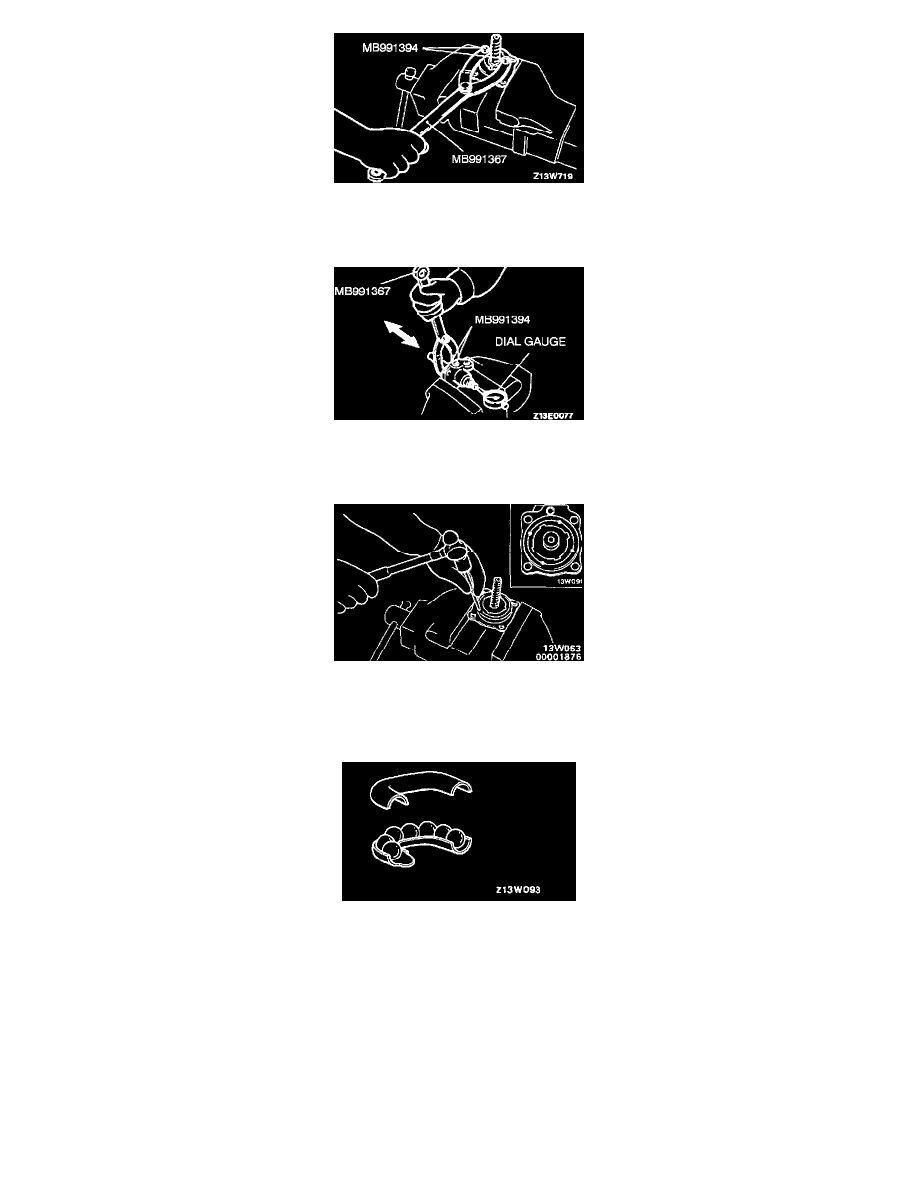
Using special tools MB991394 and M13991367, tighten carefully until the jam nut contacts the bearing race.
>G< Mainshaft End Play Adjustment
1. Adjust the play by tightening the jam nut gradually so that the mainshaft end play will meet the range of the standard value.
Standard value: 0.03 mm (0.001 inch) or less
2. Use a punch to crimp the circumference of the jam nut so as to secure the jam nut.
3. Check to be sure that the mainshaft rotates smoothly.
>H< Rack Piston And Balls Installation
1. Install the rack piston until it comes in contact with the edge of the mainshaft.
2. Rotate the mainshaft to align the ball raceway with the 19-ball insertion hole.
NOTE: The balls must be inserted so that there is no clearance between the balls.
3. Set the remaining seven balls in the circulator, and install the circulator to the rack piston.
4. Apply the Automatic transmission fluid DEXRON-H to the seal ring of the rack piston.
>I< Valve Housing Installation
1. Apply the Automatic transmission fluid DEXRON-II to the seal ring of the rack piston.
2. Insert the valve housing.
3. Rotate the main shaft until the rack piston moves to the neutral position (center).