Montero XLS 4WD V6-3.5L SOHC (2001)

Control Assembly: Service and Repair
Control Assembly, A/C and Inside/Outside Changeover Switch
Removal and Installation
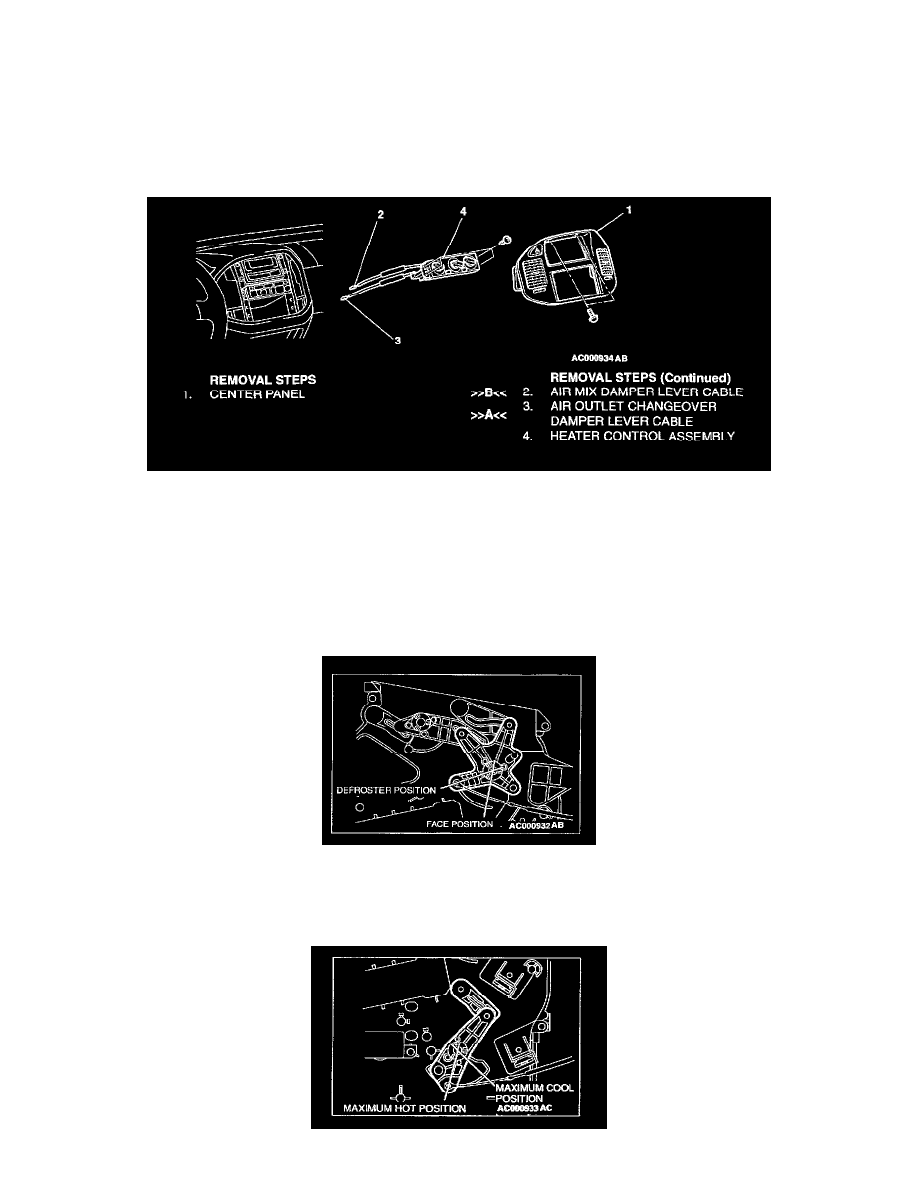
HEATER CONTROL ASSEMBLY, A/C SWITCH AND INSIDE/OUTSIDE CHANGEOVER SWITCH
REMOVAL AND INSTALLATION
Pre-removal and Post-installation Operation
-
Front Drivers Side Under Cover Removal and Installation
-
Floor Console Removal and Installation
-
Foot Duct C and Foot Duct D Removal and Installation
INSTALLATION SERVICE POINT
>>A<< AIR OUTLET CHANGEOVER DAMPER LEVER CABLE INSTALLATION
1. Set the air outlet changeover control knob on the heater control assembly to the defroster position.
2. Set the air outlet changeover damper lever of the heater/cooler unit to the defroster position as shown in the illustration, and then connect the cable
to the link pin.
3. Push the outer cable in the direction of the arrow so that there is no looseness, and then secure it with the clip.
4. After installation, ensure that each damper operates smoothly by operating the heater control assembly knob.
