
405 L4-1905cc 1.9L (1989)
Glove Compartment: Customer Interest
Glove Box - Lid Alignment Procedures
BULLETIN NO. 292
DATE:
August, 1988
SUBJECT:
GLOVE BOX LID ALIGNMENT PROCEDURES
MODELS:
405 DL, S, AND Mil6 VEHICLES
Some 405 models may require adjustment of the glove box lid to correct misalignment and/or a wide gap on the door, which can result in rattles. The
405 is equipped with a glove box striker which allows for a certain amount of adjustment to correct this situation.
NOTE:
An even gap between the glove box lid and top of the dashboard which does not exceed 4 to 5 mm is acceptable.
ADJUSTMENT PROCEDURES FOR:
1.
Wide gap at top of lid and/or rattles
2.
Uneven gap/misalignment
PROCEDURE 1 - WIDE GAP/RATTLES:
-
Open glove box lid
-
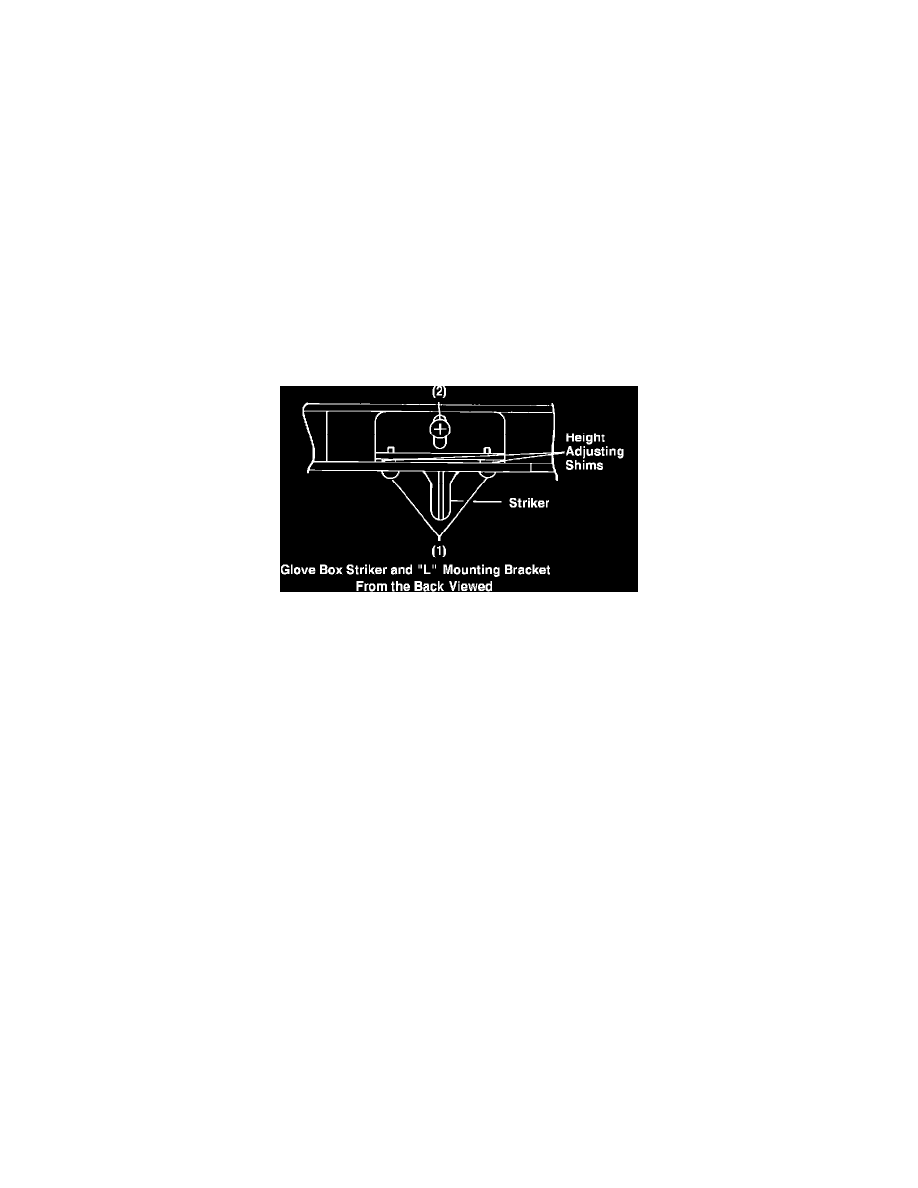
Loosen the striker mounting screws (1)
-
Loosen the screw (2) in the center of the "L" shaped bracket
NOTE:
Use of a mirror will make it easier to locate this screw
-
Adjust striker as needed; in most cases it will be necessary to pull it all the way up
-
Tighten screws (1) and (2) - Recheck alignment
-
If the glove box lid gap still exceeds 5 mm, proceed as follows:
-
Remove striker and "L" bracket - screws (1) and (2)
-
Locate 4 shim washers, approximate dimensions: 12 mm OD, 6 mm ID, 1.5 mm thickness
-
Insert right side striker screw only; place two shim washers through screw on back side of liner
-
Insert striker and "L" bracket; start a few threads on right side screw
-
Insert left side striker screw; left place two shim washers through screw on other side of liner
-
Center striker and "L" bracket; finger tighten both screws (1)
-
Adjust striker as needed; in most cases it will be necessary to pull it all the way up
-
Tighten screws (1) and (2) - Recheck alignment
PROCEDURE 2 UNEVEN GAP/MISALIGNMENT:
-
Loosen the two mounting screws holding the striker onto the upper part of the glove box
-
Move the striker all the way up and to the left
-
Retighten striker mounting screws