
405 L4-1905cc 1.9L (1989)
-
Slide the sunshade panel forward and out of the car.
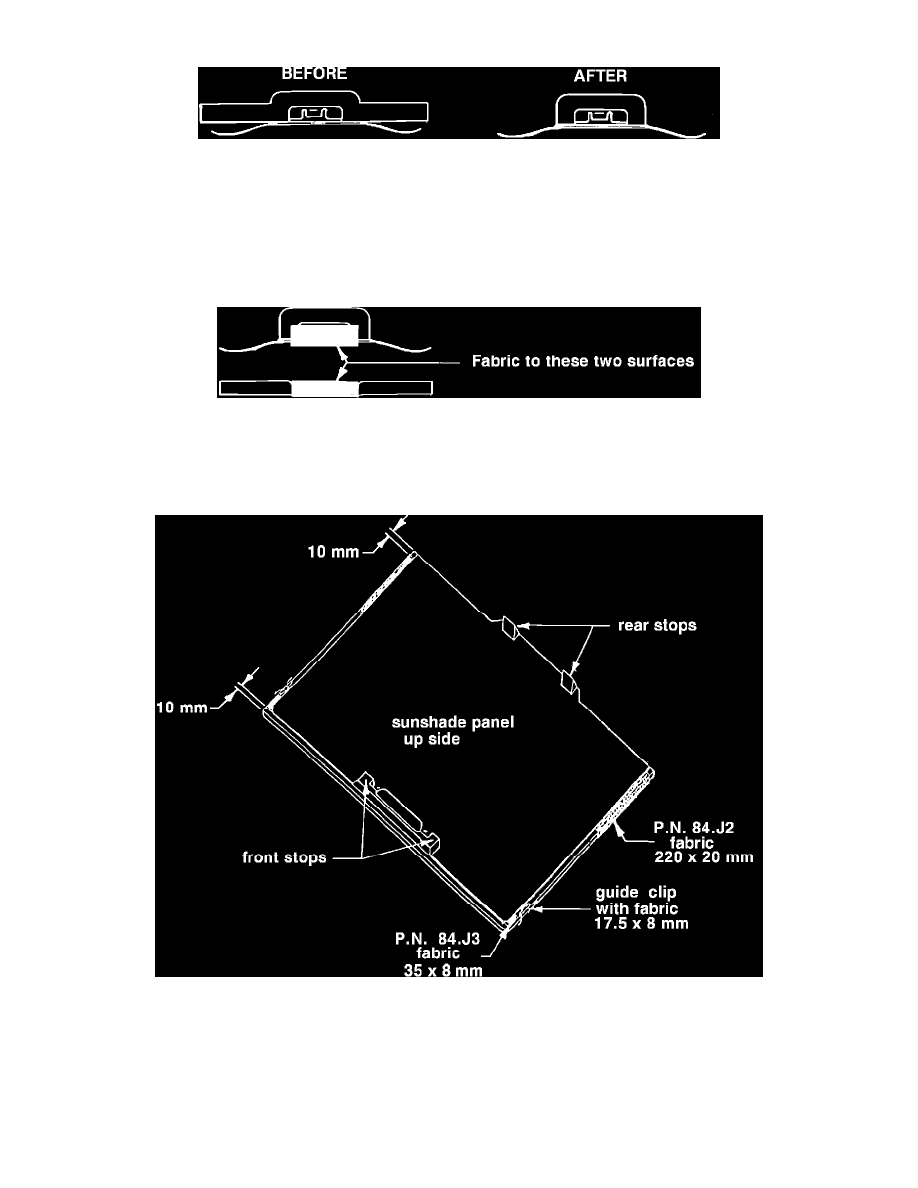
FIGURE 1
SUNSHADE PANEL MODIFICATION:
-
Remove the four (4) guide clips and discard the two used in the rear
-
The two in the front must be modified as follows:
-
Using snips or sheetmetal shears, cut the two (2) legs of the guide clip facing upward (as seen when installed on the sunshade panel) as shown
below (Fig. 1).
FIGURE 2
-
Cut one of the three (3) strips (P/N 84.J3) in half, making two pieces with the new dimensions 17.5 x 8 mm.
-
Install the new self-sticking fabric pieces on the modified guide clips onto the side and bottom surfaces (as seen when installed on the sunshade
panel) as shown below (Fig. 2).
FIGURE 3
-
Install the two modified guide clips in their original front position (largest side facing up)
-
Install the remaining two strips, P/N 84.J3, (35 x 8 mm) in front of the front guide clips, toward the side edge, 10 mm from the front edge of the
sunshade panel (See Fig. 3 below).
-
Install the two strips, P/N 84.J2, (220 x 20 mm) 10 mm from the rear edge of tile panel, starting from the inside of the groove on the up side and
wrapping around the edge onto the down side of the panel
-
Apply great pressure to the whole area of all the self-sticking fabric pieces to ensure maximum bonding.
REINSTALLATION OF THE SUNSHADE PANEL: