
SW1 L4-1.9L SOHC VIN 8 (1996)
4.
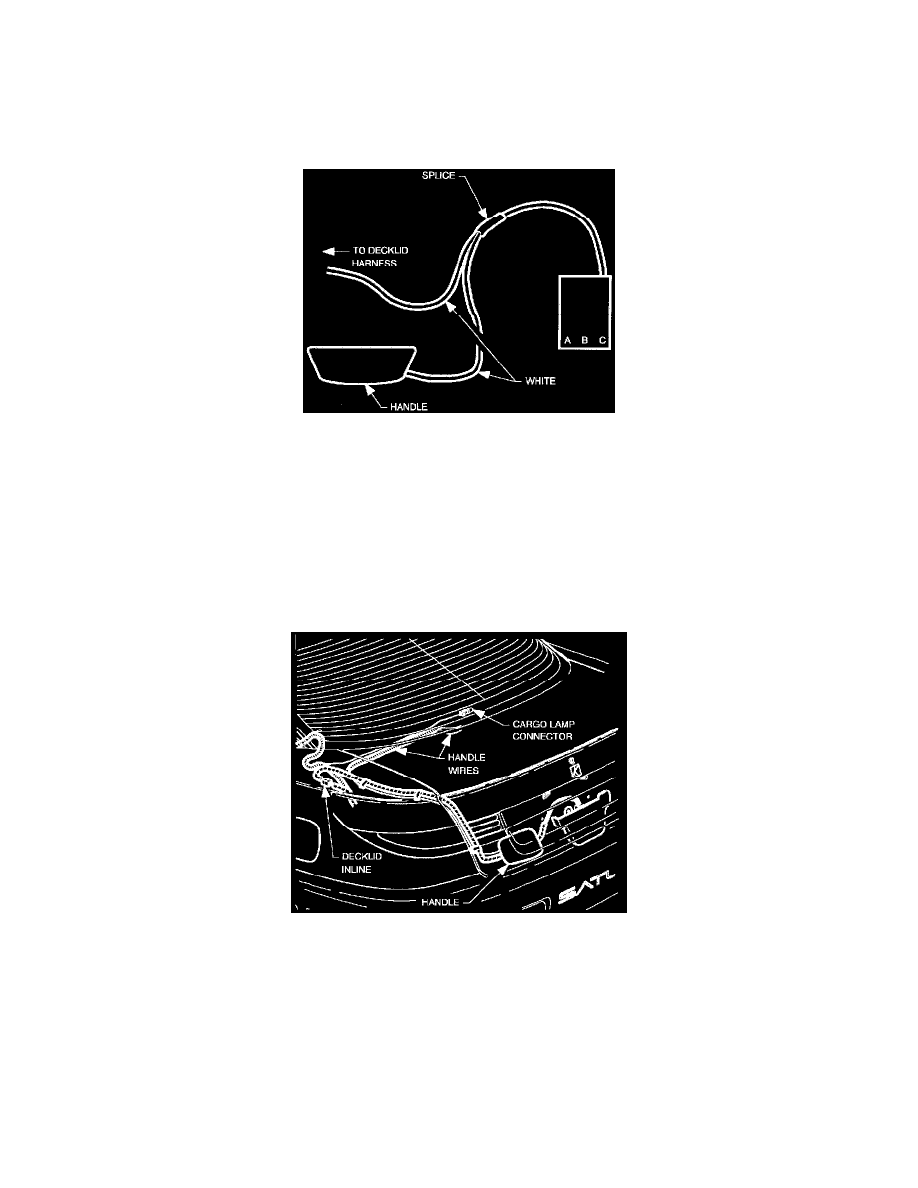
Using one black 3-way connector (P/N 12047781) and one WHT wire (P/N 12112316) supplied with kit, insert WHT wire into cavity C of black
3-way connector body.
5.
Connect the black 3-way connector to latch assembly.
6.
Route handle WHT wire over to latch connector.
7.
Cut to length and splice handle WHT wire and remaining length of handle WHT wire to jumper WHT wire coining from cavity C of the black
3-way connector.
8.
Wrap entire length of handle wiring harness with tape to prevent damage to wires.
9.
Route handle BLK wire and remaining length of handle WHT wire along existing decklid harness over to bottom of decklid hinge.
10.
Insert handle wires into existing clips along decklid harness.
11.
Place WHT and BLK handle wires in approximately three feet of conduit (P/N 21023494) and route them along bottom of rear window panel over
to cargo lamp area.
12.
Remove cargo lamp housing and disconnect cargo lamp if needed.
13.
Cut cargo lamp BLK wire in half allowing enough room for splices.
14.
Splice handle WHT wire to one cargo lamp BLK wire using splice sleeves supplied with kit.