
SW1 L4-1.9L SOHC VIN 8 (1996)
5.
To reduce the risk of debris from entering the HVAC module, check for gaps between cowl panel foam and windshield, at base of windshield.
Repair gaps by repositioning panels or by removing cowl panels and installing additional foam to panel. Use Kent Industries P/N 40115 Adhesive
Back Shim Stock or equivalent 5/16 x 3/8 inch foam.
6.
Place a drain pan directly below the HVAC drain to collect disinfectant or cooling coil coating and rinse water runoff.
7.
Open all doors and windows in the vehicle and position pedestal fan so that it provides cross ventilation through the vehicle during the
cleaning/coating procedure.
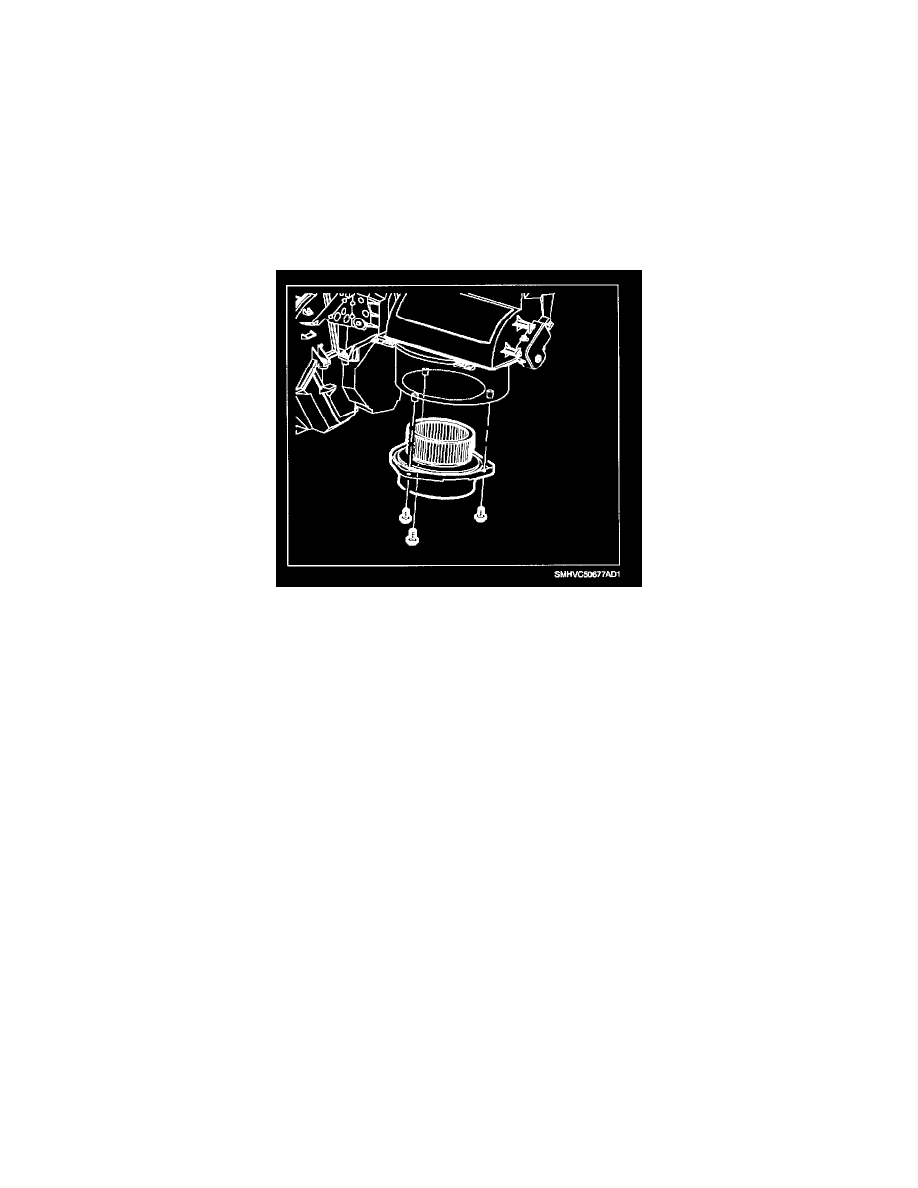
8.
Cover interior of vehicle to protect it from spray.
9.
Disconnect blower motor connector.
10.
Remove blower motor mounting screws and remove blower motor assembly.
NOTICE:
Use care when removing debris from front of evaporator so no damage is done to the fins.
11.
Check the HVAC module for debris through the blower motor opening. Remove any debris from evaporator face.
12.
Install blower motor and connect electrical connector.
Torque:
Blower Motor Mounting
Screws: 1.7 N.m (15 in.lbs)