seat Workshop Repair Guides

SEAT Workshop Service and Repair Manuals

Tightening torques > < Removing gearbox
Installing gearbox
Installing gearbox
Installation is carried out in the reverse order; noting the following:
  Note
t  Always replace self-locking nuts and bolts during assembly.
t  Replace bolts that are submitted to goniometric tightening, along with seals and gaskets.
t  Secure hose unions with hose clamps the same as those of the series → Current Spare parts catalogue.
t  All cable clamps that become loose or cut when removing the gearbox must be re-installed in the same place when installing.
–  Before fitting the gearbox, ensure that the torque converter is securely fitted in the gearbox → Chapter.
  WARNING
If the torque converter is incorrectly fitted, in the moment when the gearbox is braced to the engine the drive element of the converter or the ATF pump will be damaged.
   
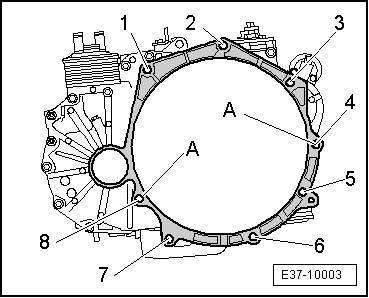
–  Before fitting ensure that the dowel sleeves for centring-A- are correctly seated.
–  Secure the gearbox with the support tool -T20138C- on the base - T20145- and fit to the engine and gearbox jack -SAT 1040- on top using the adapter for the hydraulic engine and gearbox jack -SAT 1001/1-.
  E37-10003
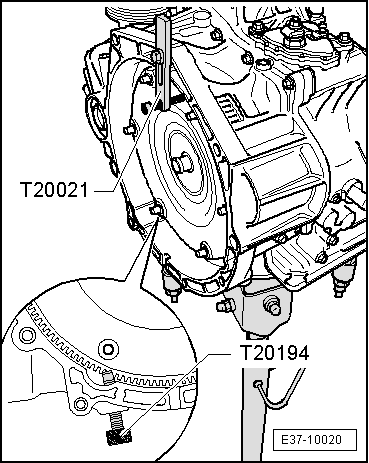
–  First remove the fitting tool -T20021 - leaving the support tool -T20194 - in place.
–  Carefully raise the gearbox with the hydraulic jack -SAT 1040- and place it in the installation position.
–  Fit all of the joining bolts between the engine and the gearbox that may be reached from under the vehicle → Chapter „Tightening torques“.
–  The nuts must always be renewed.
  E37-10020
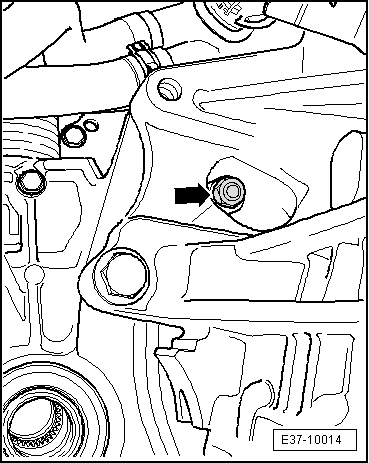
–  Fit the 6 bolts -arrow- for attachment of the torque converter on the drive plate using a 15 mm interface spanner → Anchor.
–  In order to do this, the crankshaft must be turned 60º at a time.
  WARNING
If any nut falls into the opening of the torque converter, it must be removed; if necessary the gearbox must be, once again, separated from the engine.
–  Remove the support tool -T20194 -.
  E37-10014
–  Fit the subframe as follows:
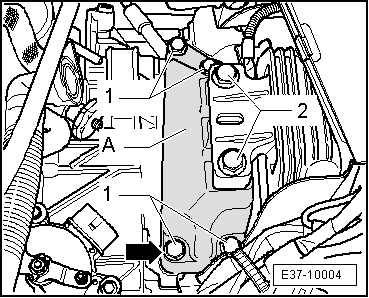
–  Place the gearbox console -A- between the gearbox and the gearbox support.
  E37-10004
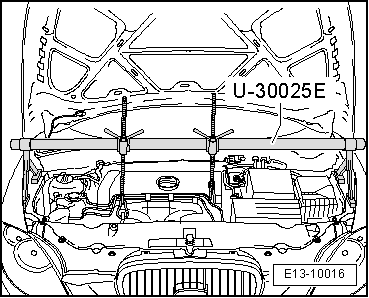
–  Pull the gearbox upwards, towards the leg of the support, with the help of the support -U 30025E -.
  WARNING
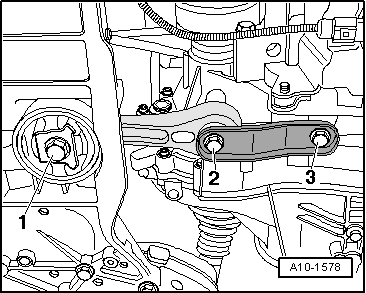
Before screwing in the bolts -1- and -2- it is essential that the foot of the gearbox support and the console are in a perfectly parallel position relative to each other; otherwise the threads will be damaged. If required, raise the rear part of the gearbox using a jack for handling.
–  Use new bolts.
  Note
The bolt indicated by the -arrow- has a special design to allow for the connection of the earth cable between the bodywork and the gearbox.
–  Fit the gearbox console -A- → Anchor.
  WARNING
Only remove the support tool -T20138C- after tightening all of the left and right hand side bolts on the subframe to the specified torque.
  E13-10016
–  Install pendulum support → Chapter.
–  Use new bolts.
–  Tighten the remaining bolts joining the gearbox and the engine → Chapter „Tightening torques“.
–  Fit the complete half-shafts → Running gear, axles, steering; Rep. gr.40.
–  Fit the starter motor → Electrical system; Rep. gr.27.
  A10-1578
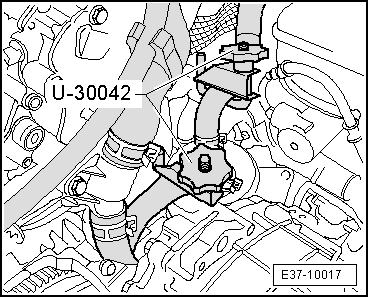
–  Connect the hoses of the ATF radiator according to the marks made during removal on the ATF radiator.
  Note
Depending on the stage of fitting, before fitting the ATF radiator, there is a plastic tube that must be refitted in position.
–  Fit the battery → Electrical system; Rep. gr.27.
–  ATF level: verification and topping up → Chapter.
–  Check the selector lever cable adjustment; adjusting if necessary. → Chapter
–  Check the level of coolant in the cooling system → Engine, mechanics; Rep. gr. 19
  E37-10017

Tightening torques > < Removing gearbox