seat Workshop Repair Guides

SEAT Workshop Service and Repair Manuals

Removing and installing ATF strainer > < Components on the 8 pin connector cable harness
Removing and installing oil sump
Consult the equivalence table for tools and equipment according to applicability among Seat / VW / Audi / Skoda → Chapter.
Special tools and workshop equipment required
   
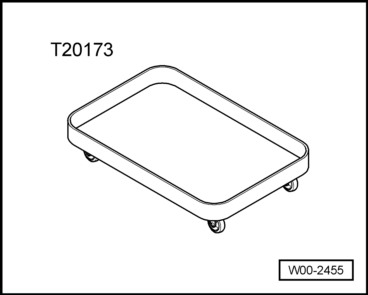
t  Tray -T20173 -, see equivalent → Anchor
t  Protective glasses
  Note
t  Rules of cleanliness to be taken into account when working on the automatic gearbox → Chapter.
t  General repair instructions. → Chapter
  W00-2455
Oil sump: dismounting
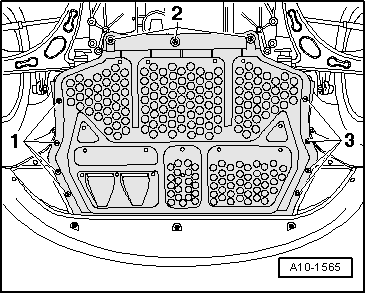
–  Remove central soundproofing -Anchorage points 1 ... 3-.
–  Fit tray -T20173- beneath gearbox.
  WARNING
Protective goggles must be worn
  A10-1565
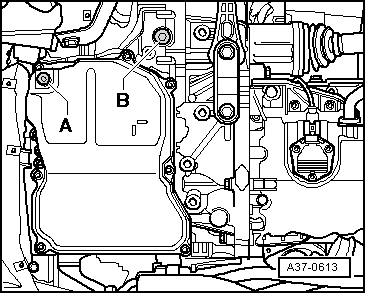
–  Unscrew the ATF drain bolt -B- and allow the ATF to drain out.
–  Unscrew the ATF level testing bolt -A-.
  Note
Where there is no ATF drain screw -B-,depending upon version, the ATF control screw is used -A- to drain ATF
  A37-0613
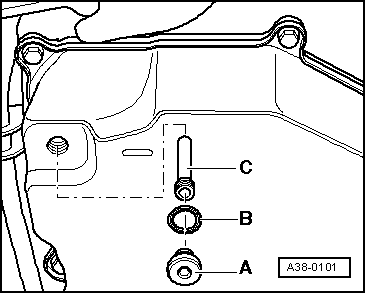
–  Unscrew the overflow tube -C- and let the ATF drain out.
  A38-0101
–  Unscrew the 8 screws of the oil sump -arrows- diagonally.
  WARNING
There is still ATF in the oil sump due to the fact that not all the ATF can be drained through the hole.
–  Remove the oil sump together with the oil sump gasket.
Oil sump: fitting
Installation is carried out in reverse order, noting the following:
–  Clean the two magnets → Item located on the grooves of the oil sump. Ensure that all the surface of the magnets sit on the oil sump.
  Note
It is essential to fit the magnets in their correct places on the oil sump.
–  Clean the gasket and seal surfaces and remove all traces of oil.
–  Ensure that the sump gasket is correctly fitted.
–  Check that no cable or tube is snagged when fitting the oil sump.
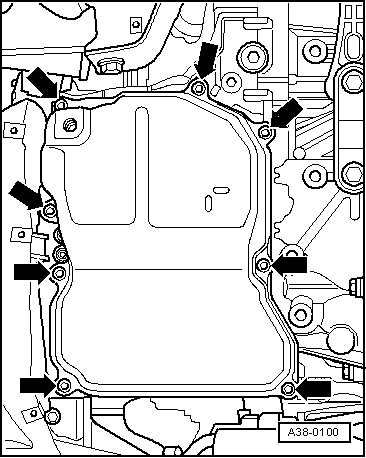
–  Screw in the 8 bolts for the oil sump -arrows- diagonally.
  A38-0100
–  Replace the seal on the ATF drain bolt.
–  Screw in the ATF drain bolt -B-.
  Note
Where there is no ATF drain screw -B-,depending upon version, the ATF control screw is used -A- to drain ATF
  A37-0613
–  Fit the overflow tube -C-.
–  Fill with ATF, check and correct ATF level → Chapter.
l  The seal -B- on the ATF level testing bolt must be replaced following the verification of the ATF level.
Tightening torques
  A38-0101
ComponentNm
ATF drain bolt to the oil pan, M1839
Oil tube on the oil sump1
ATF level testing bolt to the oil pan, M1027
Oil sump to the gearbox housing, 8 M6 bolts7 → Remark

1)  Tighten diagonally in several stages.
   

Removing and installing ATF strainer > < Components on the 8 pin connector cable harness