seat Workshop Repair Guides

SEAT Workshop Service and Repair Manuals

Pipe and hose assembly: removing and fitting > < Clutch release assembly, slave cylinder: assembly overview
Clutch slave cylinder: Removing and installing
Consult the equivalence table for tools and equipment according to applicability among Seat / VW / Audi / Skoda → Chapter.
Special tools and workshop equipment required
   
t  
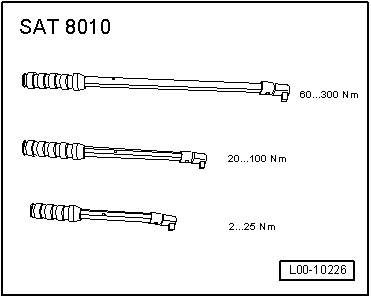
Torque wrench kit -SAT 8010-, see equivalent → Anchor
t  Removing → Anchor
t  Installing → Anchor
Removing
  Note
t  Slave cylinder and release bearing are one unit and can only be renewed together.
t  When performing the following operations, care must be taken not to spill brake fluid onto the side member or gearbox. If fluid comes into contact with them, the affected area must be thoroughly cleaned.
–  Remove gearbox → Chapter.
  L00-10226
–  Release the securing clip -2- with a screwdriver then disconnect the air bleeder valve -4- from the slave cylinder -1-.
  A30-0137
–  Screw out bolts -arrows-.
–  Remove the slave cylinder with the collar -A-.
Installing
Installation is carried out in the reverse sequence; note the following:
  A30-0012
–  Tighten bolts -arrows- to 12 Nm.
  A30-0012
–  Slide the new O-ring -3- onto the slave cylinder.
–  Insert the air bleeder valve into the slave cylinder connection until the attachment clip is connected with an audible click.
–  Pull on the air bleeder valve to ensure that it is correctly secured.
–  Install gearbox → Chapter.
–  Purging the clutch control → Chapter
  A30-0137

Pipe and hose assembly: removing and fitting > < Clutch release assembly, slave cylinder: assembly overview