
Leon Mk1
|
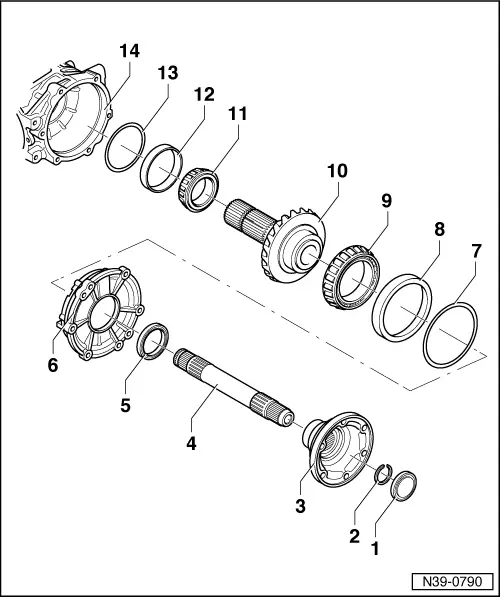
Servicing input shaft bevel gear bearings
Assembly overview
Dismantling and assembling sequence 1) Adjustment work is required if these components are replaced => Adjustment overview Page 39-193. |
 |
|
|
|
|
=> Replacement parts catalogue |
|
|