
Leon Mk1
|
|
 Note
Note| t | Only the adjustment for the left front door is described. The adjustment of the right front door is similar. |
| t | Vehicle must be standing on its wheels when front door adjustment is performed. |
| t | The front door is correctly adjusted when all shut lines are even when closed. it is not protruding too far inwards or outwards, and when the contours are flush with each other. |
| t | For checking gaps/shut lines refer to → Rep. gr.00. |
| t | After installing or alignment, carry out corrosion protection measures on hinges and screws/bolts. |

| Carry out following work: |
| Adjusting for flush fitting |
| To be able to adjust shut lines correctly, bolts -2-, -3-, -6-and -7- in A-pillar must be loosened. |
| – | For bolt -7-, dash panel must be removed → General body repairs, interior; Rep. gr.70. |
| – | For loosening bolt -3-, lower A-pillar trim must be removed → General body repairs, interior; Rep. gr.70. |
| Adjusting for flush fitting |
| In order to adjust flushness correctly, bolts -5- and -9- must be loosened. |
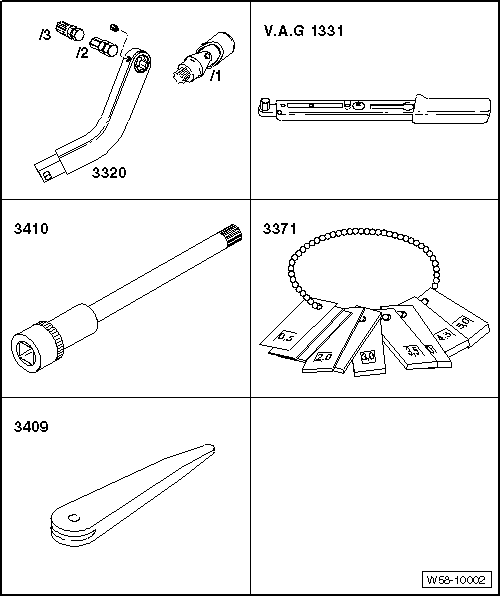
| Use door alignment tool -3320- with appropriate bit for this. |
Note| Other measures, such as raising the front door, will prove pointless. Subsequent pressure from above will cause the front door to sack again. |
| Adjusting striker pin → Chapter. |
| – | Adjust adjustment buffer. |
|
| Adjusting adjustment buffer |
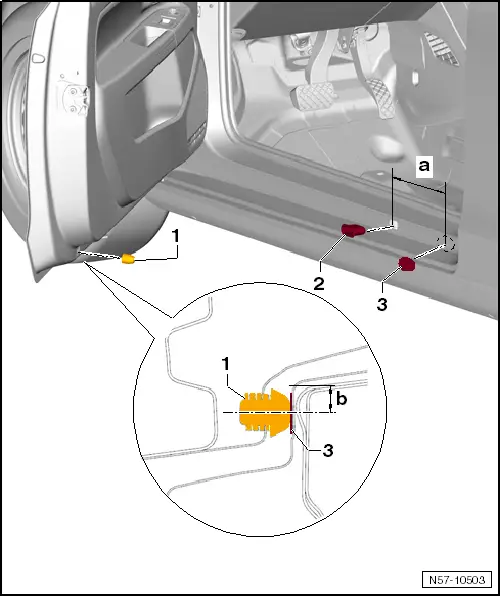
| – | Adjustment buffer -1- is adjusted by turning. |
| Protective backing |
| – | Check protective film -3- for damage and renew if necessary. |
| – | The protective film -3- must be cut out of foil sheet -AKL 448 300 04-. |
| Dimensions: |
| t | Ø 22 mm |
| t | Dimension -a- from edge of grommet to centre of protective film is 165 mm. |
| t | Dimension -b- from upper edge of side member to centre of protective film is 14 mm. |
| Grommet |
| – | Check grommet -2- for damage and renew if necessary. |