
Leon Mk1
 Note
Note
|
|

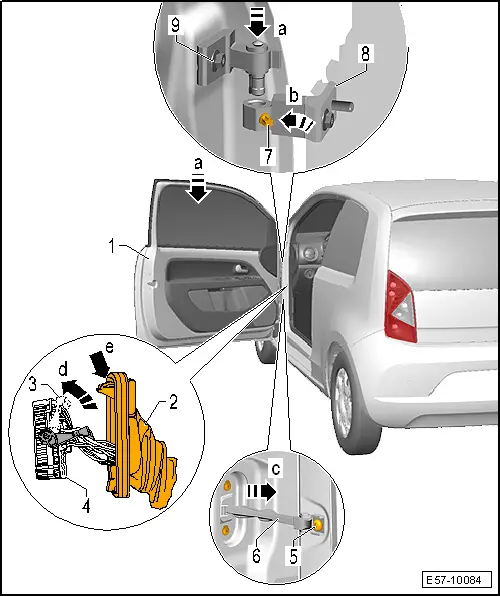
| Carry out following work: |
| – | Release boot -2- by pressing fastener -arrow a- and pull off A-pillar. |
| – | Swing release lever -3- downwards -arrow b- and disconnect electrical connector -4- from coupling station. |
| – | Undo screws -7- from hinges. |
| – | Unscrew bolt -5- for door retaining strap -6-. |
| – | Push door retaining strap -6- inwards -arrow c-. |
| – | Lift front door -1- upwards -arrow e- so that hinge -9- is released from hinge -8-. |
|
| Carry out following work: |
| Install in reverse order of removal. When doing this, observe the following: |
 Caution
|
| Specified torque for bolts -5- 30 Nm. |
| Specified torque for bolts -7- 23 Nm. |
Note| After door installation the hinge arms must be flush one above the other. |
| – | Adjust front door -1- → Chapter. |
| – | Observe front door shut lines -1- → Rep. gr.00. |