seat Workshop Repair Guides

SEAT Workshop Service and Repair Manuals

Passenger protection > < Grab handles
Brackets on the front sill panel trim: Removing and installing
  Note
Removal and installation are described for the left vehicle side. Follow same instructions for the right side as appropriate.
removing
–  Remove the connecting piece between sill panel strip and luggage compartment trim → Chapter.
–  Remove sill panel moulding → Chapter.
–  Remove dash panel end trim → Chapter.
–  On driver's side, remove bonnet operating lever → General body repairs, exterior; Rep. gr.55.
–  Remove lower A-pillar trim → Chapter.
   
–  Remove bolts -1-, -2-, -3- and-4-.
–  Push the bracket of the front sill panel trim -5- towards the middle of the vehicle and remove.
Installation
  N68-10530
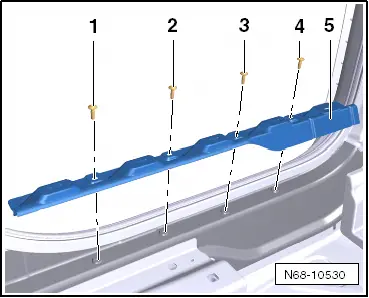
–  Centre the brackets of the front sill panel trim -5- on the rear end on the bodywork and push to the end in the direction of the lower sill.
–  Screw the brackets of the sill panel trim onto the bottom sill in the following order: -4-, -1-, -2- and -3-.
Tightening torque: 2 Nm
  N68-10530

Passenger protection > < Grab handles