seat Workshop Repair Guides

SEAT Workshop Service and Repair Manuals

Haldex Clutch > < Cardan shaft: removing and fitting
Rear flexible disc: removing and fitting
Removing → Anchor.
Fitting → Anchor.
Tightening torques → Anchor.
Check the tool and equipment equivalence table according to the applicability between Seat / VW / Audi / Skoda → Chapter
   
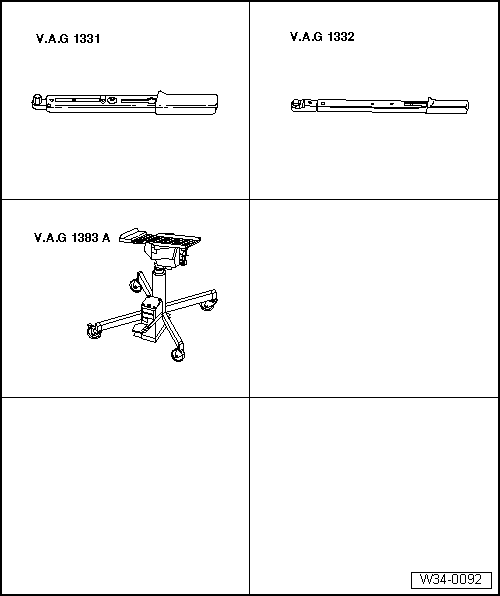
Special tools and workshop equipment required
t  Torque wrench -V.A.G 1331-, see equivalent → Anchor.
t  Torque wrench -V.A.G 1332-, see equivalent → Anchor.
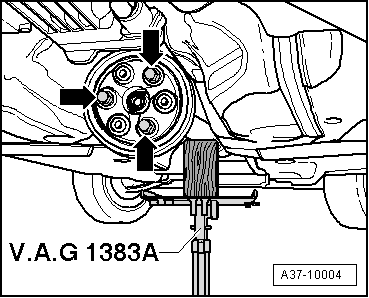
t  Engine assembly crane -V.A.G 1383 A- with Gearbox support assembly -V.A.G 1359/2-, see equivalent → Anchor.

Removing
–  Remove the rear section of the exhaust system → Rep. Gr.26.
   
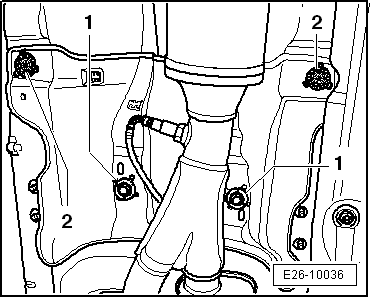
–  Loosen the bolts by a couple of turns -1- of the centre elastic support of the cardan shaft.
  E26-10036
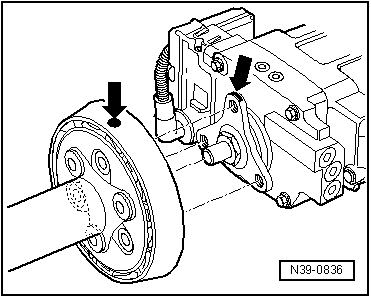
–  Check for a mark (a coloured point) on the flexible disc and on the Haldex clutch flange -arrows-.
If there are no marks, mark the position of the flexible disc with respect to the Haldex clutch flange -arrows-.
  Caution
Mark the position of the bolts, as some of them may have a balancing washer for preventing vibrations.
  N39-0836
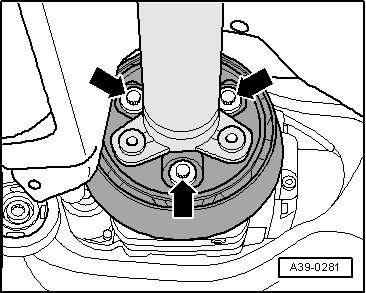
–  Remove the bolts -arrows- from the final group flange.
–  Carefully pull the cardan shaft to uncouple it from the final group flange centring pivot.
  Note
  A39-0281
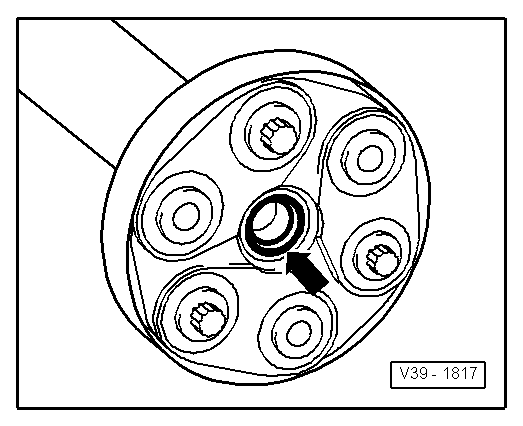
t  Do not bend the cardan shaft when removing it; separate it from the centring pivot while keeping it horizontal. Do not damage the seal in the dowel sleeve -arrow-.
t  Do not separate the flexible disc from the vibration damper.
  V39-1817
–  Support the cardan shaft on it.
–  Fasten the cardan shaft with the Gearbox support assembly -V.A.G 1359/2- belt so that it does not drop.
–  Mark the position of the rear flexible disc with respect to the flange of the rear section of the universal shaft.
–  Unscrew the cardan shaft flexible disc -arrows-.
Fitting
Installation is carried out in reverse order, noting the following:
  Note
  A37-10004
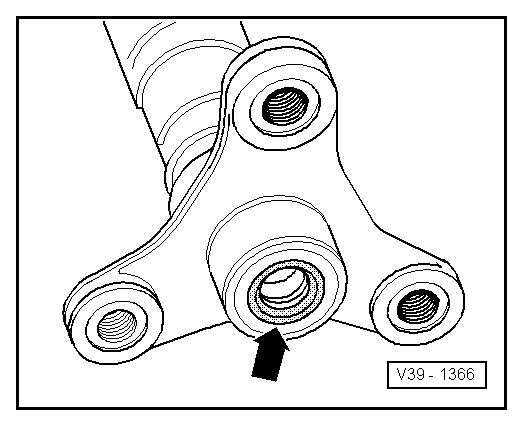
t  Do not damage the flange seals -arrow- for the cardan shaft while fitting.
t  Replace the cardan shaft if the seals are damaged.
t  Do not bend the rear section of the cardan shaft, insert it into the centring pivot while keeping it horizontal.
t  Reinstall the cardan shaft so that its marks are aligned.
t  Tightening torques → Anchor.
  V39-1366
Installation position of the flexible disc with the vibration damper:
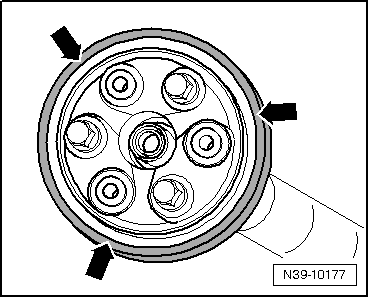
t  The projection of the exterior perimeter -arrows- must point in the opposite direction of the cardan shaft.
t  The rear final group flange and the cardan shaft have three bushings that protrude and are inserted into the holes corresponding to the flexible disc.
  N39-10177
–  Join the cardan shaft to the rear final group flange so that the marks -arrows- are aligned.
Install the centre elastic support without tension → Anchor.
–  Install the exhaust system free of stress → Rep. Gr.26.
  Note
t  If noises are heard while it is running, proceed as follows:
t  If necessary, unscrew the cardan shaft and the flexible disc, from the rear final group flange and rescrew after rotating it into position.
t  If the noise continues, readjust the position of the cardan shaft.
Tightening torques
  N39-0836
Component Nm
Centre support to bodywork25
Flexible disc to the rear final group60
Flexible disc to the cardan shaft
t  Replace bolts.
50 Nm + 90º (1/4 turn)


Haldex Clutch > < Cardan shaft: removing and fitting