Leon Mk1
| ATF Pump: Dismantling and assembling |
| Spare parts for the ATF pump and the pump itself are allocated according to the gearbox codes. |

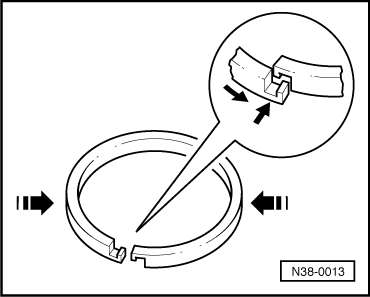
| 1 - | Piston ring |
| q | Checking the assembly → Fig. |
| q | Removing and installing → Fig. |
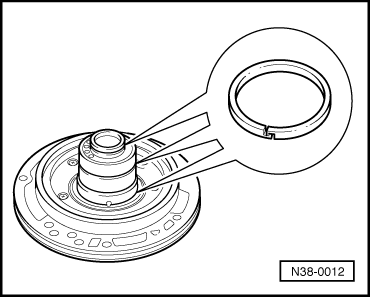
| 2 - | Piston ring |
| q | Checking the assembly → Fig. |
| q | Removing and installing → Fig. |
| 3 - | Piston ring |
| q | Checking the assembly → Fig. |
| q | Removing and installing → Fig. |
| 4 - | Thrust washer |
| 5 - | Piston |
| q | The sealing lips are attached to the piston by vulcanisation |
| q | To remove it from the steering support, carefully lever it in various places using a screwdriver |
| q | Before fitting it, apply ATF to the sealing lips |
| q | To fit, turn the piston slightly |
| 6 - | 10 Nm + 1/8 turn (45°) |
| 7 - | Steered wheel support |
| 8 - | External sprocket |
| q | Manufacturer's identification -arrow- must be pointing towards the steered wheel support |
| q | If the external sprocket is incorrectly fitted, the pump may be stiff when fitted |
| 9 - | Internal sprocket |
| q | The largest notch must be pointing towards the steered wheel support |
| 10 - | ATF pump casing |
| 11 - | O-ring |
| q | Renew |
| 12 - | Torque converter oil seal |
| q | Removing and installing → Chapter |
|
|