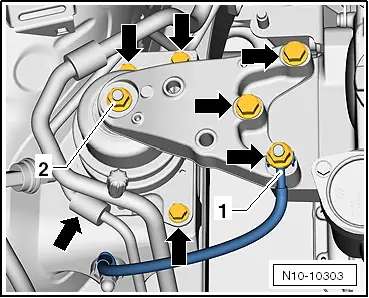
seat Workshop Repair Guides

SEAT Workshop Service and Repair Manuals

Seals and flywheel - Components overview > < Removing and installing poly V-belt
Distribution housing: removing and fitting
t  Removing → Anchor
t  Installing → Anchor
Consult the equivalence table for tools and equipment according to applicability among Seat / VW / Audi / Skoda → Chapter.
   
Special tools and workshop equipment required
t  Hose clamp -3415-, see equivalent → Anchor
t  Interlocking mandril -3415/1-, see equivalent → Anchor
t  Socket -U 30025E-, see equivalent → Anchor
t  Torque wrench (5... 50 Nm) -V.A.G 1331-, see equivalent → Anchor

   
t  Torque wrench (40... 200 Nm) -V.A.G 1332-, see equivalent → Anchor
  W00-0428
t  Fastening bolt -T10121-
Removing
–  Remove air filter → Chapter.
–  Remove the plate of the front right-hand side wheel housing → Remove and fit the front wheel housing; Rep. gr.66.
–  Mark direction of rotation of poly V-belt and remove it → Chapter.
  W00-1233
–  Remove the engine speed sender -G28- → Chapter.
  N15-0605
–  Turn the crankshaft with the securing bolt of the pulley in engine rotation direction -arrow- until the securing bolt -T10121- can be fitted into the flywheel .
–  Remove the air conditioning compressor with the connected refrigerant pipes from its bracket: → Heater, air conditioner; Rep. gr.87
  N15-0606
–  Unscrew the bolts -arrows- and place the alternator to one side.
  A27-10035
–  Fit the support -U 30025E- and pre-tighten slightly.
  Caution
Nut -2- must not be loosened.
  E15-0179
–  Unscrew earth connection -1-.
–  Take up weight of engine and remove securing bolts -arrows-.
–  Remove sump → Chapter.
  N10-10303
–  Immobilise the crankshaft with the counterhold -3415- and -3415/1- and remove the pulley.
  N13-0469
–  Remove Allen keys from the distribution casing and the bolts marked with -arrows-.
–  Remove distribution chain.
  Note
Note that crankshaft bearing bush remains in sealing flange.
Installing
–  Clean sealing surfaces carefully. They must be free of oil and grease.
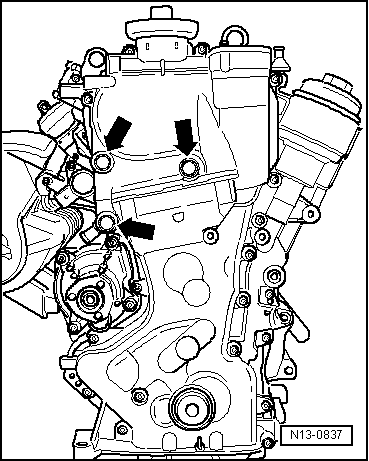
–  Screw two stud -M6x80- into cylinder head and cylinder block to improve guidance.
–  Apply a thin even coat of sealant D 174 003 A2 onto the clean sealing surface.
–  Fit timing case with crankshaft bearing bush simultaneously onto studs, dowel pins and crankshaft journal.
–  Tighten valve timing housing securing bolts evenly and diagonally.
Ensure that timing case is not canted.
Tightening torque:
Bolt M6 10 Nm.
Bolt M10 50 Nm
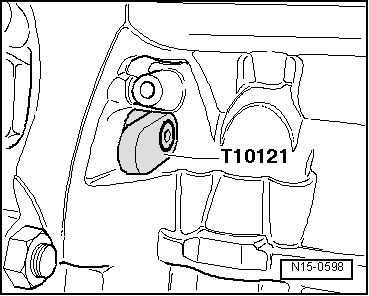
–  Fit the belt pulley with a new fastening bolt.
–  Tighten the fastening bolt as far as possible by hand.
  Note
Ensure that the pulley is not tilted during fitting.
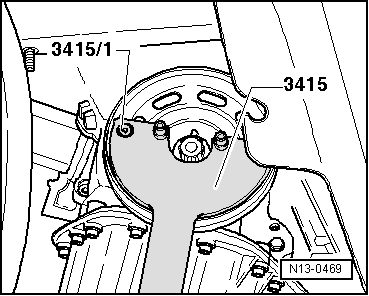
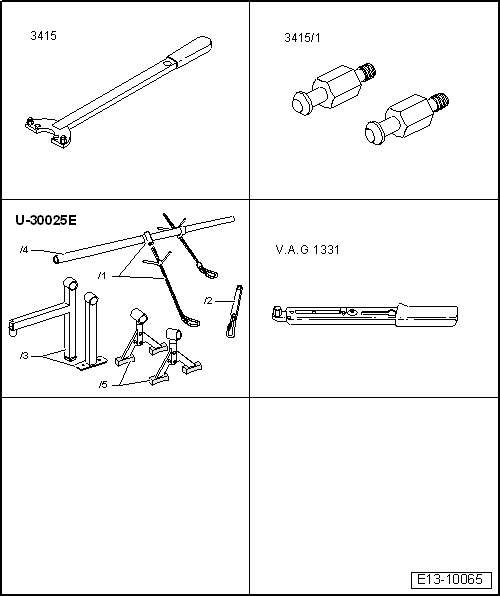
–  Hold the pulley tight using the counterhold -3415- and -3415/1-.
Tightening torque: 150 Nm + turn 180° further
  N13-0837
–  Remove the fixing bolts -T10121- from the borehole of the flywheel.
  N15-0598
–  Install the engine speed sender -G28--arrow-.
Tightening torque of fastening bolts: 8 Nm
–  Install sump → Chapter.
–  Install poly V-belt → Chapter.
Install in the reverse order to removal.
  N15-0605

Seals and flywheel - Components overview > < Removing and installing poly V-belt