Leon Mk1
|

| 1 - | Oil pump |
| q | With 12 bar discharge valve |
| q | Before fitting, check the presence of the two adjustment sleeves for centring: oil pump/engine block |
| q | Should there be streaks on the sliding surfaces and toothed wheels: replace |
| 2 - | Chain wheel |
| 3 - | 25 Nm |
| 4 - | Chain |
| 5 - | Sealing flange |
| q | With seal |
| q | Removal and refitting → Chapter |
| q | Fit with silicon based sealant -D 176 404 A2- → Chapter |
| q | Note the different versions |
| q | PTFE seal without interior spring |
| q | Replace the crankshaft seal, pulley side → Chapter |
| 6 - | 15 Nm |
| 7 - | Chain tensioner with tensioner rail, 15 Nm |
| q | On fitting, pretension the spring and fix |
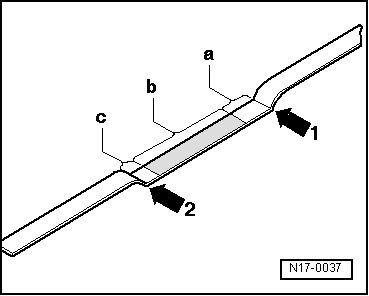
| 8 - | Oil level dipstick |
| q | The oil level must not lie above the max. mark! |
| q | Marks → Fig. |
| 9 - | Filling funnel |
| q | Remove if evacuating the oil by absorption |
| 10 - | Guide pipe |
| 11 - | Adjustment sleeves |
| 12 - | O ring |
| q | Replace |
| 13 - | Sucking pipe |
| q | Clean the filter if dirty |
| 14 - | Anti wave panel |
| 15 - | Oil pan |
| q | Before fitting, clean the sealing surface |
| q | Fit with silicon based sealant -D 176 404 A2- → Chapter |
| 16 - | Seal ring |
| q | Replace |
| 17 - | Oil purging bolt, 30 Nm |