seat Workshop Repair Guides

SEAT Workshop Service and Repair Manuals

Installing > < Removing and installing oil pump
Removing
Removing
–  Remove ribbed belt → Chapter.
–  Remove toothed belt → Chapter removing, installing and tensioning toothed bel.
–  Position crankshaft at TDC No. 1 cylinder -arrow-:
   
The tooth ground down on the toothed belt sprocket must align with mark on the oil pump -arrow-.
  Note!
Take into account that there are two PMS marks on the oil pump/retainer holder cover, a small one for 4V engines (right-hand side) and another longer mark for 2V engines (left-hand side), do not mix up the marks when placing the camshaft in PMS, since serious damage could be caused to the engine.
  N17-0082
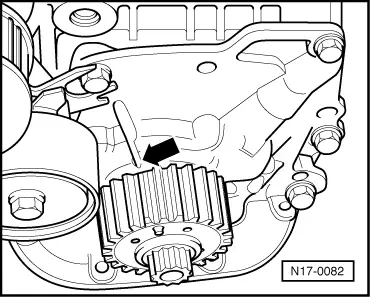
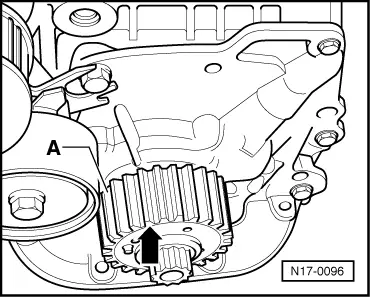
–  Turn the crankshaft or the three-cogged belt anticlockwise from the PMS position: The third cog to the right of the lowered cog -A-, must match the PMS mark on the casing of the oil pump -arrow-.
  Note!
This procedure moves the crankshaft to the correct installation position for the oil pump. One of the follower polygon cams on the crankshaft is uppermost.
–  Dismount the cogged belt wheel from the crankshaft and the tightening roller from the cogged belt. To do so, lock the wheel into place with the -T20018A- counter support
–  Dismount the oil sump → Chapter.
–  Remove suction pipe.
–  Dismount the oil pump.
  Note!
In vehicles with air-conditioning, if necessary, partially remove the wing pump-compressor-alternator support.
–  Remove gasket.
–  Remove sealant remnants on cylinder block with a flat scraper.
–  Clean sealing surfaces, they must be oil and grease free.
  N17-0096

Installing > < Removing and installing oil pump