Leon Mk1
| Rear silencer: component overview |
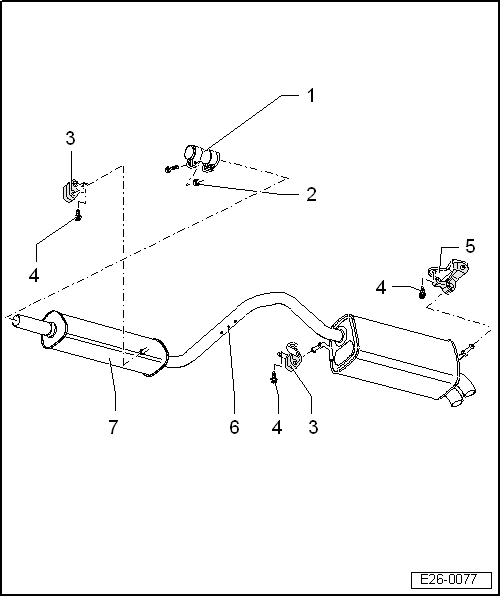
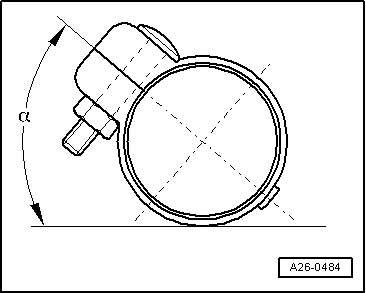
| 1 - | Double clamp |
| q | Installation position → Fig.. |
| 2 - | Screw with nut, 40 Nm |
| 3 - | Mounting |
| q | With retaining ring. |
| q | Renew if damaged. |
| 4 - | Nut, 25 Nm |
| 5 - | Mounting |
| q | With retaining ring. |
| q | Renew if damaged. |
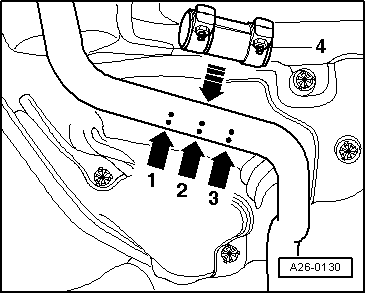
| 6 - | Cutting point → Fig. |
| q | Marked by impressions on exhaust pipe. |
| q | During production, front and rear silencers are installed as a single component. When repairing, the front and rear silencers are supplied separately with a clamping bracket. |
| q | Cut the exhaust pipe -arrow 2- at a right angle (e.g.) with the chain-type pipe cutter -VAS 6254- (wear protective goggles) → Fig.. |
| q | When installing the double repair clamp, position between the side markings -arrows 1 and 3-. |
| q | Evenly tighten threaded connections of clamping sleeve (repair double clamp), tightening torque: M 8 = 25 Nm, M10 = 40 Nm |
| q | Align exhaust system when it is cold so it is free of stress before tightening → Chapter |
| 7 - | Pre-silencer and post-silencer |
| q | Fit without tension |
| q | As standard, the front and rear silencers are a single component. When repairing, the front and rear silencers are supplied individually with a double clamp for connecting together. |
|
|