seat Workshop Repair Guides

SEAT Workshop Service and Repair Manuals

Engine lubrication > < Valve control
Camshaft housing removing and fitting
Consult the equivalence table for tools and equipment according to applicability between Seat / VW / Audi / Skoda → Chapter
   
Special tools and workshop equipment required
t  Dial gauge -VAS 6079-
t  Extractor -T10094A-, ver nota → Anchor
t  Dial gauge adapter -T10170-
t  Camshaft fastener -T10171-
t  Retention tool -T10172-, see equivalent → Anchor
t  Pin -T40011-

   
t  Suspension tool -10 - 222 A-, see equivalent → Anchor
t  Frame -10 - 222 A /1-
t  Spark plug spanner -3122 B-, see equivalent → Anchor
t  Torque wrench (5 - 50 Nm) -V.A.G 1331-, see equivalent → Anchor

Removing
  Note
t  The camshaft housing sealing surface must not be reworked.
t  Camshafts: removing and fitting → Chapter.
–  First check whether a coded radio is fitted. Check the anti-theft code in this case.
–  With the ignition switched off, disconnect battery earth strap.
   
–  Remove the camshaft housing covers by unscrewing the bolts -arrows-.
–  Press the tabs -1- and remove the air intake hose from the air intake duct.
  E13-10047
–  Remove the spring type clips -2- using hose clip pliers -VAS 6340- or the spring-type clip pliers -VAS 5024A-
–  Undo the fastening bolts on the cover of the exhaust camshaft -3- and the intake camshaft -4- and remove the covers from the camshaft casing.
  N15-10310
–  Disconnect the connectors of the oil pressure switch -F1--1-, the Hall sender -G40--2- and the valve 1 for adjusting the variable distribution -N205--4-.
–  Remove the two attachment rings -3-.
  N15-10311
–  Fit the left attachment ring -3- using bolts (M8 x 25) -1- and nuts (M10) -2- on the cylinder head.
  Note
The nuts (M10) have to make the distance between the attachment ring and the camshaft casing larger in order to be able to remove and fit the camshaft casing.
Tightening torques: 20 Nm
  N15-10313
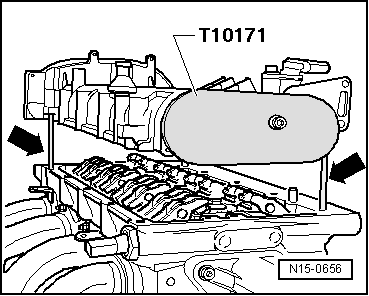
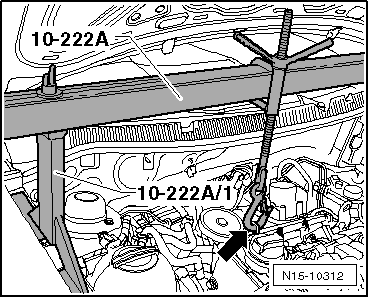
–  Place the suspension device -10 - 222 A- as shown with the frame -10 - 222 A /1- and hang from the ring -arrow-.
–  Remove distribution casing → Chapter.
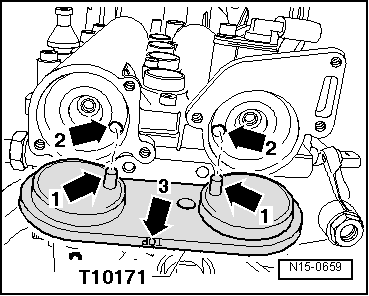
–  Place the crankshaft in TDC, cylinder 1, then turn the crankshaft 45° in the opposite direction to that of the engine rotation and remove the camshaft sprockets together with the distribution chain → Chapter.
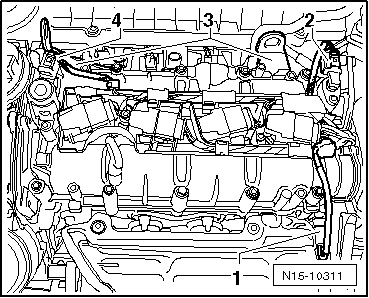
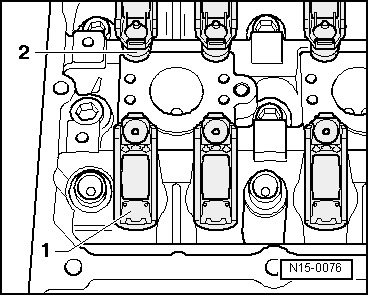
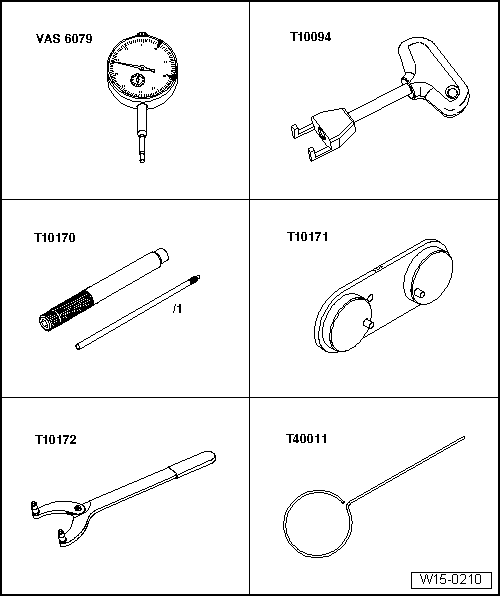
–  Removing ignition coils. Utilizar para ello el extractor -T10094A- → Chapter.
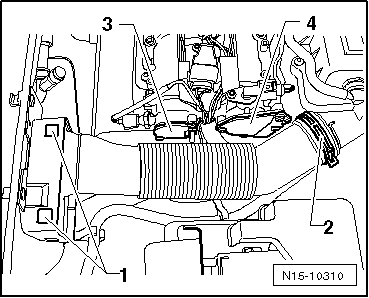
–  Remove the guide with cable harness from the camshaft housing.
–  Remove the dip stick.
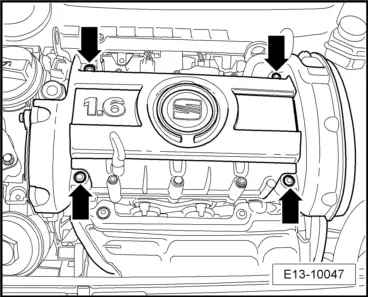
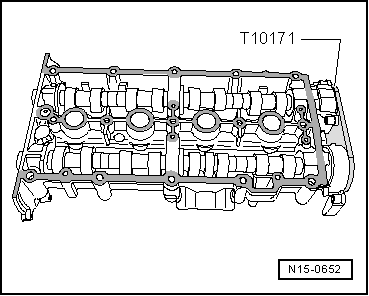
–  Loosen the camshaft housing bolts, from outside to inside, diagonally.
–  Carefully lift camshaft housing off.
Fitting
Prerequisite
l  The pistons should not be in top dead centre.
–  Remove the sealant residues from the camshaft casing and the cylinder head using a rotating brush, e.g. a hand drill machine with plastic brush (wear protective goggles).
–  This prevents dirt and sealant remains from penetrating the cylinder block.
–  Clean sealing surfaces carefully. They must be free of oil and grease.
  N15-10312
–  Turn the intake and exhaust camshafts until the camshaft fastener -T10171- is able to fully enter the openings in the camshafts.
–  Hand thread (without tightening ) an M6 bolt to secure the camshaft fastener -T10171-.
  N15-0659
–  Apply a thin even coat of sealant onto the clean camshaft housing sealing surface as shown in the illustration (shaded area).
  Note
Do not apply too thick a layer, as the excess sealant may penetrate the lubrication openings and damage the engine.
  N15-0652
–  Ensure all roller rocker fingers contact the valve ends -1- and are clipped into their respective support elements -2-.
–  Bolt two studs (M6 x 80) on the cylinder head before fitting the camshaft housing.
  N15-0076
–  Carefully fit the camshaft housing vertically onto the cylinder head studs and pins -arrows-.
  Note
Make sure that no oil falls on the sealant surface.
–  Tighten new camshaft housing securing bolts (evenly from inside to outside diagonally).
Take care not to tilt the camshaft housing. Tightening torques: 10 Nm + retighten 1/4 turn (90º)
  Note
Sealant must be left dry for approx. 30 minutes after installing camshaft housing.
–  Adjust distribution timing → Chapter.
–  Fit distribution casing → Chapter.
Continue installation following reverse order for removing.
  N15-0656

Engine lubrication > < Valve control