seat Workshop Repair Guides

SEAT Workshop Service and Repair Manuals

Cylinder block, sealing flange and engine flywheel: removing and installing > < Engine: Removing and installing
Removing
Removing
   
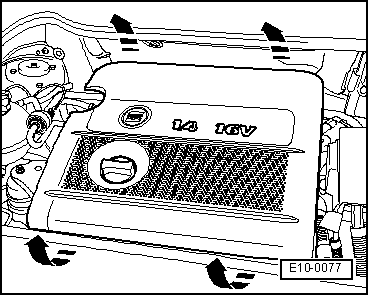
–  Remove the engine protection along with the air filter -arrows- (Engine identification letters AUB, BBY, BBZ, BKY) → Chapter.
–  Remove upper notched belt guard.
  E10-0077
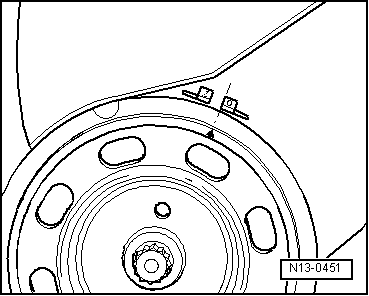
–  Place the crankshaft in cylinder 1 top dead centre. The notch on the pulley should match the edge of the mark -O-.
  N13-0451
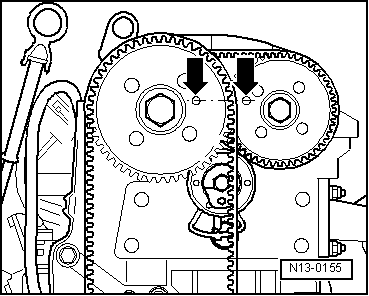
–  The locking spaces on the camshaft sprockets should line up with the spaces on the camshaft housing -arrows-.
  Note
If the marks are on opposite sides of the notched belt sprockets, turn the crankshaft one more turn.
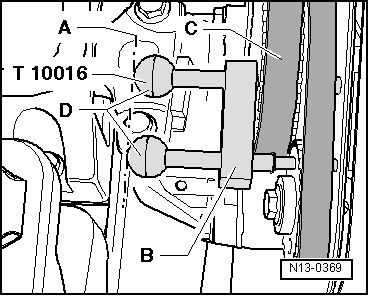
Immobilise both camshaft sprockets using the counterhold -T10016-, as follows:
  N13-0155
–  Insert both locking pins through the locking spaces on the camshaft sprockets, as far as the end point on the spaces on the camshaft housing.
  Note
The two locking pins are correctly fitted if the final parts -D- are in line with line -A-.
–  Insert support -B- as far as possible in the intake camshaft sprocket -C-.
To remove the notched belt separate the engine console as follows:
  N13-0369
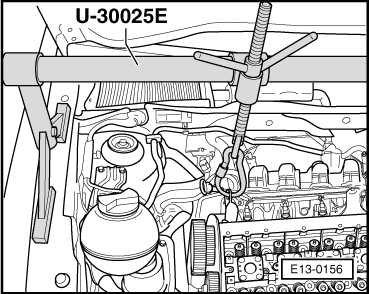
–  Connect the support -U-30025E- as shown in the diagram.
–  Remove the upper securing bolt of the lower notched belt guard located below the console.
–  Release the coolant reservoir and leave to one side.
  E13-0156
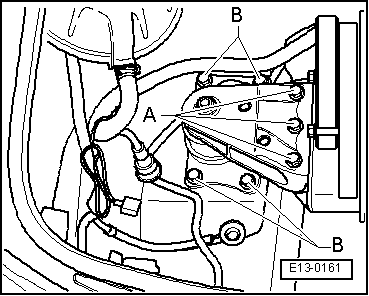
–  Slightly pretension the engine and remove the bolts -A- securing the engine console to the cylinder head mounting and the bolts -B- securing the engine console to the bodywork, and remove the console.
  E13-0161
–  Remove the bolts -A- fixing the console to the cylinder head and separate (depending on the version).
–  Remove the right front wheel.
–  Remove the lower engine protection → Bodywork, exterior fitting work; Rep. Gr.50.
–  remove the front right-hand wheel housing guard → Bodywork, exterior fitting work ; Rep. Gr.66
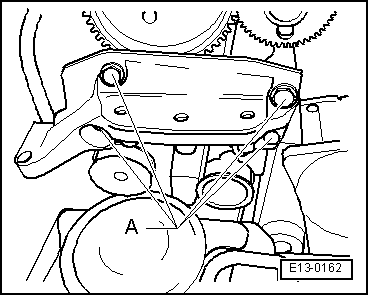
–  Mark D.O.R. of the Poly-V belt before removing and then dismount as follows:
  E13-0162
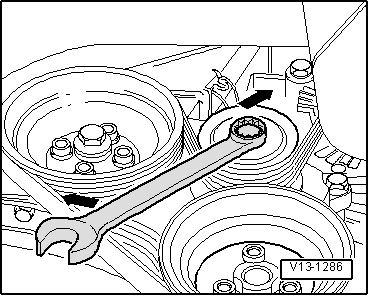
–  Use a spanner on the securing bolt swivel tensioning roller in direction of arrow.
–  Remove poly V-belt .
  V13-1286
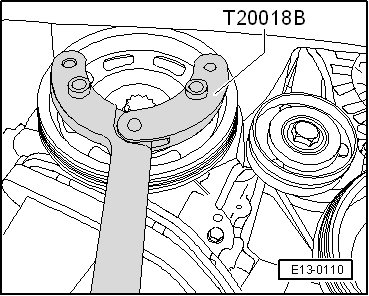
–  Loosen the bolt fixing the pulley and the wheel of the notched belt. Secure pulley with retaining tool -T20018B-.
–  Remove pulley. Screw back the bolt with two washers to hold notched belt sprocket in place.
–  In vehicles fitted with air conditioning (heating), remove the tension roller for the poly-V belt.
–  Install lower notched belt guard.
–  Mark the toothed belt D.O.R.
Removing principal notched belt
  E13-0110
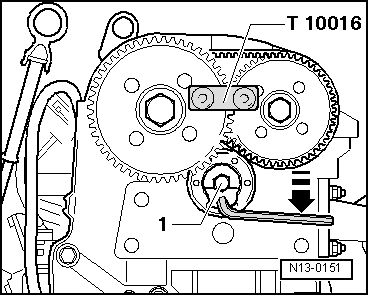
–  Release the principal notched belt tension roller, by loosening bolt -1- and release the notched belt by turning the tension roller anticlockwise -arrow-.
–  Remove notched belt.
Remove the branch derived from notched belt.
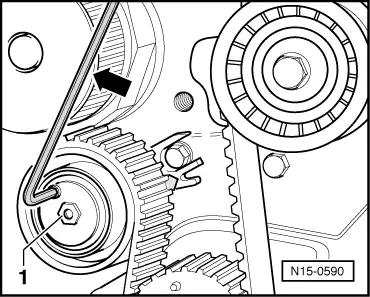
  N15-0590
–  Release the tension roller from the branch derived from the notched belt -1- and release the notched belt by rotating the tension roller clockwise.
–  Remove tension roller of the derived branch of the notched belt.
–  Remove notched belt.
  N13-0151

Cylinder block, sealing flange and engine flywheel: removing and installing > < Engine: Removing and installing