seat Workshop Repair Guides

SEAT Workshop Service and Repair Manuals

Removing and installing coolant temperature senderG62 > < Removing and installing left coolant pipe
Removing and installing right coolant pipe
t  Removing → Anchor
t  Installing → Anchor
Consult the equivalence table for tools and equipment according to applicability among Seat / VW / Audi / Skoda → Chapter.
   
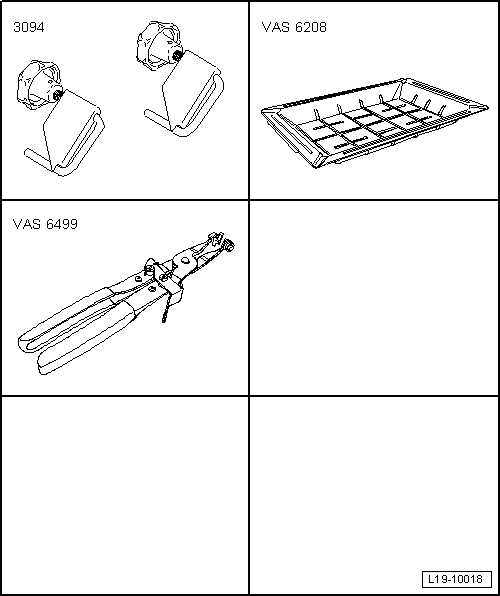
Special tools and workshop equipment required
t  Hose clamp -3094-, see equivalent → Anchor
t  Tray -VAS 6208-, see equivalent → Anchor
t  Base -VAS 6499-, see equivalent → Anchor

   
Removing
–  Remove the engine cover upwards -arrows-.
  E10-10085
–  Slacken bolt -1- and unscrew bolt -2- and nut -3-.
–  Take hose retainer -4- off fuel filter, place fuel filter -7- aside (fuel hoses -5- and -6- remain connected).
  A20-10395
–  Fit the centre noise insulation -fasteners 1 ... 3-.
  A10-1565
–  Fit the right noise insulation -fastening parts 1 ... 3-.
  A10-1643
–  Place drip tray for workshop cranes -VAS 6208- beneath engine.
–  Remove connector -3- on the coolant temperature sender -G83- at the radiator outlet.
–  Disconnect and remove the coolant hoses with the hose clip -3094-.
  A19-10640
–  Release hose clips -arrows- and pull coolant hoses off right coolant pipe.
–  Unscrew nut -1- and bolt -2-, and remove right coolant pipe.
Installing
l  Tightening torques → Chapter
Installation is carried out in reverse sequence; note the following:
  Note
Secure all hose connections with the correct type of hose clips (same as original equipment) → Electronic parts catalogue.
–  Fill coolant system with coolant → Chapter.
  A19-10640

Removing and installing coolant temperature senderG62 > < Removing and installing left coolant pipe