seat Workshop Repair Guides

SEAT Workshop Service and Repair Manuals

Crankshaft > < Sealing flange and flywheel
Bracket for auxiliary units: Removing and installing
t  Removing → Anchor
t  Installing → Anchor
Consult the equivalence table for tools and equipment according to applicability among Seat / VW / Audi / Skoda → Chapter.
Special tools and workshop equipment required
   
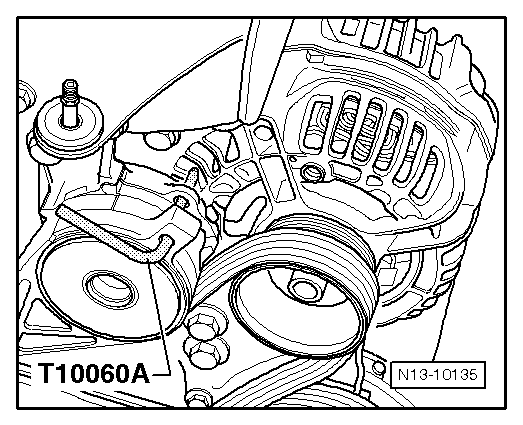
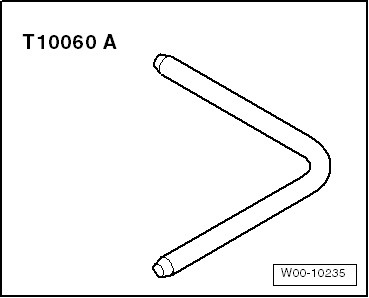
t  Hose clamp -T10060A-, see equivalent → Anchor
  W00-10235
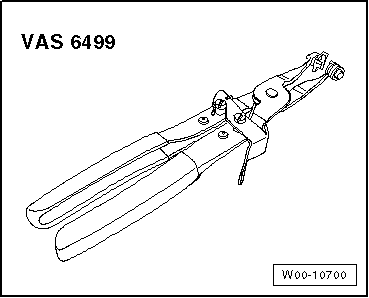
t  Pliers for spring-loaded band-type clamps -VAS 6499-, see equivalent → Anchor
Removing
  W00-10700
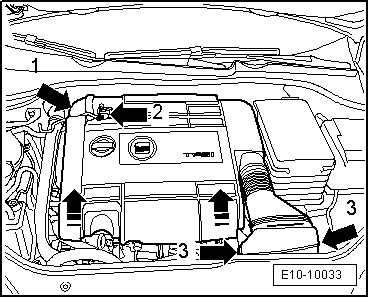
Vehicles with engine code BWA
–  Remove the suction hose -1-.
–  Disconnect connector -2-.
–  Remove bolts -3-.
–  Remove the engine cover, by pulling firmly upwards.
  E10-10033
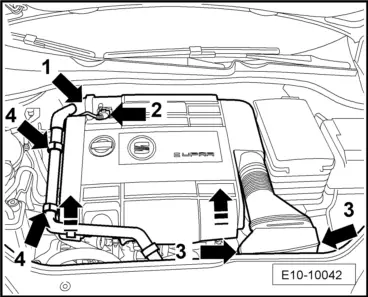
Vehicles with engine codes BWJ, CDLD, CDLA
–  Remove the suction hose -1-.
–  Disconnect hose from the attachment clamps -4-.
–  Disconnect connector -2-.
–  Remove bolts -3-.
–  Remove the engine cover, by pulling firmly upwards.
  E10-10042
All other vehicles continued
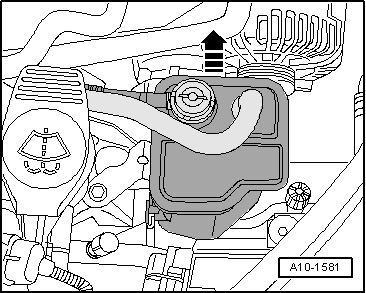
–  Remove activated charcoal canister system from support with the pipes connected, upwards -arrow- and leave to one side.
  Note
Before removing the Poly-V belt, mark the direction of rotation using chalk or a marker. Running a used belt in the opposite direction could destroy it.
–  Mark running direction of poly V-belt.
  A10-1581
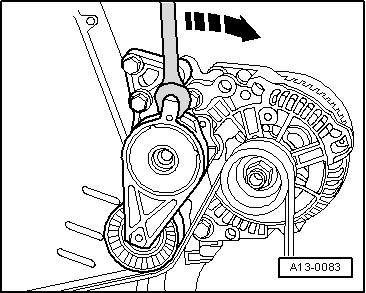
–  Swivel in the direction -arrow- to loosen the ribbed V belt .
  A13-0083
–  Lock tensioner with retention tool -T10060A-.
–  Take off poly V-belt.
  N13-10135
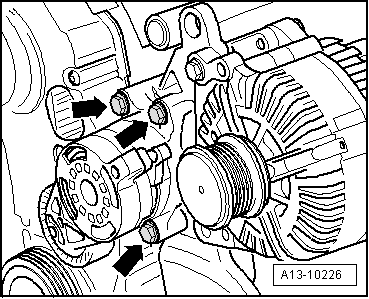
–  Unscrew poly V-belt tensioner -arrows-.
–  Remove the alternator: → Electrical system; Repair group 27 .
  A13-10226
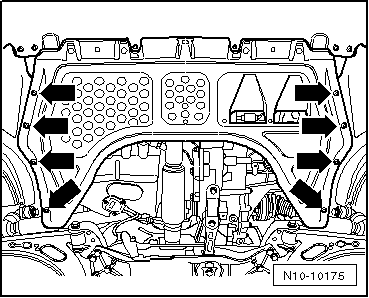
–  Unscrew the securing bolts -arrows- and remove the engine soundproofing..
  N10-10175
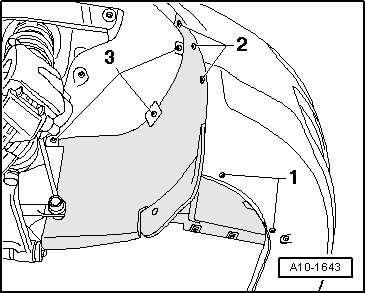
–  Remove the right noise insulation -Fixing parts 1 ... 3-.
  A10-1643
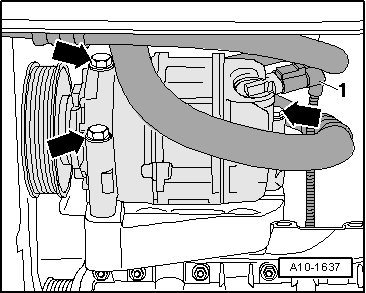
–  Disconnect electrical connection -1- for electromagnetic coupling on air conditioner compressor.
–  Unscrew the bolts -arrow- for air conditioner compressor.
  Note
To avoid damage to the air conditioning compressor or in the flexible conduits/tubes of the cooling agent, the tubes must not be pulled, bent or stretched excessively.
  A10-1637
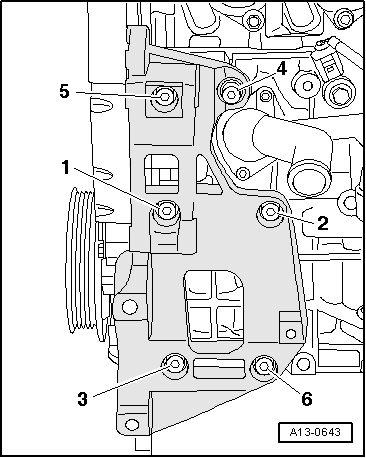
–  Unscrew mount for auxiliary equipment (bolts -1 ... 6-).
Installing
Installation is carried out in the reverse order; noting the following in the process:
  A13-0643
–  Tighten bolts in the specified sequence:-1 ... 6-.
–  Install alternator → Electrical system; Repair group 27.
–  Install the air conditioner compressor → Rep. gr.87.
–  Install poly V-belt → Chapter.
–  Connect battery → Electrical system; Rep. gr.27.
  A13-0643

Crankshaft > < Sealing flange and flywheel