seat Workshop Repair Guides

SEAT Workshop Service and Repair Manuals

Exhaust turbocharger, G-charger > < Removing and installing accelerator module
Removing and installing fuel gauge senderG
Removing and installing fuel gauge sender -G-
t  Removing → Anchor
t  Installing → Anchor
Removing
–  Remove fuel delivery unit → Chapter.
   
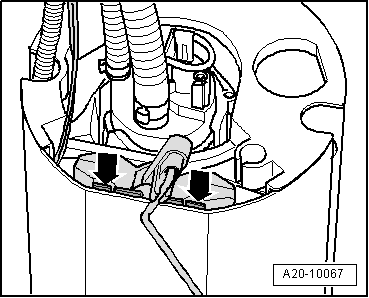
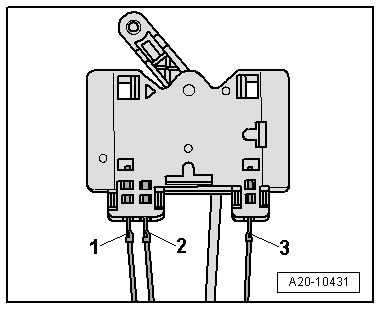
–  Release the connectors -arrows- and detach the electrical cables -1, 2 and 3-.
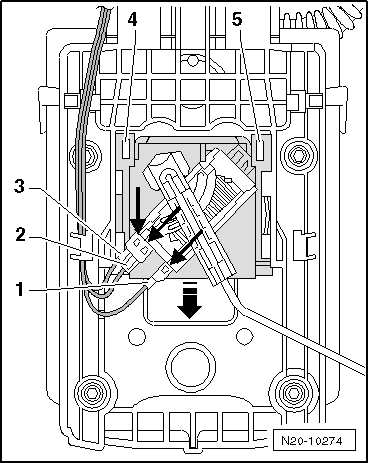
–  Lever off retaining lugs -4- and -5- using a screwdriver and remove the Fuel gauge sender -G- by pulling downwards -arrow- .
Installing
–  Insert the fuel gauge sender -G- into the guides on fuel delivery unit and press upwards until it clicks into place.
–  Insert connector and check they have engaged properly.
–  Install fuel delivery unit → Anchor.
Removing (new version):
–  Remove fuel delivery unit → Anchor.
  N20-10274
–  Move the fuel gauge sender -G-up and to the side.
  N20-10175
–  If the sender cannot be removed, the retaining lugs -arrows- must be pushed to the side a little.
–  Note the colours of the lines for fitting later on.
  A20-10067
–  Unlock and remove the electric connector -1...3-. Then lift the securing hooks of the electrical connector.
Installation
  A20-10431
–  Connect the connectors -1 ... 3Connect -. Note the colour identification.
–  Pull on the connections to check if they have been connected correctly.
–  Insert the fuel gauge sender -G- into the guide on fuel delivery unit and press downward until it clicks into place.
–  Fuel delivery unit: Installing → Anchor.
  A20-10431

Exhaust turbocharger, G-charger > < Removing and installing accelerator module