SEAT Workshop Service and Repair Manuals
HOME
FEATURES
MENU
INDEX
ABOUT US
Oil pressure and oil pressure switch: checking >
< Removing and installing oil pressure switchF22
Leon Mk1
Power unit
4 cylinder Injected engine (engine 1.8 l and 2.0 l, timing chain)
Engine lubrication
Oil filter and oil cooler (engine codes CCZB - CDAA)
Removing and installing oil pressure switch for reduced oil pressureF378
Removing and installing oil pressure switch for reduced oil pressureF378
Removing and installing oil pressure switch for reduced oil pressure -F378-
Removal:
–
Remove the purging line
-1-
, disengage the activated carbon vessel
-A-
and remove upwards
-B-
. Move the activated carbon vessel to one side.
Note
Place a cloth underneath bracket for ancillaries to catch any escaping oil.
–
Unplug electrical connector
-2-
at oil pressure switch for reduced oil pressure -F378-.
–
Unscrew oil pressure switch for reduced oil pressure -F378-
-1-
.
Installation
l
Tightening torque
→ Chapter
Reassembly is carried out in the reverse order; note the following:
Note
t
Renew seal.
t
Fit the new oil pressure switch for reduced oil pressure -F378- into the connection immediately to avoid loss of oil.
–
Check oil level
→ Fig.
.
Power unit
4 cylinder Injected engine (engine 1.8 l and 2.0 l, timing chain)
Engine lubrication
Oil filter and oil cooler (engine codes CCZB - CDAA)
Removing and installing oil pressure switch for reduced oil pressureF378
Oil pressure and oil pressure switch: checking >
< Removing and installing oil pressure switchF22
 Note
Note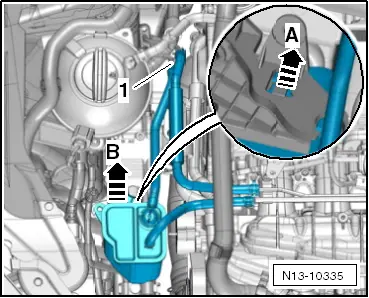 Note
Note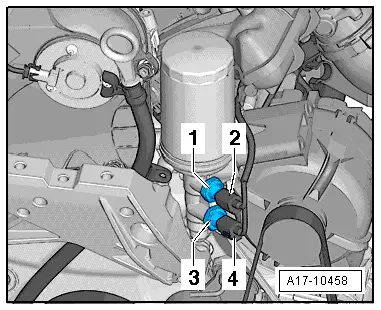
 Note
Note
Note
Note