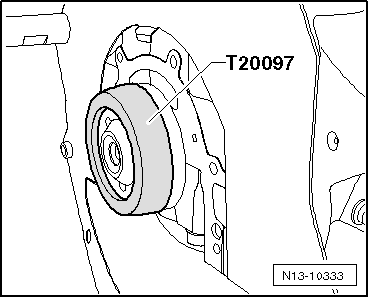
seat Workshop Repair Guides

SEAT Workshop Service and Repair Manuals

Cylinder block (pulley end) > < Crankshaft
Removing and installing sealing flange (gearbox end)
Special tools and workshop equipment required
t  Electric drill with plastic brush attachment
t  Protective glasses
t  Silicone sealant -D 174 003 A2-
t  Guide sleeve -T20097-
Removing:
l  Gearbox removed.
l  Flywheel removed → Chapter.
   
–  Unhook intermediate plate on sealing flange and on the dowel sleeves -arrows-.
  A10-0129
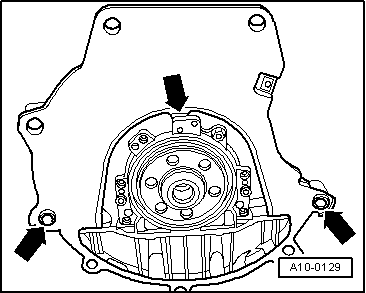
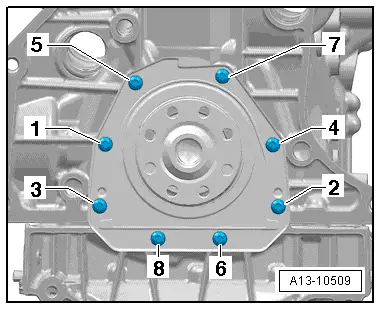
–  Remove bolts -1 ... 8-.
–  Remove sealing flange (gearbox end).
Installing:
  Note
t  
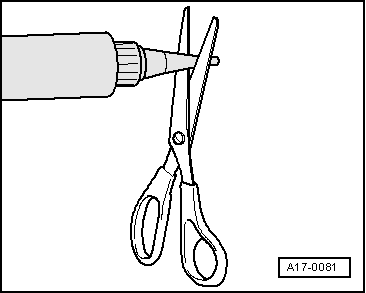
Note the expiry date of the silicone sealant.
t  The sealing flange must be installed within 5 minutes of applying silicone sealant.
t  The bead of sealant must not be thicker than specified, otherwise excess sealant can enter the sump and obstruct the strainer in the oil intake pipe.
t  After installing the sealing flange, wait about 30 minutes for the sealant to dry. Only then should the engine be refilled with oil.
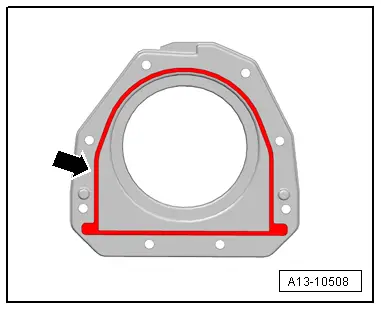
–  Remove sealant remaining on cylinder block with flat scraper.
  WARNING
Wear eye protection.
  A13-10509
–  Remove sealant residue on sealing flange using rotating plastic brush or similar.
–  Clean sealing surfaces; they must be free of oil and grease.
  A13-0590
–  Cut off tube nozzle at upper marking (nozzle Ø: approx. 2 mm).
  A17-0081
–  Apply silicone sealing compound bead, as shown in diagram, to clean sealing surface of sealing flange.
t  Thickness of the sealant grub: 2 ... 3 mm
  A13-10508
–  Fit guide sleeve -T20097- onto crankshaft journal.
–  Slide sealing flange over guide sleeve -T20097- onto crankshaft journal.
  N13-10333
–  Tighten bolts -1 to 8- in the sequence shown:
–  1. Screw in and tighten bolts by hand.
–  2. Tighten bolts to 9 Nm.
Further assembly is performed in the reverse sequence.
  A13-10509

Cylinder block (pulley end) > < Crankshaft