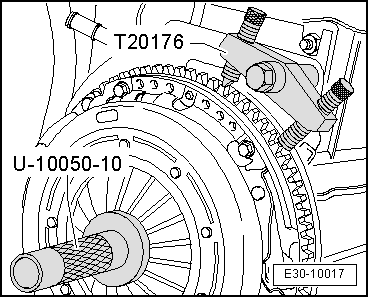
| So that the dual-mass flywheel is not broken or damaged during removal, the bolts -B- should never be unscrewed using a pneumatic or percussion screwdriver. Unscrewing the bolts-B- must only be done by hand. |
| –
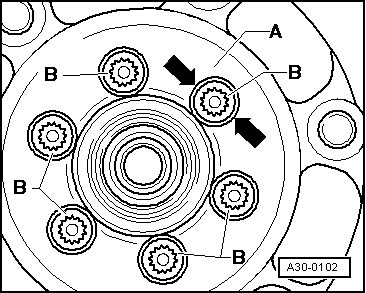
| Rotate the flywheel -A- so that bolts -B- are aligned with the holes -arrows-. |
| –
| When loosening bolts -B- check that the bolt head does not touch the flywheel -arrows- nor damage it as it continues to rotate. |
| –
| Mark the position of the flywheel on the crankshaft with a permanent marker. |
| –
| Extract the bolts fixing the flywheel and remove it. |
| Continue the installation in the reverse order of removal sequence, observing the following: |
| –
| Position the flywheel on the crankshaft in the previously marked position. |
| –
| Replace bolts and tighten to prescribed torque → Item. |
|
|
|
 Note
Note