
Leon Mk1
|

| 1 - | Oil pump: |
| q | With 12 bar pressure relief valve |
| q | removing and fitting → Chapter |
| q | Before installing, check that the two dowel sleeves → Item for centring oil pump/cylinder block are fitted. |
| q | Renew pump if there is scoring on moving surfaces and gear teeth. |
| q | Tightening torque for oil pump cover to oil pump housing: 10 Nm |
| 2 - | Oil pump chain sprocket |
| q | Sprocket can only be fitted on oil pump shaft in one position. |
| 3 - | 20 Nm + 90° (1/4 turn) further |
| q | Replace. |
| 4 - | Chain for oil pump |
| q | For oil pump |
| q | Mark direction of rotation before removing. |
| q | Check for wear |
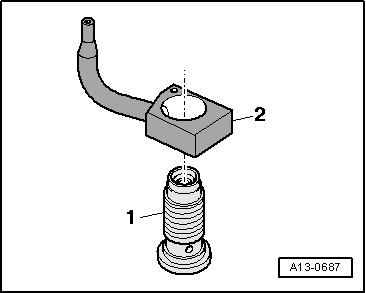
| 5 - | Front sealing flange: |
| q | Fit using silicon sealant → Chapter |
| q | Renewing crankshaft oil seal on pulley end → Chapter |
| 6 - | 15 Nm |
| 7 - | Chain tensioner |
| q | Tighten to 16 Nm |
| q | Do not dismantle |
| q | Note fitting position: |
| q | Pre-tension spring and engage before installing |
| q | If the spring is broken, replace the complete chain tensor |
| 8 - | Oil pump chain sprocket |
| q | removing and installing → Chapter |
| 9 - | Dowel sleeves |
| q | 2x |
| 10 - | 15 Nm |
| 11 - | Oil intake pipe |
| q | Clean strainer if dirty |
| 12 - | O-ring |
| q | Replace. |
| 13 - | Anti-surge valve |
| 14 - | 16 Nm |
| 15 - | 15 Nm |
| 16 - | Oil sump |
| q | removing and fitting → Chapter |
| 17 - | Seal |
| q | Replace. |
| 18 - | Oil drain plug - 30 Nm |
|
|

| 1 - | Seal bolt -25 Nm |
| 2 - | Seal |
| q | Replace. |
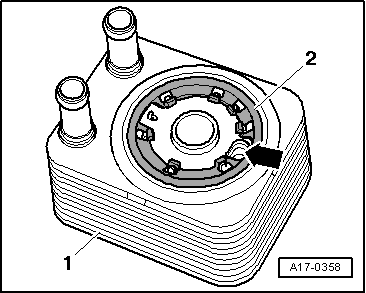
| 3 - | Oil cooler |
| q | See note → Anchor |
| q | Coolant hose schematic diagram → Chapter. |
| 4 - | Seal |
| q | Replace. |
| q | Installation position → Fig. |
| 5 - | 14 Nm + 90° (1/4 turn) further |
| q | Replace. |
| q | Tighten diagonally |
| 6 - | Seal |
| q | Replace. |
| 7 - | Oil filter bracket |
| q | With oil retainer valve |
| q | The oil check valve cannot be replaced separately |
| 8 - | Seal |
| q | Replace. |
| 9 - | Oil pressure switch -F1- -20 Nm |
| q | 0.7 bar - brown |
| q | testing → Chapter |
| 10 - | Trim cap, -25 Nm |
| q | Depending on version: Wrench -T20160- e/c 36 mm or universal socket wrench -e/c 32 mm- |
| 11 - | O-ring |
| q | Replace. |
| 12 - | Oil filter cartridge |
| q | Remove seal bolt → Item |
| q | When replacing the oil filter, replace the O-rings → Item and → Item |
| q | Note fitting position: |
| q | Heed replacement intervals → Booklet1 |
| 13 - | O-ring |
| q | Replace. |
| 14 - | Oil supply line |
| q | Tighten to 22 Nm |
| q | to turbocharger |
| q | Note the installation sequence: |
| – | Screw in first the two ends of the conduit and leave them loose |
| – | Then, carry out a final tightening of the two conduction ends. |
| – | Finally, secure the bracket. |
| 15 - | Joint mouth |
| 16 - | Seal |
| q | Replace. |
|
|