seat Workshop Repair Guides

SEAT Workshop Service and Repair Manuals

Oil pump: removing and fitting > < Lubrication system - General components overview
Oil sump: removing and fitting
t  Removing → Anchor
t  Fitting → Anchor
t  Specified torques → Anchor.
Consult the equivalence table for tools and equipment according to applicability among Seat / VW / Audi / Skoda → Chapter.
Special tools and workshop equipment required
   
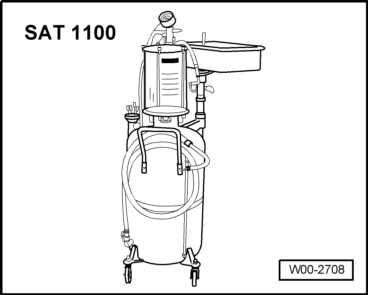
t  Extractor -SAT 1100-, see equivalent → Anchor
  W00-2708
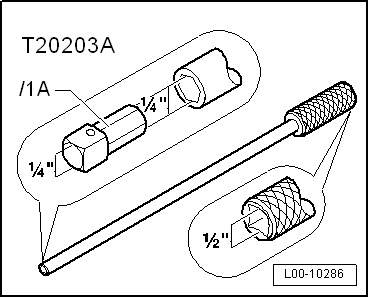
t  Wrench -T20203A-, see equivalent → Anchor
t  Electric drill with plastic brush attachment
t  Silicone sealant → Parts catalogue
  L00-10286
Removing
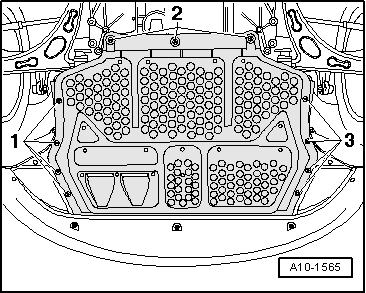
–  Remove centre noise insulation -mounting parts 1 ... 3-.
  A10-1565
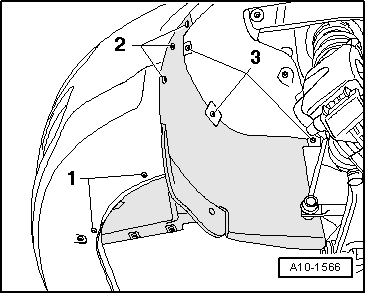
–  Remove the right soundproofing -Anchorage parts 1 ... 3-.
  A10-1566
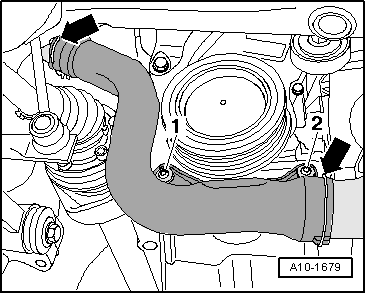
–  Unscrew bolts -1- and -2-.
–  Remove the air conduit hose; to do this, lift the retainers slightly -arrows-.
–  Remove the engine oil with the Oil extractor -SAT 1100-.
  A10-1679
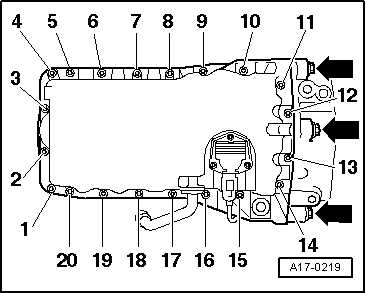
–  Remove bolts for sump/gearbox -arrows-.
–  Loosen the bolts -1 … 20- diagonally then remove them.
–  Remove the oil sump, in case of doubt, release by tapping gently using a rubber mallet.
  Note
  A17-0219
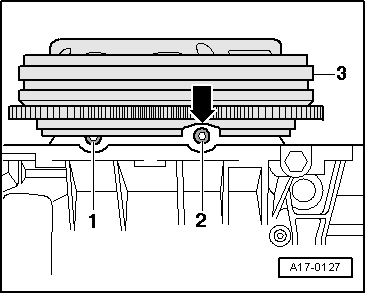
The two rear sump bolts -1- and -2- are accessible via the recess -arrow- on the flywheel -3- (turn the flywheel as required).
Fitting
Installation is carried out in the reverse order of removing, when doing this note the following.
  Note
Replace the seal.
  A17-0127
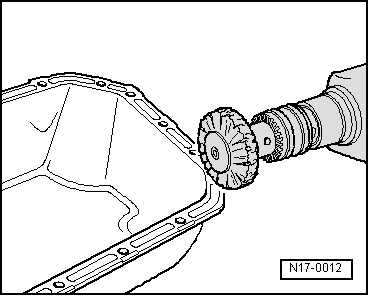
–  Remove sealant remaining on oil sump and the engine block (with rotating plastic brush or similar).
  WARNING
Wear eye protection.
–  Clean sealing surfaces; they must be free of oil and grease.
  N17-0012
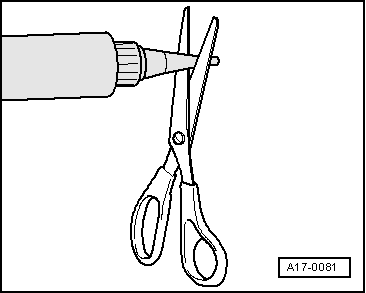
–  Cut nozzle off tube at front marking (Ø nozzle diameter: approx. 3 mm).
  A17-0081
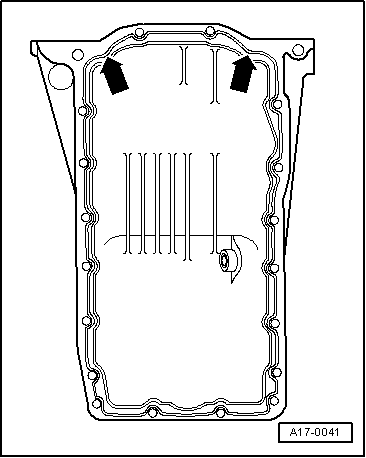
–  Apply silicone sealing compound, as shown, to clean sealing surface on oil sump.
l  Thickness of the sealant grub: 2 ... 3 mm
  Note
t  Sealant bead must not be wider than 3 mm, otherwise excess sealant could ingress into sump and clog strainer in oil intake pipe.
t  Carefully apply the silicon to the rear of the sealing flange -arrows-.
t  The oil sump should be fitted within 5 minutes following the application of the silicon sealing paste.
  A17-0041
–  Install oil sump immediately and tighten bolts in the indicated sequence:
–  Tighten the bolts -1 … 20- diagonally to 5 Nm.
–  Tighten sump/gearbox bolts -arrows- to 45 Nm.
–  Tighten the bolts -1 … 20- diagonally to 15 Nm.
  Note
t  When installing the sump with the engine removed from the vehicle, ensure that the sump is flush with the cylinder block at the flywheel end.
t  Let sealing compound dry for approx. 30 minutes after installing oil sump. Only then should the engine be refilled with oil.
–  Fit the charge air system lines, follow the instructions during this → Chapter.
–  Fill with engine oil and check the oil level.
Specified torques .
  A17-0219
ComponentNm
Oil pan to cylinder block15
Sump to gearbox40
Oil drain plug30


Oil pump: removing and fitting > < Lubrication system - General components overview