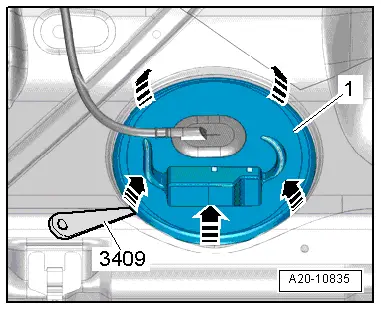
seat Workshop Repair Guides

SEAT Workshop Service and Repair Manuals

Removing and installing fuel gauge sender > < Assembly overview - fuel delivery unit, fuel gauge sender
Removing and installing fuel delivery unit, fuel gauge sender
  Note
After removing fuel delivery unit, check fuel tank for heavy soiling and clean if necessary.
Special tools and workshop equipment required
   
t  Fuel drainage equipment -VAS 5190-
  W00-1107
t  Union nut tool -3217-
  W00-0291
t  Torque wrench -V.A.G 1332-
  W00-0428
t  Removal wedge -3409-
Carry out the following work:
Removal:
l  Fuel tank must not be more than 3/4 full. This ensures that the fill level is below the flange of the fuel delivery unit.
  Note
Assembly overview - fuel tank → Chapter.
–  Observe safety precautions → Chapter.
–  Observe rules for cleanliness → Chapter.
–  Drain fuel tank with fuel extractor -VAS 5190- → Chapter.
–  Disconnect battery earth → Electrical system; Rep. gr.27.
  Caution
When disconnecting the battery there is a risk of serious damage to electronic components:
Observe the correct procedure for disconnecting the battery.
–  Remove rear bench seat → General body repairs, interior; Rep. gr.72.
  W00-0016
–  Unclip cover -1- at retaining tabs -arrows-, using removal wedge -3409-.
  A20-10835
–  Release connector -1- and unplug.
  WARNING
Fuel supply line is pressurised. Wear eye protection and protective clothing to avoid eye injuries and skin contact. Before loosening hose connections, wrap a cloth around the connection. Then release pressure by carefully pulling hose off connection.
–  Unlock and disconnect fuel lines -2- from fuel delivery unit -3-. Separate push-on couplings → Chapter.
  N20-10928
–  Loosen union nut with union nut tool -3217-.
  N20-0605
–  Pull sealing flange out of the opening in fuel tank.
–  Remove seal from opening in fuel tank.
  WARNING
Danger due to fuel running out of the fuel extraction unit.
Place a cloth underneath to absorb fuel.
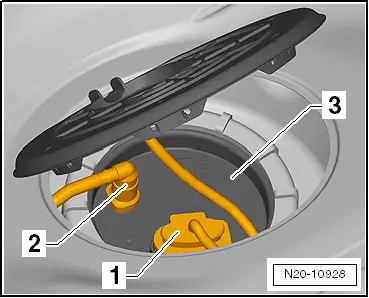
–  Pull fuel extraction unit -1- with fuel gauge sender out through the installation opening of the fuel tank carefully.
  Note
t  When removing the fuel delivery unit, ensure that the float arm of the fuel gauge sender -G- is not bent.
t  If delivery unit is to be renewed, old delivery unit must be drained before disposal.
t  Observe environmental regulations for disposal.
t  Check fuel tank for foreign bodies and dirt.
Installation
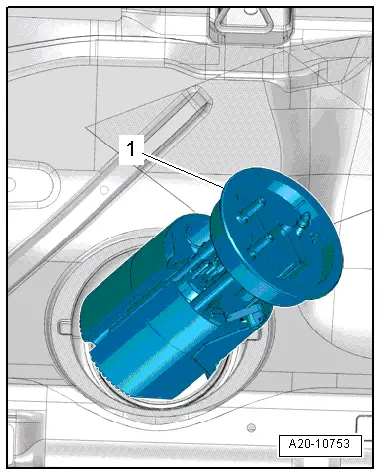
Installation is in the reverse sequence of removal. Note the following:
–  Renew seal.
–  Insert seal for fuel delivery unit dry into opening of fuel tank.
–  Coat inner side of seal with fuel.
–  When inserting fuel delivery unit, ensure that fuel gauge sender is not bent.
  A20-10753
–  Push sealing flange -1- downwards against spring force and place sealing flange into installation position.
l  -Arrow- on sealing flange -1- must be between markings -2- on fuel tank.
–  Tighten union nut.
  N20-10936
–  Plug in connector -1-.
–  Connect fuel line -2-.
–  Ensure push-fit couplings and connector are secured properly by pulling.
Specified torque .
  N20-10928
ComponentSpecified torque .
Union nut80 Nm


Removing and installing fuel gauge sender > < Assembly overview - fuel delivery unit, fuel gauge sender