seat Workshop Repair Guides

SEAT Workshop Service and Repair Manuals

ABS components on the front axle: Assembly overview > < Control unit and hydraulic unit
Removing and installing speed sensor cable on the rear axle
Special tools and workshop equipment required
   
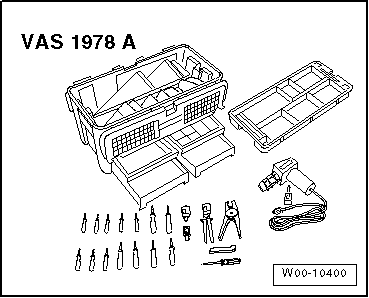
t  Wiring harness repair set -VAS 1978A-
Removal:
  Note
t  Before disconnecting the battery, consult the customer regarding the anti-theft code provided with the radio.
t  If the battery is reconnected check the vehicle equipment (radio, clock, electric comfort system, etc.), following the indications in the Workshop Manual and/or the Operating Instructions.
  WARNING
Before working on the electrical system, disconnect the battery earth strap.
–  Disconnect battery.
–  Disconnect connector from the revolution sensor cable.
  W00-10400
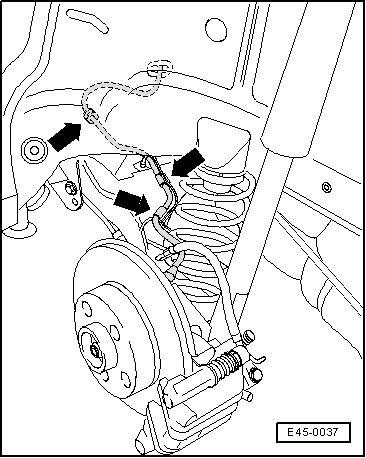
–  Unclip the rev. sensor cable from its fittings in the rear axle and the bodywork -arrows-.
–  Remove rear seat cushion → Interior body assembly; Rep. gr. 72.
–  Remove lower B-pillar panelling: → Bodywork, interior fitting work; Rep. gr. 70.
–  Bend back the floor mat and the insulation felt in the rear seat area.
  E45-0037
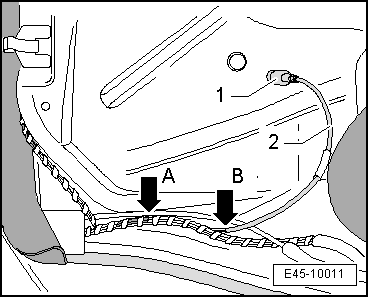
–  Loosen the rubber socket -1- and pull the revolution sensor cable -2- towards the interior.
–  Cut the speed sensor cable between the socket -arrow A- and the insulation -arrow B- with the stripping pliers in the cable repair kit -VAS 1978A -.
Installation
  E45-10011
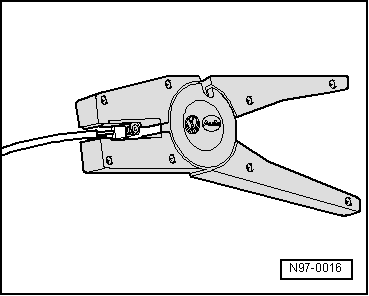
–  Strip the last 15 mm of the cable with the stripping pliers and bend the stripped portion in half.
–  Pass through the new rev. sensor cable and fit the rubber socket.
  N97-0016
–  Clip the rev. sensor cable to its fittings on the rear axle and the bodywork -arrows-.
–  Connect connector to the revolution sensor.
Remember to make sure the rev. sensor cable does not get twisted when installing.
–  Remove the two-pin connector, if present, from the new revolution sensor cable with the wire stripping pliers.
–  Strip the last 15 mm of the cable with the stripping pliers and bend the stripped portion in half.
–  Join the revolution sensor cable with a suitable pressure tool from the cable repair kit -VAS 1978A -.
Perform remaining installation in reverse order of removal.
–  Install lower B-pillar panelling → Bodywork, interior fitting work; Rep. gr. 70.
–  Install rear seat cushion → Bodywork, interior fitting work; Rep. gr. 72.
–  Carry out automatic check → Vehicle diagnostic tester
  E45-0037

ABS components on the front axle: Assembly overview > < Control unit and hydraulic unit