seat Workshop Repair Guides

SEAT Workshop Service and Repair Manuals

Rear brake: repair > < Rear brake: repairs - drum brake
Removal:
Removal:
  Note
t  The following process is only required to replace the brake calliper or for the repair work described below.
t  Mark the brake pads that are going to be re-used before removing them. It is necessary to fit them in the same position. If not, the braking effect will not be uniform.
–  Remove wheel.
–  Connect the air bleeding bottle tube to the bleeding valve for the brake calliper and open the valve.
–  Fit the block for the brake pedal -VAG 1869/2-.
–  Close the bleeding valve and remove the bleeding bottle.
–  Unscrew the brake pipe from the brake calliper → Item.
   
–  Release clip -1- by levering with a screwdriver and remove it downwards.
–  Push the brake lever -2- in the -direction of the arrow- and release the hand brake cable -3-.
–  Remove the hand brake cable from the brake calliper support.
–  Connect the air bleeding bottle tube to the bleeding valve for the brake calliper and open the valve.
  N46-0232
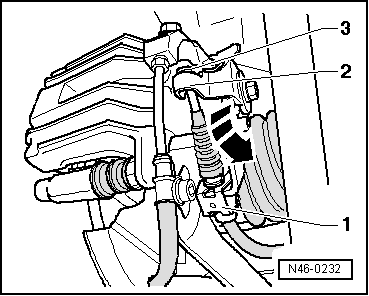
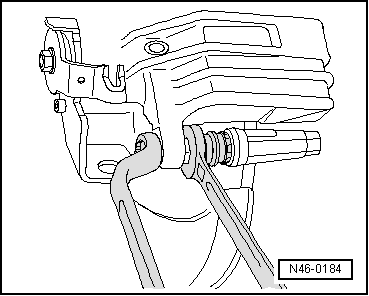
–  Remove securing bolts from the brake calliper housing. For this, block the guide pins.
–  Remove the brake calliper from the brake back plate.
–  Clean the brake calliper housing, especially the brake pad contact surface.
  Note
t  Only alcohol may be used to clean the brake calliper housing.
t  The contact surface of the brake pads should be free of traces of adhesive and grease.
  N46-0184

Rear brake: repair > < Rear brake: repairs - drum brake