seat Workshop Repair Guides

SEAT Workshop Service and Repair Manuals

Steering column Removing and installing|Installation > < Steering column Removing and installing
Removal:
Removal:
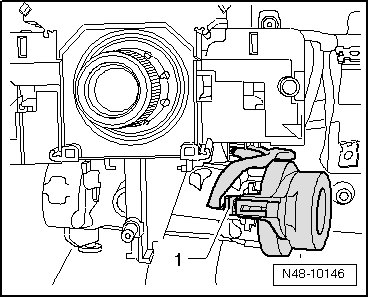
The steering column is only supplied as a complete spare part. Cannot be repaired.
Steering lock housing can be transferred → Electrical system; Rep. gr.94.
  WARNING
The following conditions must be met before starting work on the electrical system and removing the steering wheel:
t  Disconnect earth strap from battery → Electrical system; Rep. gr.27.
t  Turn wheels to straight ahead position.
If these instructions are not followed then the airbag system could fail later!
–  Turn wheels to straight ahead position.
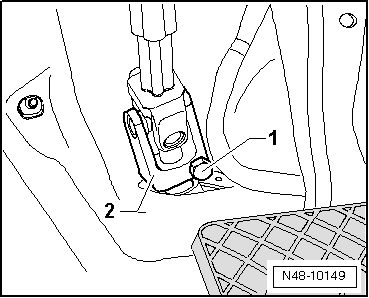
–  Pull down lever beneath steering column.
–  Incline the column downwards as far as it will go and remove.
–  Press the lever below the steering column upwards again.
–  Remove the steering wheel airbag → Bodywork, interior fitting work; Rep. gr.69.
–  Remove steering wheel → Chapter.
–  Remove trim from the combined steering column switch → Bodywork, interior installation work; Rep. gr.68.
–  Remove the left-hand trim on driver's side: → Bodywork, fitting work, interior; Rep. gr.68
–  Remove steering column switch → Electrical system; Rep. gr.94.
–  Remove the footwell vent located below the steering column → Heating, air-conditioning; Rep. gr.80.
   
–  Unplug connector -1-.
  N48-10146
–  Remove the cable rail -1- located below the column. Lift the clips slightly -arrow- on both sides and remove the column rail guide.
  N48-10147
–  Unscrew securing nuts -arrows- and remove footwell trim -1-.
  N48-10148
–  Undo bolt -1- and remove the cross member -2- from the steering box.
  N48-10149
–  Disconnect the earth connection -arrow- and the cable -1- of the column.
–  Remove bolts -2-.
–  Lower the column slightly and remove by lifting carefully.
  N48-10150

Steering column Removing and installing|Installation > < Steering column Removing and installing