seat Workshop Repair Guides

SEAT Workshop Service and Repair Manuals

Headlamps: Install > < Headlamps: Removing and installing
Headlamps: removing
Headlamps: removing
Special tools and workshop equipment required
   
t  Torque wrench -V.A.G 1410-
  Note
t  Do not disconnect the mass tape from the terminal.
t  
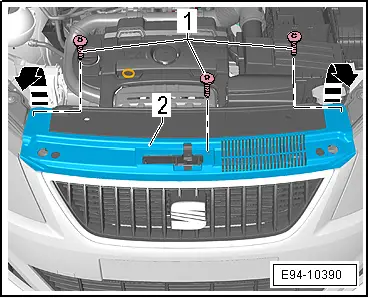
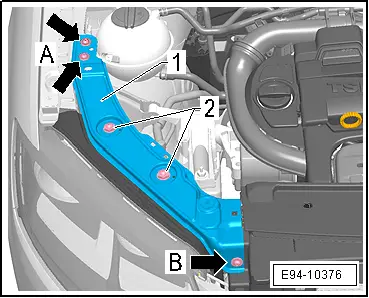
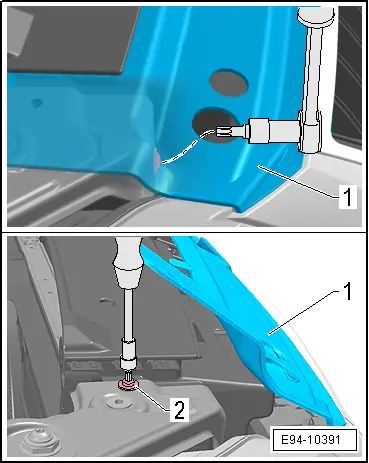
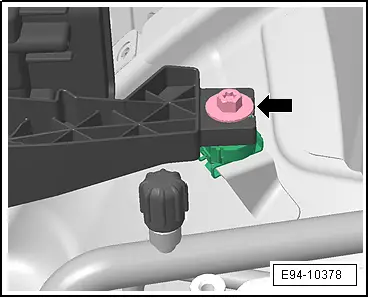
The figures show the removal and assembly of the left headlight.
t  The removal and installation of the right headlight is done the same way.
t  Check the adjustment of the headlamp and adjust when necessary „maintenance to be considered precisely“; → Booklet.
  Caution
t  If the headlamps are not removed in a correct way, there is a risk that the headlamp or the guard element of the front bumper may be damaged.
t  The paint on the guard element of the front bumper may get scratched.
t  When removing the headlamp, proceed carefully and without applying force in the sequence described.
t  Cover the guard element of the front bumper to protect the paintwork.
t  To protect the headlamp, cover the inside of the wing at the tip.
–  Disconnect ignition and all electrical loads, and remove ignition key.
  Note
Information on the use and the safety of the gas discharge lamps must be observed
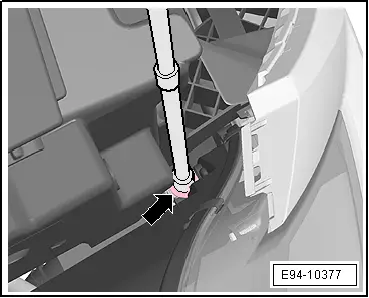
–  Unlock the multiple connector and separate.
  W00-2760
–  Unscrew the three fixing screws -1- of the radiator grille → Bodywork, exterior fitting work; Rep. gr.66.
–  Unlock and remove the electric connector of the headlamp.
  E94-10390
–  Press the upper side of the radiator grille -2- outwards -arrows- until it releases from its attachments.
For better understanding: View of the drawing without radiator grille.
–  Unscrew the four fixing screws -arrows A- and -arrows B- from the strut.
  E94-10376
–  Unscrew both screws -1- hidden by the grille using an angled spanner throught the flapü in the grille.
–  To unscrew the second screw -2-, apply pressure to the wing until you can access the screw.
  E94-10391
–  Unscrew both adaption and adjustment screws of the headlamp -2- using the sleeve. When removing the left headlamp, separate the cable for opening the bonnet and remove the bracket -1-.
For better understanding: View of the drawing without radiator grille.
  E94-10377
–  Unscrew the fixing screw -arrow- using an extension and with a Torx Bit T-30H on the front side of the headlamp.
–  Unscrew the fixing screw -arrow- on the rear side of the headlamp and remove the headlamp by turning 90° in its axis and taking it out upwards from the bodywork frame.
Installation:
Installation is carried out in the reverse order. When installing, note the following:
–  Cover metal parts of the bodywork in order not to scratch the headlamp.
  E94-10378
–  When installing the braket -1-, observe the tightening sequence for the fixing screws:
–  First tighten the fixing screws -arrows A- and then tighten the fixing screws -arrows B- to the specified tightening torque → Chapter.
–  Control the headlight position. The clearance with respect to the bodywork should be even.
If the headlight shows irregular gaps with respect to the bodywork, correct the instalölation position → Chapter.
–  After setting the gap, tighten the screws using the adjustment socket -2-. → Chapter
–  Check headlight functions.
  Note
If a headlamp is removed, it must always be adjusted after installing.
–  Check the adjustment of the headlamp and adjust the headlamp when necessary „maintenance to be considered precisely“; → Booklet.
  E94-10376

Headlamps: Install > < Headlamps: Removing and installing